You are here: Client menu > SERVICING > Creating Certificates
Creating Certificates
Nexsure offers the ability to create a certificate of insurance for
one or multiple Holder / Additional Interest(s) in a single process. A separate
certificate will be created for each Holder / Additional Interest added.
The option is available to add a Holder / Additional Interest from an existing
group of holders that have been used for this insured.
Note:ACORD mandates that only the most recent version of a certificate be used. For your convenience, one previous version is currently maintained in Nexsure for referential purposes..
To Create
a Certificate of Insurance
- On the Primary menu, click SEARCH. Search for the appropriate client.
- On the Client
menu,
click SERVICING.
- Click the New Certificate(s) option. The New Certificate of Insurance screen is displayed.
- In the Certificate Selection area, select the type of certificate to create.
- In the Insured Name area, select the name of the insured from the list.
- Select an Authorized
Representative Signature from the list. This signature will appear on the certificate. The Authorized
Representative Signature selection list is populated with staff members in the branch that have
a signature file appended to the identity tab of their employee details.
- In the Description (optional) box, enter a description for the certificate.
- Click [Next].
- In the Coverage Summary area, click [Add New] to add a line of business.

- Select the appropriate line(s) of business for the certificate and click [Next].
Note: When the certificate tab is displayed, click Print on the Navigation Toolbar to view the certificate. Once the holders are added to the certificate, the Print function changes to a batch print function.
- Click the certificate
holders tab to add certificate holder(s):
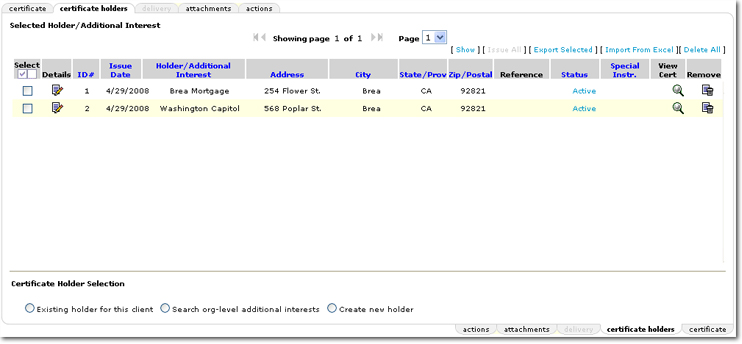
Note: Line items for each certificate holder will have an active Remove  icon until the certificate for that holder is issued. Once the certificate holder has been issued, no further additions or modifications can be made.
Select one of the following options:
 Existing holder for this client
When selecting the existing holder, select the entity name then click Use Selection. To select multiple additional interests, hold the CTRL
key, select the name, and click Use Selection.
Existing holder list can be searched by selecting Show on the top right corner of the existing holder popup..
Search org-level additional interests
- Selecting the Search Holders option will
open the additional interest search dialog box.
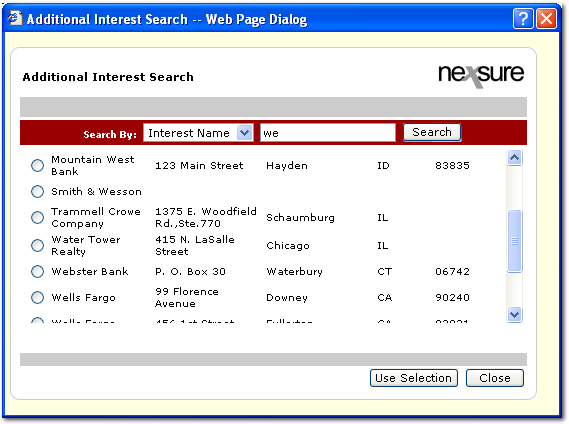
- Search by name, address, phone number
etc. Select
the Search By item from the list, enter at least two characters in
the search box and click Search.
- Select the additional interest to search
for and click Use Selection.
- Notice that when Use Selection
is clicked in the search screen, the name is added to the certificate.
Tip:
Additional
interests can be removed from the certificate by selecting the Remove  icon for that particular name.
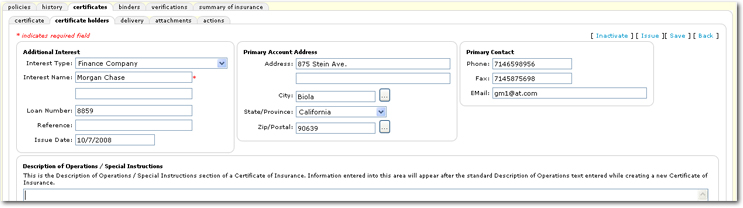
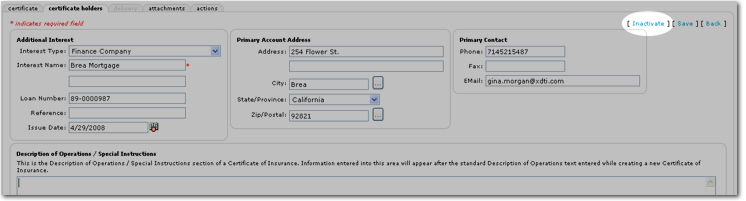
Create new holder
- Selecting
the Create New Holder option will allow entry of information for a
new additional interest on the certificate
holders tab. Once the additional interest name and contact information has been added, the
Description of Operations / Special Instructions can be entered
at the bottom of the screen.
- Once the information
is complete, click Save.
- Selecting the certificate
tab will open the fields for the ACORD certificate form for the additional
interest added.
- To view any other certificate
holders that have been added, click [Back] on the certificate
holder tab.
- Once the certificate
holders have been added, view and edit the details of a record
by clicking the Details
 icon. Clicking
the Details icon will also give access to the Description of Operations / Special
Instructions section for a specific Holder / Additional Interest. Remember,
a separate certificate will be created for each holder listed. Each certificate will display the selected Holder / Additional Interest Description of Operations / Special Instructions.
icon. Clicking
the Details icon will also give access to the Description of Operations / Special
Instructions section for a specific Holder / Additional Interest. Remember,
a separate certificate will be created for each holder listed. Each certificate will display the selected Holder / Additional Interest Description of Operations / Special Instructions.
To Add Special Instructions
- On the Certificate
Holders tab, click the Details icon for the specified
holder.
- Enter any special instructions
into the text area. Information
entered into this area will appear after the standard Description of Operations
text entered while creating a new certificate of insurance.
- Click Save.
Tip: To
edit any information in this area at a later time, click the Details icon for the specified special instructions. Clicking
the blue column headings will sort multiple certificates by the respective
heading.
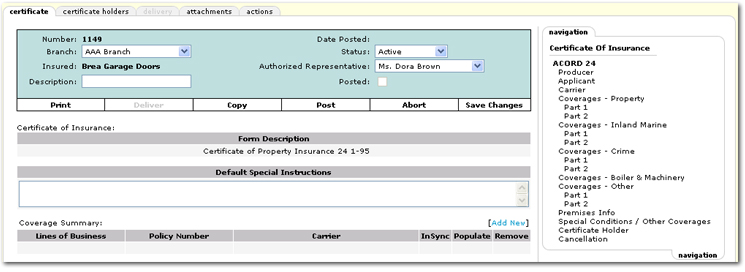
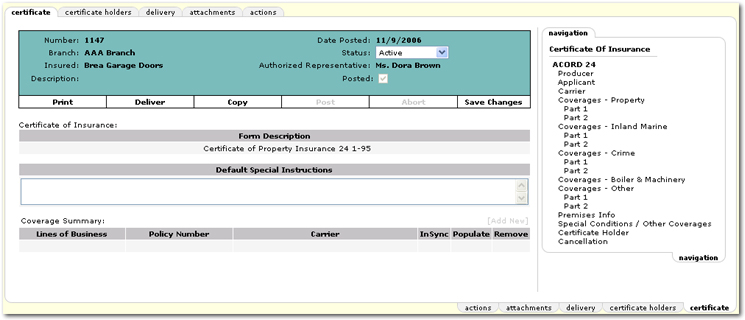
- To populate the certificate
form, select the certificate tab.
- Once a line of business is added, the user may select theLookup] link in order to view schedules of data for the policy added. To add information contained in the schedule, select the item or items from the listing and then select Prefill from the Lookup]window, the user may also perform the following functions:
- Certificate PDF icon: Selecting this PDF icon allows the user to preview the certificate.
- Risk Data: By default this box selected, showing scheduled data that may be prefilled to the certificate.
- Carrier Data: Selecting this check box will display the carrier, policy term and policy number of the policy associated to the certificate. This may be useful while navigating within the certificate form tree, allowing user to view policy information without going back to the main certificate detail page.
- Clear Data. : Selecting this check box will remove all data from the form which allows the user to start the population process over should they choose an incorrect policy.
- LOB Name Link: Selecting the LOB hot link will bring up the selected policies summary of insurance.
- Form Title Link: Selecting hte form title hot link will bring up a PDF of the selected LOB application.
- Enter the remaining certificate
information using the navigation tree on the right. Once information is entered in a section, click [Next], [Prev] or another link on the navigation tab to save changes.
Important: Certificate holder and Description of Operations / Special Conditions information may be specific to a certificate holder. There may be many holders attached to one certificate which requires that information specific to the holder be entered directly into the certificate and not added from the navigation tree. Below are the ACORD form sections that must be entered directly into the certificate screens:
ACORD 22
Description of operations
Certificate Holder
ACORD 23
Special Conditions / Other Coverages
Additional Interest (including if the AI has already been added to the policy)
ACORD 24
Special Conditions / Other Coverages
Certificate Holder
ACORD 25
Description of Operations
Certificate Holder
ACORD 27 & 28
Special Conditions / Other Coverages
Additional Interest (check boxes)
- Click Save Changes on the Navigation Toolbar under the certificate header to save changes after entering the Cancellation terms.
- Click Certificate of Insurance at the top of the navigation tab to close the form.
- In the Default Special Instructions box, enter special instructions that will be displayed on all certificate holder copies.
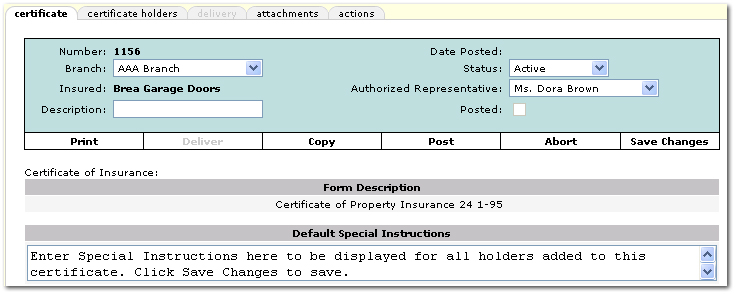
Note: If special instructions need only be displayed for one holder, enter those special instructions on the certificate holders tab.
- On the Navigation Toolbar, click Save Changes to save changes to the Default Special Instructions.
- Click Print, Post or click Abort to
cancel the certificate. When printing a certificate, iterations of the certificate for holders that have not been issued are not available to print.
- Once Post is clicked, the following confirmation dialog box is displayed:
- Click OK and the certificate is posted.
Issuing a Certificate from the Certificate Holders Tab
Once a certificate is posted, certificate holders can be issued.
- From the POLICIES menu, click the certificates tab.
- Click the Details icon next to the certificate.
- Click the certificate holders tab.
- To issue all un-issued holders, click [Issue All].
A confirmation dialog will display.
- To issue to a single holder, select the Details icon for the holder from the certificate holders tab and select [Issue], or add the holder as described starting in step 13 above.
- In the certificate holders detail screen, click [Issue]. A confirmation is displayed.
Note: The [Issue] link is only available on posted certificates. Once a certificate holder has been issued, the only item that can be modified is the Reference notation.
- Click OK.
Inactive Certificate Holders
To Indicate a Holder is Inactive
- On the certificate holders tab, click the Details icon next to the holder to become inactive. The certificate holder details are displayed.
- At the top of the screen click [Inactivate].
- Click [Save]. The Status information is then displayed on the Selected Holder / Additional Interest screen in the Status column.
Delivering a Certificate
Once a certificate is posted and the holder is issued or batch printed, the certificate can be delivered.
To Deliver to a Single Holder
- On the certificate tab, on the navigation toolbar, click Deliver.
- Follow either the email or fax delivery instructions outlined in the Delivery topic.
To Deliver to Multiple Holders
- On the certificate holders tab of an issued certificate, select holders to be delivered to. Only active holders with an email and/or fax number are available for selection.
- Once more than one selection is made, the [Mass eMail] and/or Mass Fax links above the search filter will become active. Select desired method of delivery. Certificate Delivery popup will be displayed.
- Enter generic information for email or fax cover sheet since all certificates will be sent with the same email or cover. If attachments exist at the certificate level, users may add attachments before sending the delivery. Certificates may not be added at this level since the delivery information must first be verified. Select Send to delivery certificates.
- Follow either the email or fax delivery instructions outlined in the Delivery topic.
Certificate Batch Printing
Certificate Renewal
Copying Certificates
Client Access for Certificates
Delivery