Delivery
Using Nexsure's delivery tab, policy information and documents can be delivered
via fax or email. All deliveries must be created at the client level.
The delivery tab can be accessed from the Home
menu, Client menu or Retail Agent entity.
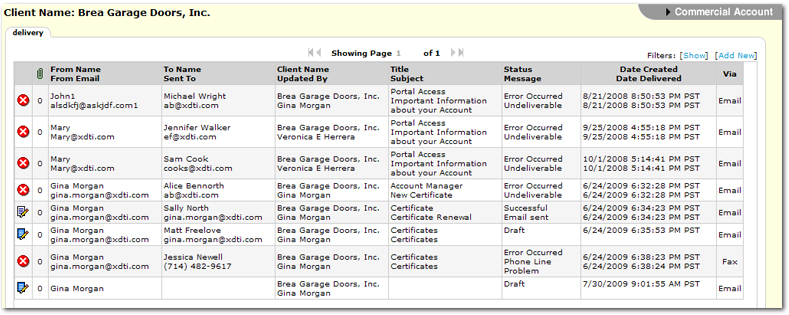
From the Home menu, a summary for all deliveries the staff member logged into Nexsure is authorized to view will appear. At
the client level, only deliveries for the specified client will be displayed. When the Details  icon is selected for a restricted delivery to which the staff member is not assigned, a dialog box will display listing the staff members that are assigned to the policy.
Note: Any deliveries that include attachments of policies, cancellations, claims or other attachments associated to a restricted policy will not display. The logged in staff member must be assigned to the restricted policy associated to the delivery to view the delivery details.
Quickly navigate to procedures included in this topic by clicking one of the links below:
To Deliver Policy Information
To Send a Saved Draft
To Print Delivery Details
- The Details
column displays an icon to determine the status of a delivery:

|
| Method |
Icon |
Status |
Status Message |
Successful |
| Email / Fax |

|
Draft |
--- |
No |
| Email / Fax |

|
Processing Forms |
Rendering PDF |
No |
| Email / Fax |

|
Pending |
--- |
No |
| Fax |

|
Processing |
Picked up |
No |
| Fax |

|
Processing |
Sending... |
No |
| Fax |
|
Processing |
Phone line problem |
No |
| Email / Fax |

|
Successful |
Completed |
Yes |
| Fax |

|
Error Occurred |
Ring, timeout waiting for answer |
No |
| Fax |
|
Error Occurred |
Voice answer detected |
No |
| Fax |
|
Error Occurred |
Transmission error |
No |
| Fax |
|
Error Occurred |
Bad Conversion |
No |
|
Note:
To re-send
a failed delivery, from the delivery tab, click the Details  icon for the failed delivery, then click Re-Send.
- The attachment
 column displays the number of attachments associated with
the delivery.
column displays the number of attachments associated with
the delivery.
Sending a Delivery
To Deliver Policy Information
- On the Client menu,
click DELIVERY. The
delivery tab is displayed. If
this is the first delivery there will be a prompt to add a new delivery.
If previous deliveries have been made, they will appear in the summary.
- Click [Add New].
- Select a delivery method, email or fax tab.
- Enter the delivery information in the address fields, or use the address book
 .
.


Important: Do not enter dashes ( - ) in the From / To Fax Number boxes. Enter only the digits of the fax numbers.
- Title:
The Title box is not displayed to the recipient and is intended to
be used as an internal note or to aid in a search.
- From
E-Mail Address / Fax number: The
email address or fax number (for reply purposes only).
Note: A valid email address or a fax machine is not required,
the From email box must still be populated. The
policy information will be sent via Nexsure and a third-party tool.
- From:
Enter the From
name.
- To
E-Mail Address / Fax Number: Enter
the recipient's email or fax number.
Tip:
To send
an email of fax to multiple recipients, add a semicolon between the multiple
email addresses or fax numbers.
- To: Enter the recipient's name.
- CC: (email only) Enter the email address of any additional persons to whom the information should also be sent. Separate multiple email addresses with a semicolon.
- BCC:
(email only) Enter the email address of any additional persons to whom the information should also be sent without informing the To or CC recipients. Separate multiple email addresses with a semicolon.
- Subject:
The delivery
subject, as would be shown on the cover page or in the Subject line of an email.
- Message:
Enter a
message, if needed, to accompany the attachments. You
can
 add a signature file to your deliveries on the Employee > Identity
screen.
add a signature file to your deliveries on the Employee > Identity
screen.
Note: The Auto Wrap While Edit option is available for fax cover pages.
Signature files can display sender's name, company
name, phone number, etc.

- On the Primary menu,
click ORGANIZATION.
- Click the employees
tab.
- Select the employee name to append the signature
file to and click the Details
icon.
- Click the identity
tab.
- Click Add
Salutation.
Note:
Though
it is possible to have more than one salutation (or signature) file, the first one
will appear in the delivery message body.
- Enter a Name for the signature file (i.e.
Delivery).
- In the Text box, enter the signature information.
- Click Save,
then click Update on the employee / identity
tab.
- Attach a policy, claim,
cancellation, certificate, verification, binder or other (such as a digital
picture).
- Choose a type of attachment
and click Add. The Add Delivery Attachment dialog box is displayed.

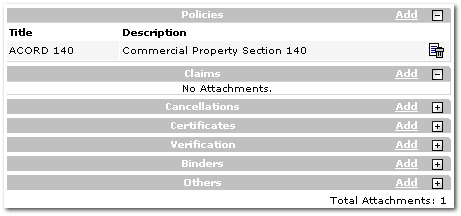
- Select any of the available tabs:
- policies
- claims
- cancellations
- invoices
- certificates
- verification
- binders
- other
- On each tab the available attachments are displayed. If a needed attachment is not displayed, the Filters may be changed to search for the necessary attachment.
Note: Any attachments that
are associated with a restricted policy will not be displayed to staff members that are not assigned to the policy.
Tip: An attachment may also be previewed before adding it to the delivery. To preview an attachment, find the attachment on one of the available tabs. Notice that the attachment is labeled with blue text. Click on the blue title of the attachment to preview.

- Select the policy, certificate,
image or other item and click Next.
Follow
any remaining prompts.
- Once the email or fax is complete the following options are available:
- Close: Click [Close] to close the fax or email tab without saving changes.
- Send: Click [Send] to send the email or fax to the recipient.
- Save Draft: Click [Save Draft] to save the email or fax to send at a later time. Any attachments added to the email or fax will be saved as well. All drafts are then available on the delivery tab.
Note: If the initial fax could not be delivered, an email will be automatically sent to the sender's email address. The email contains information to help identify the fax that failed. There are two ways to proceed:
A PDF file of the document will be automatically generated. That
file may then be printed and manually faxed.
Or
Click the Details icon for the failed delivery,
then click Re-Send.
- After the delivery has
been sent, the viewer tab will appear on the delivery tab. To
view the attachment, click the Details icon for the attachment.
- Click
the viewer tab, and click the
Magnifying Glass
 icon to view the document attachment or digital image
in the viewer.
icon to view the document attachment or digital image
in the viewer.
Important: Once
a draft or delivery has been created it cannot be deleted.
To Send a Saved Draft
Once a draft of the email or fax has been saved, the draft can be accessed and sent at a later time.
- Navigate to the saved draft by clicking SEARCH.
- Click the Details icon next to the appropriate client.
- On the Client menu, click DELIVERY. The delivery tab is displayed.
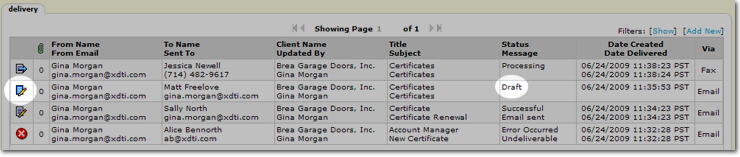
- The draft is identified by a blue Details
 icon and Draft in the Status column. Click on the blue Details icon. The saved email or fax draft is displayed.
Note: The number of attachments, if any, is not shown in the attachment column of the delivery tab. The attachments are available but will not show a count until the email or fax has been sent.
- Make any necessary updates to the draft and click [Send].
Important: If [Cancel] is clicked at this point, the email or fax will be cancelled and cannot again be accessed to send. To return to the delivery tab again without sending the draft, click [Save Draft] to save updates or click [Close] to return to the delivery tab without saving changes.
To Print Delivery Details
Once a delivery has been sent, the delivery details can be viewed and printed for reference.
- Navigate to the previous delivery by clicking SEARCH.
- Click the Details icon next to the appropriate client.
- On the Client menu, click DELIVERY. The delivery tab is displayed.
- On the delivery tab, click the Details icon next to the appropriate delivery. The details tab is displayed.
- On the details tab, click [Print]. The Delivery Details screen will be displayed.
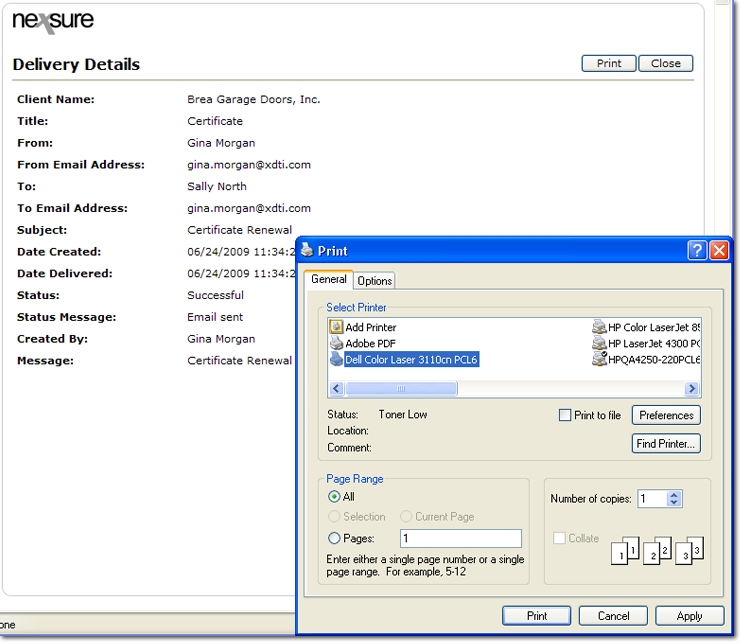
- On the Delivery Details screen, click Print. The Print dialog box is displayed.
Or
Click Cancel to return to the delivery details tab.
- In the Print dialog box, make the appropriate selections and click Print. The Delivery Details are printed.
Related Topics
Attachments
Attaching Outlook Messages