
The attachment option allows the staff member to attach photographs, documents, email, etc. to a client or to a client’s policy. Documents can be created with or without using a pre-designed template. Attachments can be up to 25 MB in file size with current Nexsure Controls.
Quickly navigate to procedures included in this topic by clicking one of the links below:
To Use Client Level Attachment Folders
To Add Policy Level Attachments
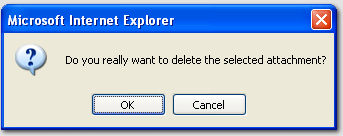
Important: As of the Nexsure 1.92.5 release, attachments are not duplicated for each policy with which they are associated. If an attachment is removed, it is removed from Nexsure completely regardless of associations. When removing attachments added prior to 06/01/07 a dialog box is displayed confirming the removal of the single iteration of the attachment. When removing attachments added after 06/01/07 a different dialog box is displayed confirming that all instances of the attachment will be removed.
| Pre 06/01/07 | Post 06/01/07 |
|---|---|
|
|
|
There are two levels of attachments that can be created, the client level and the policy level:
This attachment is created from the ATTACHMENT link in the Client menu. An attachment created here would contain general information pertaining to a client.
 icon next to the attachment to view. If the attachment selected is associated with a restricted policy and the staff member logged on is not assigned to the policy, the Microsoft® Word Attachment
  , Details and Remove
  icons appear dimmed and cannot be selected.
 Note: If an attachment is associated to any restricted policy, that attachment can only be accessed by staff members that are assigned to the restricted policies. If an unrestricted policy contains an attachment that is associated with another restricted policy, that attachment will only be available for staff members assigned to the restricted policy.
Tip: An attachment can be attached to an unrestricted policy at the policy level to provide unrestricted access to a document.
Note: The ATTACHMENTS link on the Client menu will display all attachments for the client being accessed.
icon. If the attachment is associated with a policy, a dialog box will be displayed giving notification that the attachment will be removed from both the client and policy levels. To Use Client Level Attachment Folders
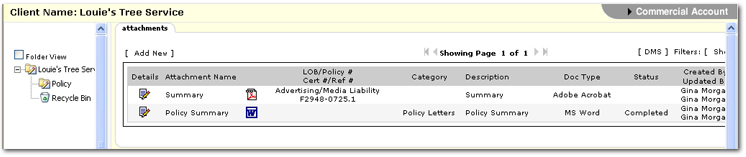
In order to organize a high volume of client attachments, attachment folders are available.
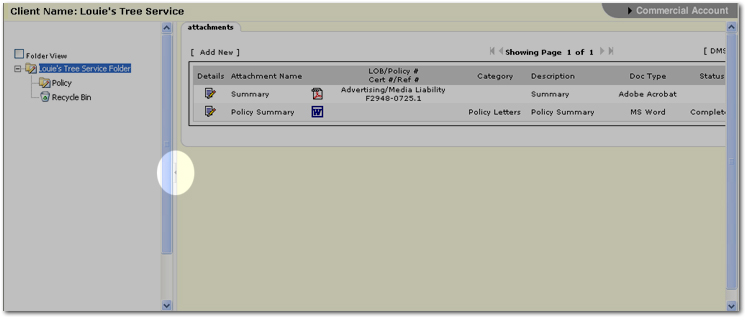
When the client attachments tab is first displayed, all attachments for the selected client are shown. The folder view is also displayed on the left. By default, a client folder containing all client attachments and a Recycle Bin are displayed. Once a folder is clicked, the Folder View check box is automatically selected indicating that only attachments for the selected folder are displayed.
Up to 100 folders per organization can be added. Folder are cross-organizational so any folders added for one client will show for all clients in the organization. Only staff members with security rights for addition, deletion, or modification of folders can respectively add, delete or rename a folder.
The following options are available after right-clicking on a folder to view the context menu:
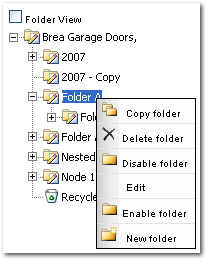
Other folder options available are:
icon. The attachment is added to the Recycle Bin in the folder panel. Once the attachment is in the Recycle Bin, the Remove icon can again be clicked and the attachment is removed from Nexsure.
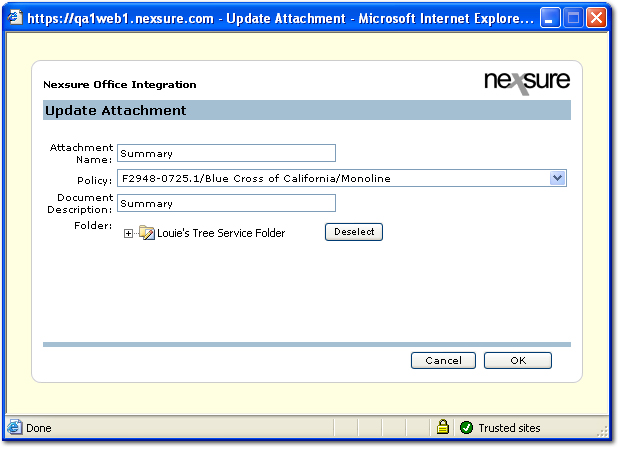
Note: If a folder is selected in error, Deselect can be clicked.
Note: The logged in staff member must be assigned to the restricted policies in order for those policies to display in the policy drop down.
To Add Policy-Level Attachments
This attachment is created from the attachments tab at the policy level. An attachment created here would pertain to a client’s policy.

Note: From this point forward adding an attachment is the same for both client and policy levels.
Four choices are available at this time:
Note: If an attachment is removed from the policy level, the attachment is completely removed from Nexsure.
Documents on the attachment tab can be checked out by a staff member for editing if the Nexsure document is saved in draft form. The check-out process enables multiple staff members to be aware that a document is being edited. The initial staff member that checks out the document can make changes and save the document. If a second staff member accesses the same document, while the first staff member is still editing the document, the second staff member will get a read-only copy of the document.
Note: Multiple office integration documents can be viewed and edited at the same time. Microsoft Office® documents can simultaneously be open outside of Nexsure as well.
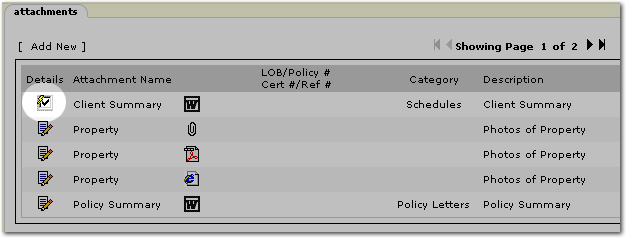
The following attachment screens contain the document check out function:
icon next to the document to check out. The document will be available for editing. Other staff members that try to access the same document will see a Checked Out icon. The document can still be viewed by a second staff member in a read-only copy. The name of the staff member that has checked out the document is displayed in the Updated by column.
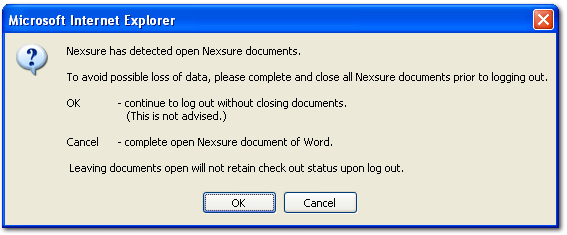
icon.Important: The following prompt is displayed if all office integration documents are not closed at the time of log out. To avoid any loss of data, close all office integration documents before logging out of Nexsure.
Related Topics
In order to utilize Attachment Manager, your organization must be a member of the Nexsure User's Group. Attachment Manager is a separate program from Nexsure and will need to be downloaded to individual work stations.
Getting Started with Attachment Manager
From the Nexsure Login Screen, select the Download Attachment Manager link. Once installed, the desktop will display the Attachment Manager Icon.
In order for individuals to have access to Attachment Manager, the employee users security page will need to have the "allow access to attachment manager" check box selected.
Attachment Manager will adhere to security user rights templates regarding attachments as set and assigned in Nexsure (i.e., if user does not have rights to add attachments to policies in Nexsure, they will not be able to add attachments to policies in Attachment Manager. Keep in mind that opportunity attachments rights are controlled by marketing attachment security settings). Attachment Manager also enforces business type and restricted policy security.
Select Attachment Manager icon and login using your Nexsure user name and password.
From the top tool bar, select File, then Options to specify a folder that files will be downloaded to.
To add Outlook messages to the Attachment Manager with any attachments included with the message, nothing else needs to be done. In order to have Outlook messages and their attachments added as separate files, select the "Extract attachments from Outlook messages" check box. Click OK.
Using Attachment Manager
Attachment Manager only handles true attachments in Nexsure. Any documents created within Nexsure (with or without a template) can not be handled in Attachment Manager. Attachment Manager mimics the same process by which "add new" is selected from the attachments screen in Nexsure, and then the add attachment radio button is selected. Just as the actual attachments added to Nexsure may not be altered, neither can the items added through the manager.
All client entity attachments added through Attachment Manager are added to the main system attachment file folder. Attachments contained in the Nexsure recycle bin will not display in Attachment Manager.
Attachment Manager opens to the logged in users client listing from the Nexsure Search screen history by default. Double click on any client to view the client level attachments. Type any client name in the search box to search for a client not displayed in the default client history
. Select the retail agent option in the bottom right pane to work with retail agent attachments rather than client entity (including policy) attachments.
Select the blue arrowhead to expand the tree to display the other attachment levels of Opportunities, Marketing, Policies and Certificates. Policy listings are sorted by effective date ascending and then issuing carrier ascending. Only the most current version of the policy in a policy family will display in Attachment Manager.
To open an attachment in Attachment Manager, double click the attachment type icon or right click and select open from the context tool.
The attachments listed in the attachment manager right pane may searched and/or sorted by selecting the header for each column.
Attachments that are checked out attachments may not be moved. modified or deleted until they are checked back in to Nexsure.
Changes in Attachment Manager are recorded in the Nexsure T-log.
Note: Attachments added to Attachment Manager will actually be copies of the original attachment. The user may drag and drop the same attachment to multiple policies, clients, etc. However, Attachment Manager will not allow the same attachment to be duplicates on the same client or policy in order to mitigate user errors.
Adding Attachments through Attachment Manager
Any documents added to the attachment manager will appear in Nexsure at the level and with the information they were added to in Attachment Manager. Documents may be added to Attachment Manager by simply dragging them from your desktop, file folder or Outlook E-mail and dropping it in the right side attachment listing pane. The attachment will be added and associated to the retail agent, client, policy and/or certificate that was open and selected when the new file was dropped in the right pane.
Attachments may also be added using the left window pane in Attachment Manager, however, caution should be observed when adding attachments in this manner. The attachment will be added to the place it was dragged to, not the current open item in Attachment Manager.
The attachment name and description will default to the file name.
Attachments added to active policies will appear in Nexsure on all iterations of that policy within the same policy family.
Note: Additions or changes made in Nexsure while Attachment Manager is open will not display unless Attachment Manager is refreshed. To refresh, right click on the left pane node you wish to be refreshed and select the refresh option. The client & retail agent search display, opportunities, certificates and marketing and policy history and active nodes may all be refreshed.
Modifying Attachments from Attachment Manager
The attachment name, description, and portal viewable indicators may be changed by selecting the row and clicking any editable field one time and making the desired change. User may also select the row and press <F2> on the keyboard.
Moving Attachments
Attachments in Attachment Manager may be moved from clients and policies to different clients or policies. Only true attachments may be moved, not documents created within in Nexsure because of the links to the Nexsure data in the XML tree contained within documents created in Nexsure.
Deleting Attachments from Attachment Manager
To delete an attachment from Attachment Manager, select attachment row and then <DEL> keyboard key or right click on the attachment row and select delete from the context menu. Attachments deleted from Attachment Manager will be placed in the recycle bin in Nexsure.
Using Attachments in Attachment Manager Outside of Nexsure
Copies of attachments may also be downloaded from Attachment Manager to the users desk top or to an Outlook email message. A copy of the attachment will be placed in the users designated folder or temp folder, if a designation was not made from the File/Options menu in Attachment Manager.
Note: Documents must be downloaded to the workstation when dragged from Attachment Manager which may take some time, especially for larger files.
Global Searching of Attachments
Attachment Manager allows users to search across all attachments in Nexsure . Select the Global Search option from the bottom of the Attachment Manager left pane. Enter text to search across all attachment names and descriptions in the system (that the user has security to view) and click Search. A maximum of 500 records will be returned for any given search.