Adding Employees
Employees should be added at the organization level which
allows their names to be
(region, territory or branch). Access
rights and security rights are assigned after the new employee has been added
as a Nexsure user.
Note: Employees
can be added at lower organization levels such as region, territory, or
branch. However,
employees added at a specific level only have access to that level and
the levels below it. For
example, an
employee added at the region level has access to region, territory, and
branch functionality but does not have full organization-level capability. An
employee added at the territory level has access to territory and branch
functionality, but not to region or organization level functionality. Employees
added at branch level only have access to branch level functionality.
The different
levels of security can be edited in Security Administration >
User
Rights Templates.
Quickly navigate to procedures included in this topic by clicking one of the links below:
To Add an Employee
To Add User Rights
To Add an Employee Photo
To Add an Employee Salutation
To Add an Employee Signature
To Add
an Employee
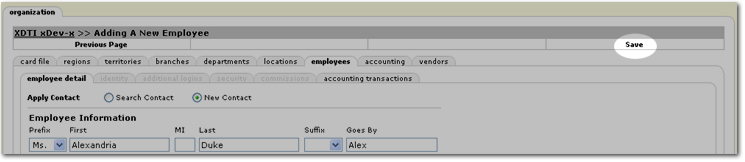
- On the Primary
menu,
click ORGANIZATION.
- Click the employees
tab.
- Click Add
New. The employee detail tab is displayed. The Search Contact option is selected by default.

- In the Apply Contact area, select New Contact.
Tip: While
not necessary, a search should always be performed to see if the contact already exists in Nexsure.
- In the Employee Information area, enter the employee detail
information.
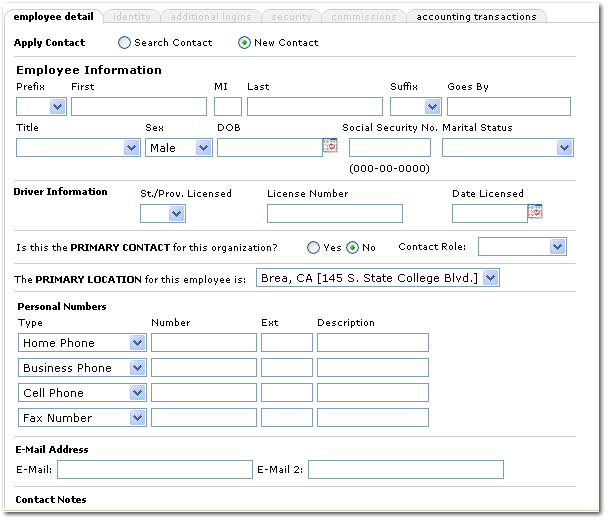
- After all of the Employee Information is entered, click Save.
Note: Adding
an employee in Nexsure does not automatically make that employee a Nexsure
user, they must be added as a user and granted security user rights. See
To Add User Rights below.
To Add User Rights
- On the employees tab, click [Show] and search for the employee to update.
- Click the Details
 icon next to the appropriate employee. The employee detail tab is displayed.
- At the bottom of the employee detail tab, click the link in the User Information section to make the contact a user. The security tab is displayed.
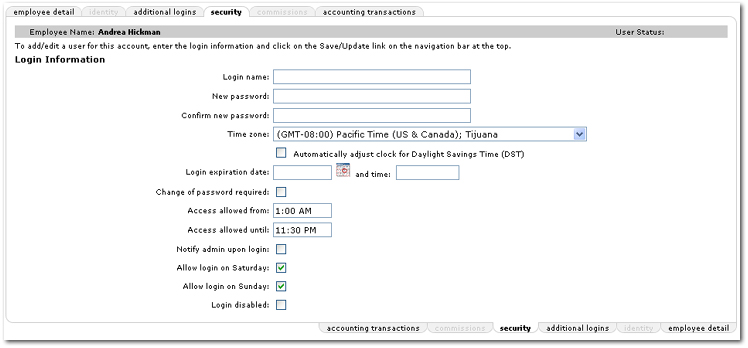
- In the Login name box, enter the new login name for the staff member.
- In the New password and Confirm new password boxes, enter the new password for the staff member.
- In the Time zone list, select the time zone setting for the staff member. This time zone will be used when activities in Nexsure initiated by this staff member are date and time stamped.
- Select the Automatically adjust clock... check box if automatic adjustments daylight savings are desired.
- In the Login expiration date box, select a date and time if this staff member's login requires an expiration date. This
is useful in the event a temporary employee is granted Nexsure access. If only a date is entered and not a time, the system will default to 12:00 AM.
- Select the Change of password required check box if the staff member must change their password the first time they log on to Nexsure.
- In the Access allowed from / until boxes, enter the time range that the staff member is allowed to be logged on to Nexsure.
- Select the Notify admin upon login check box if the Nexsure administrator is to be notified each time the staff member logs on to Nexsure.
- Select the Allow login on Saturday / Sunday check boxes if a staff member will be allowed to log on to Nexsure on those days. These options are selected by default. To restrict access on those days, clear the check boxes.
- Select the Login disabled check box to restrict access for the staff member.
- Once all Login Information is entered, click Save at the top of the organization tab. The security tab is again displayed with the option to add security at the bottom of the tab.
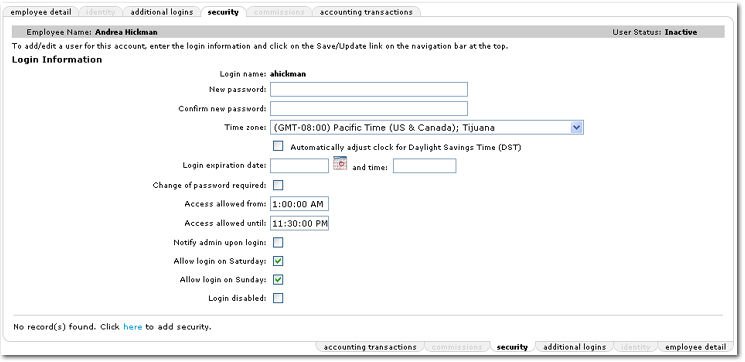
- At the bottom of the security tab, click the Click here to add security link. The User Rights Information dialog box is displayed.
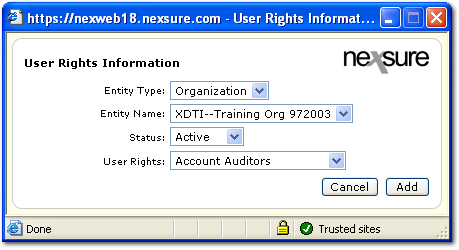
- In the Entity Type list, select the level at which the staff member should be added.
- In the Entity Name list, if there is more than one entity for the Entity Type selected, select the name of the entity to be used.
- In the Status list, select whether the staff member will be active or inactive.
- In the User Rights list, select the appropriate user rights template to be associated with the staff member.
- Click Add. The information is added to the User Accounts section.

Employee Identity
A photo of the employee can be added to Nexsure as well as custom signature and salutation information to be used when creating documents in Nexsure.
To Add an Employee Photo
Employee photos are displayed when another staff member clicks on the employee name link.
- On the ,
click ORGANIZATION.
- On the employees tab, click [Show] and search for the employee to update.
- Click the Details icon next to the appropriate employee. The employee detail tab is displayed.
- Click the identity tab. The Employee Photo tab is displayed. A .jpg format photo of the employee can be uploaded to Nexsure.
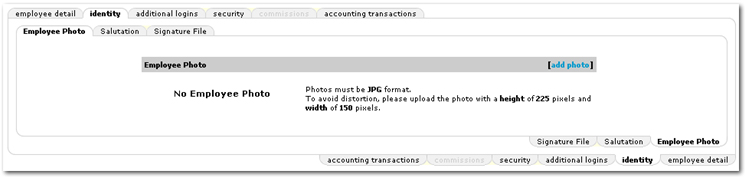
Tip: When preparing the photo for upload, size the photo width to 150 pixels and height no larger than 225 pixels. The photo must be formatted as a .jpg image.
- Click [add photo]. The Add new photo screen is displayed.
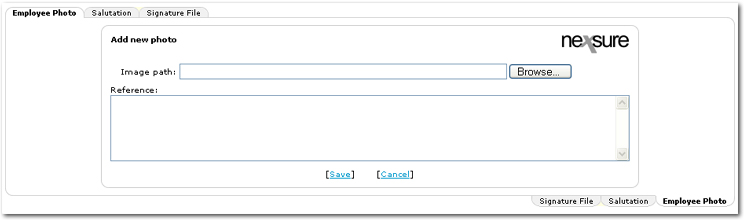
- Click Browse, navigate to the photo and click Open. The path to the photo is then added.
- In the Reference box, enter any necessary reference information about the photo.
- Click [Save]. The photo is then added to the employee identity.
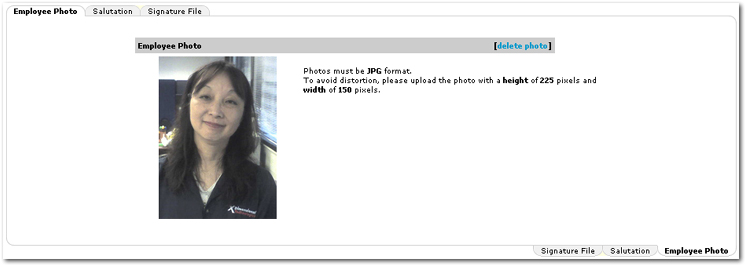
- The photo can be removed by clicking [delete photo].
To Add an Employee Salutation
The employee salutation is used on Nexsure email and fax deliveries as a closing.
- On the ,
click ORGANIZATION.
- On the employees tab, click [Show] and search for the employee to update.
- Click the Details icon next to the appropriate employee. The employee detail tab is displayed.
- Click the identity tab. The Employee Photo tab is displayed.
- Click the Salutation tab. The Employee Salutation screen is displayed.

- Click [add salutation]. The Add A Salutation screen is displayed.
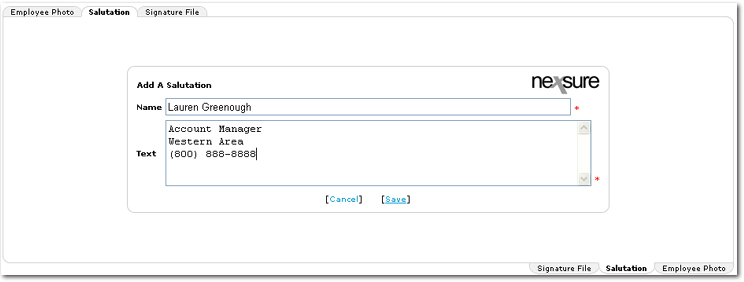
- In the Name box, enter the employee's name.
- In the Text box, enter all text that is to be pre-filled as the closing on deliveries in the text field.
- Click [Save]. The salutation is then added to Nexsure.
- The salutation can be removed by clicking [delete salutation].
To Add an Employee Signature
Signature files are appended when creating Nexsure certificates. Signature files MUST be created and attached to the employee identity to create new certificates in Nexsure. This option is not available if certificates are generated via ConfirmNet.
Tip: A signature must be saved in a JPG format. Microsoft® Paint or Adobe® Photoshop® can be used to save the signature image to the JPG format. The image must be sized within a height of 75 pixels and a width of 300 pixels. For more information on setting up a digital signature see Tips & Facts Vol. 3, Issue 3.
- On the ,
click ORGANIZATION.
- On the employees tab, click [Show] and search for the employee to update.
- Click the Details icon next to the appropriate employee. The employee detail tab is displayed.
- Click the identity tab. The Employee Photo tab is displayed.
- Click the Signature File tab.
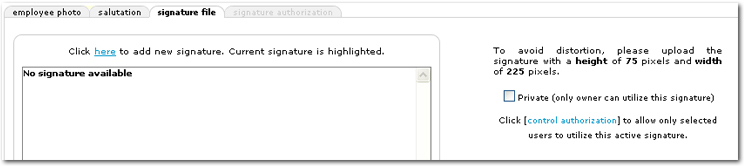
- Click the Click here... link to add a new signature. The Add new signature screen is displayed.
Tip: When preparing the signature for upload, size the signature width to 225 pixels and height no larger than 75 pixels. The signature must be formatted as a .jpg image.
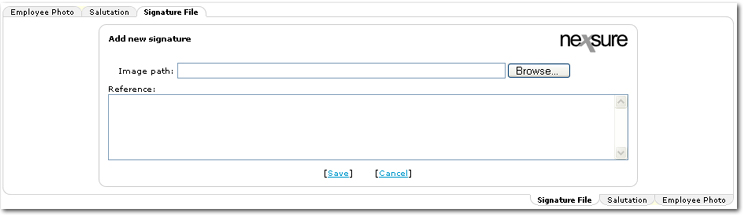
- Click Browse and navigate to the signature image and click Open. The path to the signature image is then added.
- Click [Save]. The signature is then added to Nexsure. A staff member can have multiple signatures in Nexsure, however only one can be active.
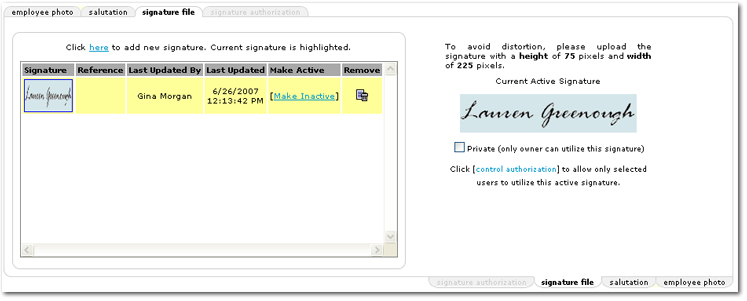
- Click the Remove
 icon to remove a signature from Nexsure. If the signature has been in use, it can be made inactive instead of being removed.
- To inactivate a signature once it has been added, use the [Make Inactive] link. Once the signature is inactive, it will no longer be displayed in signature selection lists throughout Nexsure. If a signature is made inactive, any previous documents in which the signature was used will not be changed.
Note: If a staff member is made inactive in Nexsure, their signature will no longer be displayed for selection. A signature can be reactivated as long as no other signatures for that staff member are active.
- Select the Private check box if only the signature owner should be allowed to use the signature.
Or
Leave the Private check box unchecked to allow the signature to be used by all staff members within the branch.
Or
Click [control authorization] to allow only selected staff members to use the active signature. The signature authorization tab is displayed.

- In the Filter area, click [Show] to open the search and sort filters. Search for the staff members that require access.
- Select the staff members that require access.
- On the navigation toolbar, click Update. The selected staff members will be authorized to use the active signature when completing forms.
User Rights Templates
Employee Commissions
Employee Login Security
Global Reassignment
IMX
Instant Messenger