User Rights Templates
User rights templates are used to assign security to the following entities:
- Additional Interest
- Carrier
- Client
- Financial Entity
- Organization
- Retail Agent
- Vendor
Quickly navigate to procedures included in this topic by clicking one of the links below:
To Add a Template
To Copy a Template
To Edit a Template
To Export a Template
To Delete a Template
To Add a Template
- On the Utility menu,
click SETUP.
- From the Setup Console,
click Security Administration and
select the user rights templates tab.

- Click [Add]. Each
new template added is automatically stored with the Date Created,
Last Modified and Modified By which can be seen when an installed template is selected from the user rights templates tab.
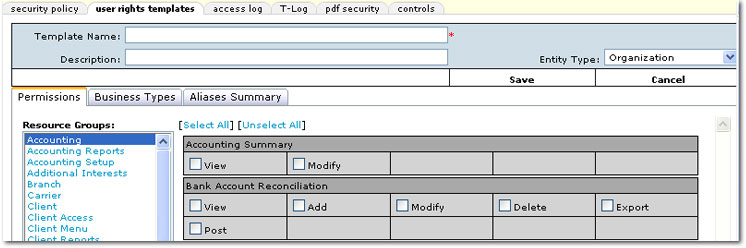
- On the user rights template
tab, enter the following:
- Enter
the Template Name in the space provided.
- Enter a description
in the Description field.
- Select an Entity Type to which the template will be added.
- On the Permissions tab, to
assign security rights for a specific area, select a Resource Group. Selecting View,
Add, Modify,
Delete or Import will grant security access for those particular items.
- On the Business Types tab, to assign only specific Business Types to a template or set up access to all Business Types use the following guidelines:
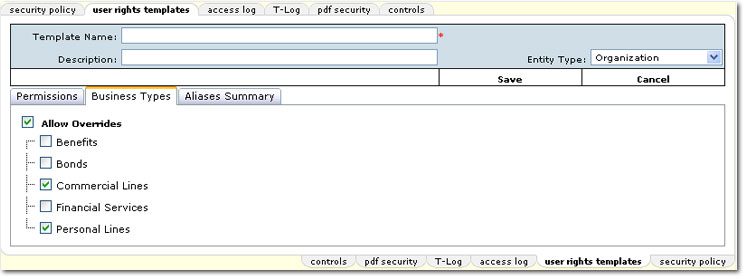
- Select the Allow Overrides check box to allow the staff member to see all business types rather than the defaults for any entry screen.
- Select one or more Business Types to set as defaults in entry screens throughout Nexsure. If only Business Types are selected and not the Allow Overrides check box, only those Business Types selected will be available in entry screens.
Note: If Allow Overrides is selected along with specific Business Types, the specific types will be made default on entry screens. However, if other selections are available as a default on the entry screen, those selections will remain available.
- On the Aliases Summary tab, alternate titles can be set up for the labels detailed below:
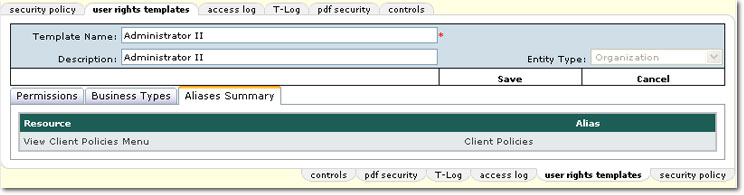
- To populate the Aliases Summary tab, add the alias on the Permissions tab in the associated rights area. The following rights allow the set up of an alias:

- Client Menu > Policies
- Marketing > Policies
- Policy > Policies
- Policy Reports > Policies
- Click Save to
save the added template.
Or
Click Cancel to exit the screen without saving.
To Copy a Template
- On the Utility menu,
click SETUP.
- From the Setup Console,
click Security Administration and
select the user rights templates tab.
- On the user rights templates tab, select a template to copy. The [Copy] link becomes active once the template selection has been made.
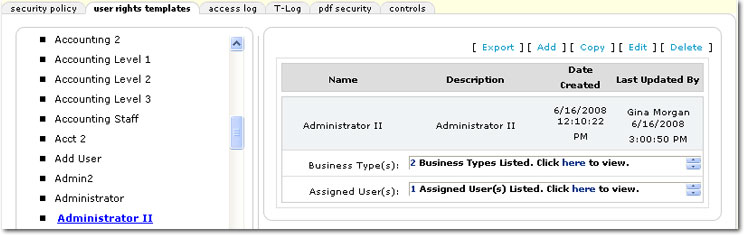
- Click [Copy]. The user rights templates tab is displayed with rights copied from the previous template.
- In the Template Name box, enter a name for the template.
- In the Description box, enter a brief description for the template.
- In the Entity Type list, the selection is based on the selection in the copied template. This selection cannot be changed.
- Access each of the following tabs to make any necessary adjustments in the template:
- Permissions
- Business Types
- Aliases Summary
- Click Save to
save the copied template.
Or
Click Cancel to exit the screen without saving.
To Edit a Template
- Click Edit
and select a Resource Group. Make the necessary changes to the template.
- Click Save
to save the updated template.
Or
Click Cancel to exit the screen without saving.
Note: When
a template is modified all staff members associated with the template will be synchronized with the template updates the next time they log in to Nexsure.
To Export Rights Templates
- On the Utility menu,
click SETUP.
- From the Setup Console,
click Security Administration and
select the user rights templates tab.
- On the user rights templates tab, select the appropriate template.
- Once the selection has been made, click [Export]. The File Download dialog box is displayed.
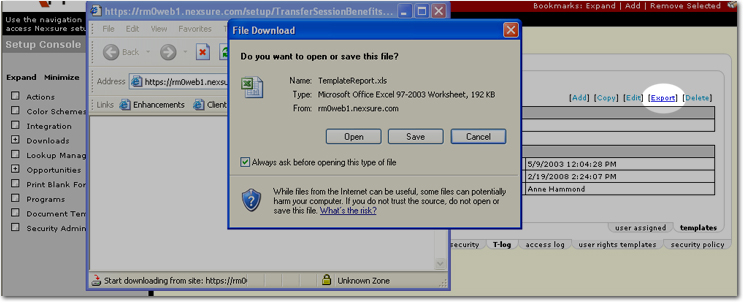
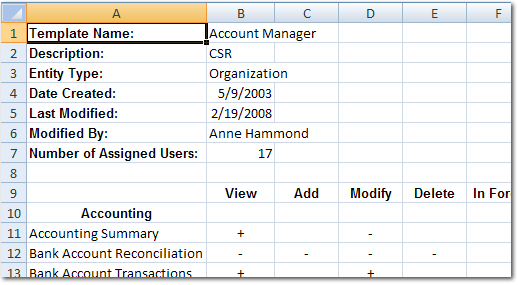
- In the File Download dialog box, click Open. The Microsoft® Excel® spreadsheet is displayed. Once the new spreadsheet is displayed, it can be saved.
To Delete a Template
- On the Utility menu,
click SETUP.
- From the Setup Console,
click Security Administration and
select the user rights templates tab.
- On the user rights templates tab, select the appropriate template.
- Once the selection has been made, click [Delete]. A confirmation dialog box is displayed.
- Click OK. The template is deleted.
Important: Default system templates and templates to which staff members are still assigned cannot be deleted.
Security Administration