Adding a Vendor
Vendors are outside entities to which payments are made for operating
expenses such as rent, office supplies, etc. Vendors
are created on the SEARCH screen and used in the Accounting screens of
Nexsure.
Note: The vendor is added globally through SEARCH and then must be associated at a book level (organization or territory) by adding the vendor to the vendors tab. The vendor is then available for the entity level accounting transactions including disbursements, receive payment, and accounts payable.
To Add a Vendor
- On the Primary menu ,
click SEARCH.
- In the Entity
list, select Vendor.
- In the Vendor box, enter the vendor name and click
Search. The
vendor name entered here will pre-fill to the vendor card file tab.
Note:
The [Add
New Record] link will not be displayed unless an actual search has been run.
- If the vendor is not in the system, click [Add New Record].
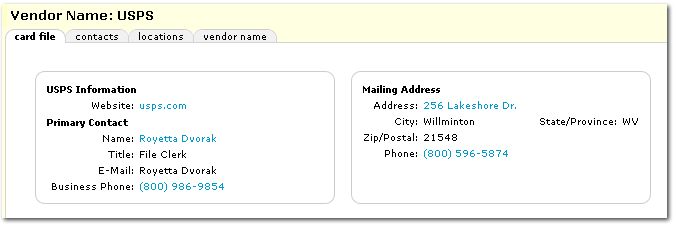
Vendor Info:
- Complete the Vendor
Name.
- Enter the vendor’s
Website, if applicable.
- Enter the Primary Account Address.
- Select the Location
Type from the list.
- Enter the vendor's Location Address.
- Enter the vendor's City.
Note:
Clicking
on the Ellipsis  button after the city will display all cities and zip
codes associated to the city entered. Select
the applicable City, State and Zip Code from the list and click
Use Selection to pre-fill the State
and Zip Code to the card file tab.
button after the city will display all cities and zip
codes associated to the city entered. Select
the applicable City, State and Zip Code from the list and click
Use Selection to pre-fill the State
and Zip Code to the card file tab.
- Enter the State.
- Enter the Zip Code.
Note: If the city and state are unknown, enter the zip code. Clicking
on the Ellipsis button after the zip code will display the city
and state associated to the zip code. Click
Use Selection to pre-fill the city and state to the card file.
- Enter the location’s
Phone Number.
- In the Apply Contact area:
 Use Existing: Select
this option to search all contacts in Nexsure.
Use Existing: Select
this option to search all contacts in Nexsure.
- Enter at least two
characters in the Last Name.
- Click Search.
- If the contact is found,
click the name and Save.
- If the contact is not
found, select Add New.
Add New: Select this option to add a new contact to Nexsure.
- Enter the First Name
of the contact.
- Enter the Middle Initial
(MI) of the contact.
- Enter the Last Name
of the contact.
- Select the Suffix from
the list. Items
may be added to the list in Setup > Lookup Management.
- Select the Title from
the list. Items
may be added to the list in Setup > Lookup Management.
- Select the Contact
Role from the list. Items
may be added to the list in Setup > Lookup Management.
- The E-mail address for the contact are optional. If the format is entered
incorrectly an error will be returned to warn of the improper format.
The email
address field must contain the @ and . symbols.
- Phone
Numbers:
- Select the Type of
phone number from the list.
- Enter the phone numbers,
without formatting, for this contact. Formatting
will be applied after the screen has been saved.
- Up to a six digit Extension
may be entered.
- A Description may be
entered for each number using alpha or numeric characters.
Note:
Items with
a red * asterisk are required fields.
- Click Save.
Or
Click Clear to clear the screen of all information
except the Vendor Name. Once the information is saved the vendor card
file tab will be displayed.
- Click the Details
 icon on the contacts and locations tab to make updates or changes.
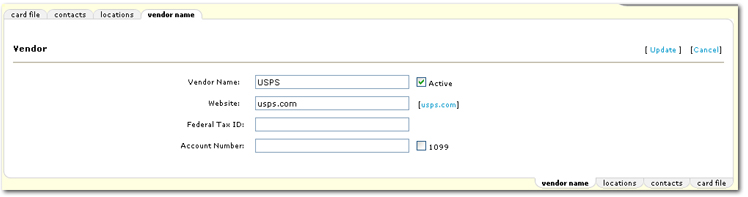
- Select the vendor name tab and enter the following
information:
- Vendor Name
- Make changes to the Vendor Name.
- WebSite
- Make changes to the vendor Website.
- Federal
Tax ID - Enter the Federal Tax ID for the vendor. The Federal Tax ID will default to the vendor Federal Tax ID when added at organizational book levels (organization or territory). However if a different ID is necessary at those levels, the default can be overwritten at those levels.
- Account
Number - Enter your agency's Account Number with the vendor.
- Active
- Selected by default. If your agency is not currently doing business
with this vendor, clear the box to designate them as inactive.
- 1099
- Select this box if the vendor is on 1099 status with your agency. All general ledger line items added for this vendor will then be marked as 1099 by default if the vendor is associated at the organization level and the 1099 check box remains checked at the associated level. If unchecked there the general ledger 1099 line item default will be unchecked.. This
box must be selected to be included
in the year end Vendor 1099 Disbursement
Details report.
Working
with Vendors
Disbursements
Accounts
Payable