Disbursements
Quickly navigate to procedures included in this topic by clicking one of the links below:
To Create a Disbursement (Post / Print a Check)
To Print the Disbursement Checks
To Create a Disbursement (Post / Print a Check)
- On the Primary
menu,
click ORGANIZATION.
- Select the book level tab (such as territories) and click the Details
 icon next to the appropriate entity.
- Click the accounting > transactions > disbursements
tab.
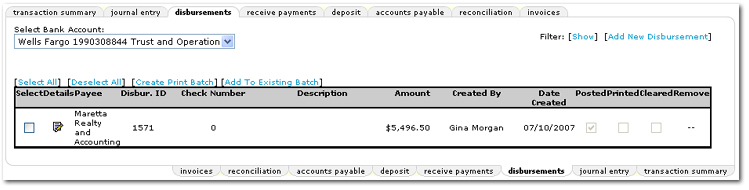
- Select a bank account from the list.
- Click [Add New Disbursement]. The Disbursement dialog box is displayed.
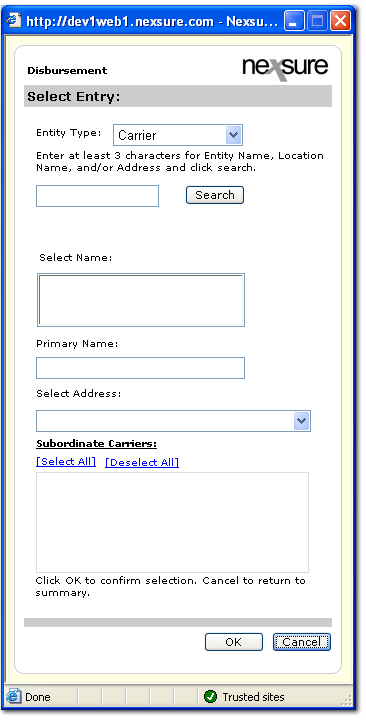
- Select an Entity Type
from the list.
Note: Only carriers that are associated to the territory will be available in the search. For more information about carrier associations, see the Carrier Associations topic.
- Enter at least two characters
of the name for the entity to disburse to and click Search.
Note:
If the
entity has an alternate payment address, it can be selected from the Select Address list.
- Select the entity in
the search results and click OK. The disbursements tab is displayed.
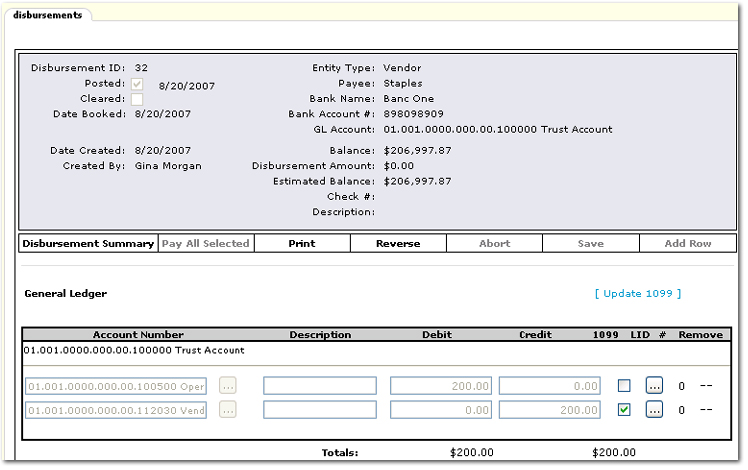
- Complete the Disbursement
Header information.
- In the Payee area, click the Ellipsis
 button to select another address for the payee if necessary.
- In the Navigation Toolbar, click Save.
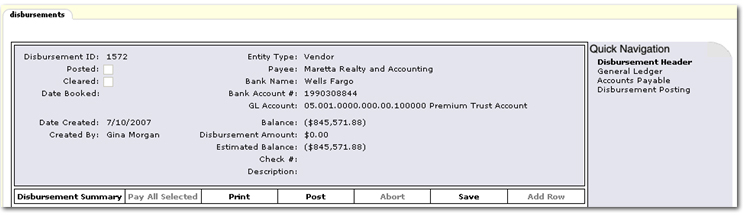
- In the Quick Navigation
panel, click General Ledger. Quick Navigation links vary by entity selected but the General Ledger link is available in all entity types.
- In the Navigation Toolbar, click Add Row to distribute general ledger activity.
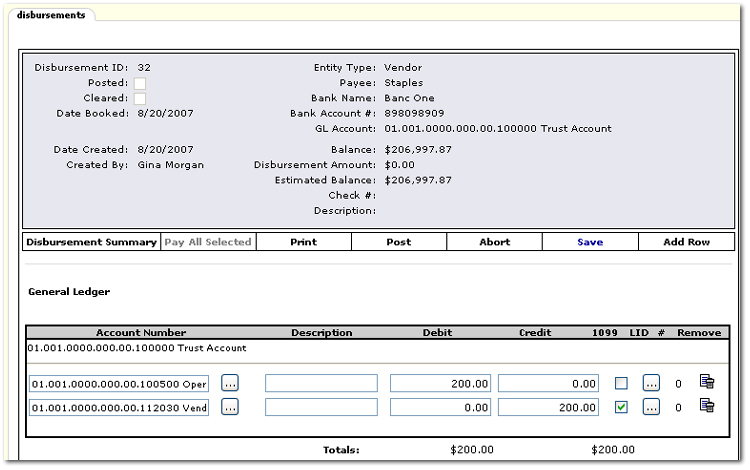
- In the Navigation Toolbar, click
Post. A confirmation message is displayed to confirm the post, click OK.
The posted
and printed from the Disbursement Summary
screen.
Note: Only the Disbursement Summary can be printed before a disbursement is posted. After post, the summary and various check styles can be printed.
Important: When posting to locked periods, keep the following in mind. If the staff member has rights to post to a locked period a dialog box is displayed letting the staff member know they are posting to a locked period. If the staff member does not have rights to post to a locked period, the only option is to change the date booked to an unlocked period. More information on rights for staff members to post to locked periods can be found at Transactions > Reconciliation Security.
- Once the disbursement has been posted, only the 1099 check boxes are editable. If it is necessary to update a 1099 selection, make the new selection and click [Update 1099].
To Print the Disbursement Checks
- On the Navigation Toolbar, click Print. The Print Disbursement Selection dialog box is displayed.
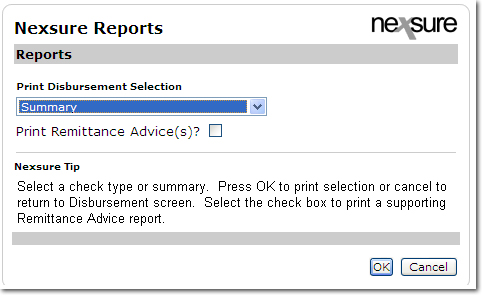
- In the Print Disbursement Selection list, select the appropriate check style or a summary.
- Select the Print Remittance Advice check box to open a separate PDF containing the remittance advice(s) for printing.
- Click OK. The check is then printed to Adobe® PDF format.
- On the Adobe PDF toolbar, click the File > Print. The Print dialog box is opened for print options.
Batch Printing