Carrier Associations
The carrier associations tab is available to associate carriers with specific territories. The associations will filter the branches listed in the carrier commissions tab which, in turn, filters the billing and issuing carriers listed for selection at the policy level.
Quickly navigate to procedures included in this topic by clicking one of the links below:
To Search for Existing Carrier Associations
To Add a New Carrier Association
To Edit an Existing Association
To Add a Batch of Associations
To Search for Existing Carrier Associations
- On the Primary menu,
click ORGANIZATION.
- Click the territories
tab and select a territory by clicking the Details
 icon.
icon.
- Click the entities
associations > carrier associations tab. Any existing carrier associations will be displayed.
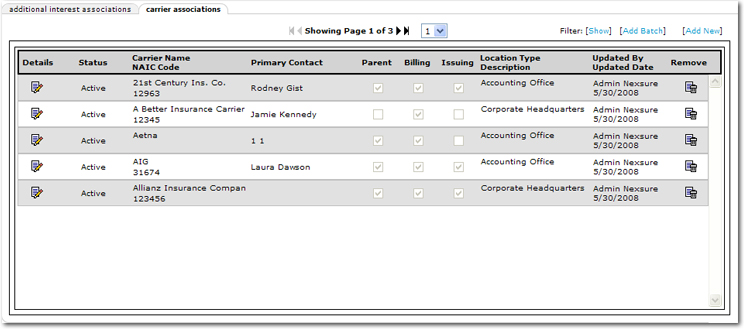
The following options are available when working with carrier associations:
- Showing Page: The Arrow

 icons can be used to navigate through pages of search results.
- First Page
 icon.
icon.
- Previous Page
 icon.
icon.
- Next Page
 icon.
icon.
- Last Page
 icon.
icon.
- Page List: Click the Page List
 arrow to open a list of all search results pages. Select the desired page number to open that page of search results.
- Search Filters: Click [Show] or [Hide] to toggle the Search Filters screen.

The options available on the Search Filters screen are:
- Save Filter Settings: Selecting the Save Filter Settings check box on the Search Filters screen and clicking Search will change the default Search Filter setting. The next time the carrier associations tab is opened, the associations returned will be filtered by the saved setting. As a general rule, check the filter settings each time this tab is accessed.
- Carrier Name: Enter the name of the carrier for which to search. Enter at least two characters to narrow the search results. Entering some of the Carrier Name returns a broader result; enter most of the name for more specific results.
- NAIC Code: Enter the NAIC Code for the carrier. Enter at least two characters to narrow the search results. Entering some of the NAIC Code returns a broader result; enter most of the code for more specific results.
- Updated By: Enter the name of the staff member that last updated the carrier association details. Enter at least two characters to narrow the search results. Entering some of the Updated By name returns a broader result; enter most of the name for more specific results.
- Description: Enter some or all of the description for the carrier association. Enter at least two characters to narrow the search results. Entering some of the Description returns a broader result; enter most of the Description for more specific results.
- Association Status: In the Association Status list, select the current status of the carrier association. The options are:
- All
- Active
- Inactive
- Sort Filters: Use the Sort Filters to sort the results of the actions search.

- Sort Field 1: By default Sort Field 1 is set to Carrier Name. However, another column heading from the Sort Field 1 list may be selected. The search results will be sorted by the column selected in the Sort Field 1 list.
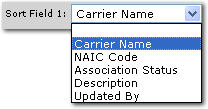
- Sort Order 1: By default Sort Order 1 is set to Ascending. However, either Ascending or Descending may be selected to set the order of the carrier association records returned. Ascending will set the order from A-Z. Descending will set the order from Z-A. The Sort Field 1 will be the first sort and Sort Field 2 will be the sub sort.
- Sort Field 2: By default Sort Field 2 is not set by default. However, a column heading from the Sort Field 2 list may be selected. The search results will be sorted by the column selected in the Sort Field 2 list.
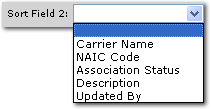
- Sort Order 2: By default Sort Order 2 is set to Ascending. However, either Ascending or Descending may be selected to set the order of the carrier association records returned. Ascending will set the order from A-Z. Descending will set the order from Z-A. The Sort Field 1 will be the first sort and Sort Field 2 will be the sub sort.
- Files Per Page: By default the Files Per Page is set to 5. However, 5, 25, 50, or 100 carrier association records may be selected to display per screen.
- Clear: Click Clear to remove all entries in the Search Filter and Sort Filters fields.
Important: Clicking Clear does not remove the Save Filter Settings selection.
- Search: Click Search. The results of the Search Filter criteria and Sort Filter settings are displayed.

The following columns are displayed in the carrier associations search results:
- Details: Click the Details
 icon to open the carrier associations tab for editing. For more information about editing the carrier associations tab, see To Edit an Existing Association.
- Status: The status of the carrier association is displayed. The possible status types are Active and Inactive. Active is set if the carrier / branch association must be available for selection at the carrier > commissions tab. The Branch Name list on the carrier > commissions tab will then only include branch names with active associations.
- Carrier Name / NAIC Code: The name of the associated carrier and the NAIC code are displayed.
- Primary Contact: The name of the carrier's primary contact is displayed.
- Parent / Billing / Issuing: The check boxes are selected for each item depending on the role of the carrier. The Issuing and Billing selections are automatically added from the information on the carrier > carrier name tab in the Carrier Types area.
- Location Type: The location type associated with the carrier record.
- Description: The description entered when the carrier association was created.
- Updated By / Updated Date: The name of the person that last updated the carrier association record and the date the update was made.
- Remove: Click the Remove
 icon to remove the carrier association.
To Add a New Carrier Association
- On the Primary menu,
click ORGANIZATION.
- Click the territories
tab and select a territory by clicking the Details
 icon.
icon.
- Click the entities
associations > carrier associations tab. Any existing carrier associations will be displayed.
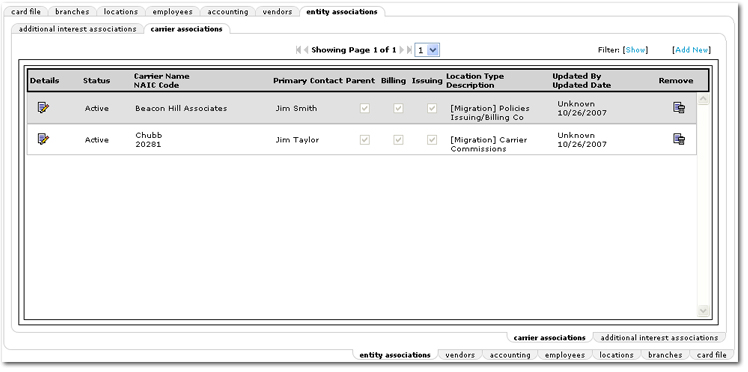
- Click [Add
New] to add a new carrier association. The carrier associations tab is again displayed with entry options for a new association.

- In the Name area, click the Ellipsis
 button. The Territory Carrier Association dialog box is displayed.
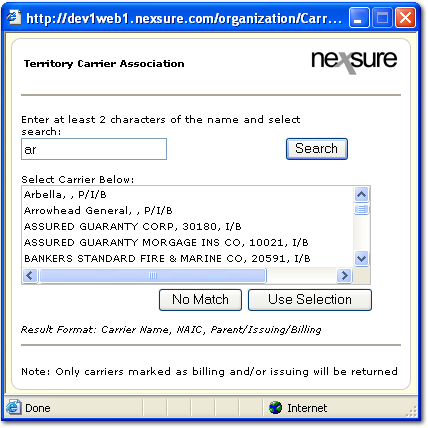
- Search for the desired carrier,
if the carrier appears in the Select Carrier Below list, select the carrier and click Use
Selection.
Or
Click No Match to clear the search criteria and start a new search. Existing carrier associations for the territory will not display in search results.
- In the Description box, enter a brief description for the carrier association. This description will be displayed on the carrier associations summary screen.
- In the NAIC Code area, the carrier's NAIC code is automatically displayed if one is available.
- In the Territory Association Status area, select the Active check box if the carrier / branch association must be available for selection at the carrier > commissions tab. The Branch Name list on the carrier > commissions tab will then only include branch names with active associations.
- In the Primary Contact list, the primary contact from the carrier will be automatically added. Another contact from the carrier may be selected.
- In the Default Address list, the primary carrier location will be automatically added. Another address may be selected. If no locations exist, one will need to be added to the carrier record before continuing.
Note: The default address is populated from the global carrier name card file tab, not the carrier locations tab.
- Once all entries have been made on the carrier associations tab, click Save.
Or
Click Cancel to return to the carrier associations summary screen without saving entries.
To Edit an Existing Association
- On the Primary menu,
click ORGANIZATION.
- Click the territories
tab and select a territory by clicking the Details
 icon.
icon.
- Click the entities
associations > carrier associations tab. Any existing carrier associations will be displayed.

- To view or edit the details
of an association, click the Details
 icon next to the association to edit. The carrier associations tab is displayed with the details of the association.
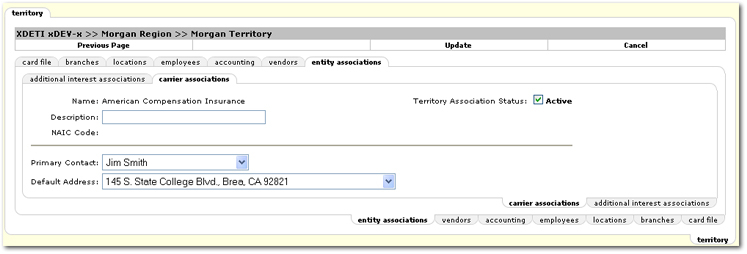
- On the carrier associations tab, make any necessary edits to the information.
- Once all edits have been made, click Update to save the changes.
Or
Click Cancel to return to the carrier associations summary screen without saving the updates.
To Add a Batch of Associations
- On the Primary menu,
click ORGANIZATION.
- Click the territories
tab and select a territory by clicking the Details
 icon.
icon.
- Click the entities
associations > carrier associations tab. Any existing carrier associations will be displayed.
- Click [Add Batch]. The Carrier Association screen is displayed.
- In the Carrier Association Source Options lists, select the appropriate Territory and Branch.
- In the Carrier Associations Target Options list, select the Branch to which the new associations will be made.
- Next, select the Carrier Name and enter the Branch Code to associate the selected carrier names to the above selected Territory and Branch.
Adding
Territory Locations

 arrow to open a list of all search results pages. Select the desired page number to open that page of search results.


 icon to open the carrier associations tab for editing. For more information about editing the carrier associations tab, see To Edit an Existing Association.

 button. The Territory Carrier Association dialog box is displayed.

