Working with Vendors
The vendor entity must be entered in Search, see Adding
a Vendor, to be able to associate it to a general ledger account at
the territory level. Associating
the vendor to a general ledger account at the territory level will make
it available for setting up account payable records.
Note: An accounts payable record must be created prior to the disbursement. The default general ledger number will be pulled into the accounts payable record.
- On the ,
click ORGANIZATION.
- Click the territories
tab.
- Click the Details
 icon of the appropriate territory.
- Click the vendors tab.
- Click the [Add
New] link.
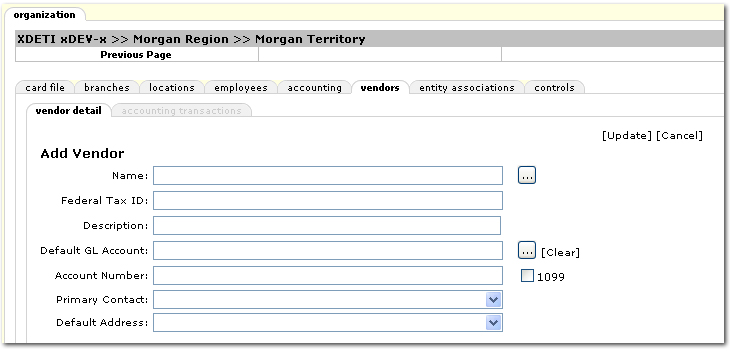
- Click the Ellipsis
 button next to the Name field. The Nexsure Accounting
screen will be displayed.
button next to the Name field. The Nexsure Accounting
screen will be displayed.
- In the Search box, enter
at least three characters of the vendor name and click
Search.
- Select the vendor name
and click OK.
- In the Federal Tax ID box, enter the tax identification number for the vendor. The Federal Tax ID defaults from the vendor Federal Tax ID added when searching for the vendor. However if a different ID is necessary at the territory level, the default can be overwritten.
- Enter a Description for
the vendor.
- Click the Ellipsis button next to the Default GL Account field.
- The Nexsure Accounting
screen will be displayed.
Note: The Region
and Territory should be grayed out; this will confirm that the vendor
is being added at the territory level. If
it is not grayed out, click Cancel
and start at step 1.
- The Branch,
Department and Unit,
if applicable, may be selected from the lists. This
information may be left blank.
- The Classification,
Group and Type,
may be selected from the lists. This
information may be left blank.
- Enter at least two characters
in the general ledger name or number boxes and click Search.
- All general ledger accounts
will be displayed. Select
the appropriate general ledger number and click OK.
- The general ledger number
will be pulled over to the Default GL Account number for the vendor.
Note: If this
account is not accurate, click the Clear
link to clear the field. Click
the Ellipsis button
to run a new search.
- Enter the Account Number
for this vendor.
- In the Primary
Contact list, select a contact, if applicable.
- In the Default
Address list, select an address, if applicable.
- Click Update. The vendor will appear in the vendor tab summary view.
Adding a Vendor
Disbursements
Accounts Payable