You are here: Utility menu > Setup Console > Programs > Setting Program Status to Inactive

Setting Program Status to Inactive

If a program is no longer valid, it may be identified as inactive so it is no longer an available selection on the Client > OPPORTUNITIES detail screen.

  1. Click the Details icon of the selected program.

  1. Click the Details icon on the selected associated branch.

  1. On the Branch Details pop-up window, select Inactive from the Status drop-down box.
  2. Click the [Save] link to store the change or [Cancel] to abort.

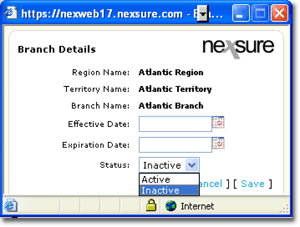
Note: Programs must be set to inactive by the branch in order to disable use at the Client > OPPORTUNITIES level.

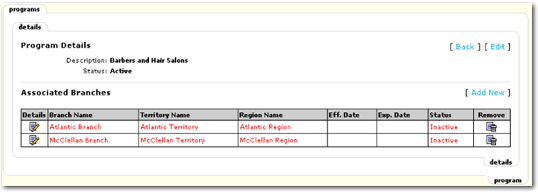
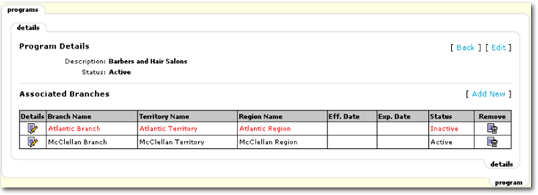
After saving the newly modified status, the programs > details screen is displayed. The red font indicates that a program's status has been set to Inactive.

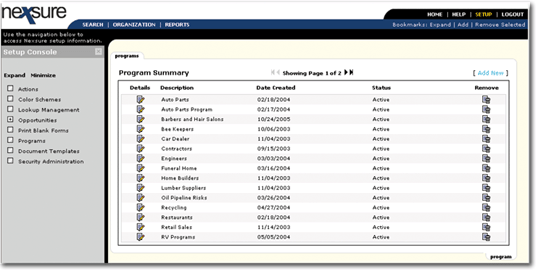
If the entire program is no longer valid for all branches, make sure to set all branches’ status to Inactive individually.

  1. Click the [Edit] link on the programs > details screen.
  2. Select the Inactive option from the Status drop-down box.
  3. Click the [Save] link to store the change or [Cancel] to abort.

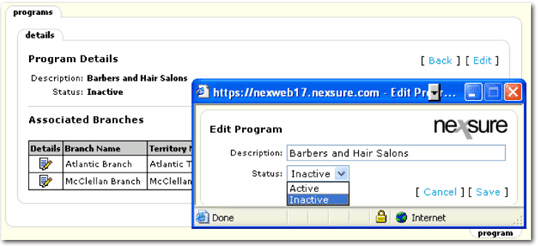
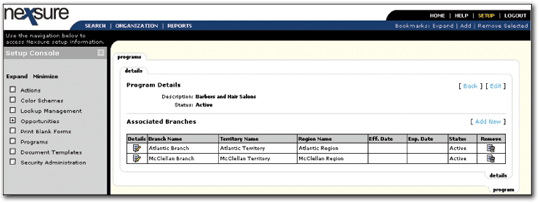
Once saved, the program displays on the programs > details screen with a red font indicating it is an inactive program.

Related Topics

Programs

Adding New Programs

Associating Programs with Branches

Editing an Existing Program

Removing Associated Branches

Removing Programs