Adding Suspects, Prospects and Clients
Adding new suspects, prospects and clients starts from the
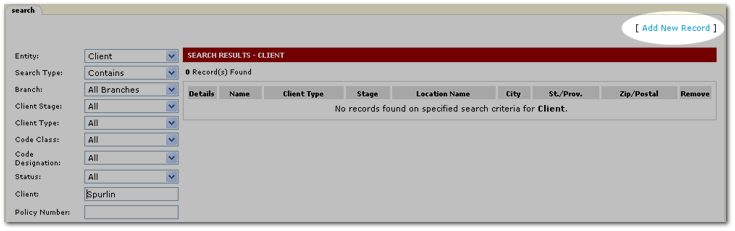
Search screen. Before adding a new client, a search must be conducted to avoid duplicate entries.
To Add a Client
- On the Primary
menu,
click SEARCH.
- In the Entity list, select Client. The Entity list defaults to client.
- In the Branch list, select the appropriate branch to add the client to. The Branch list defaults to All Branches.
Note: Searches are limited to branches where security access has been granted.
- In the Client box, enter the name of the client. Any search information entered will be automatically transferred to a new client record.
- Click Search. Possible client matches are displayed and the [Add New Record] link is displayed.
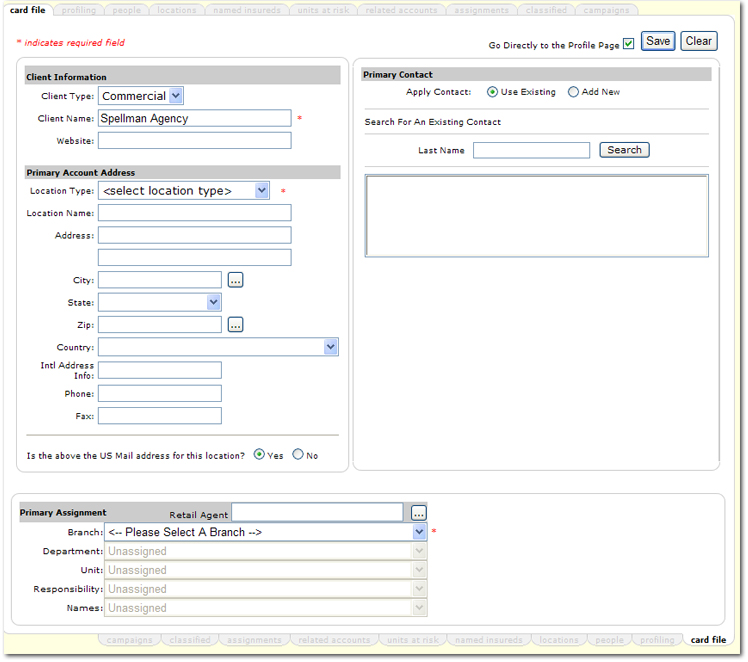
- Click [Add New Record]. The Add
a New Client screen is displayed with the card file tab active.
Note:
The [Add New Record] link will not display unless a search
has first been run.
- In the Client area, enter the following information:
- In the Client Type list, select either Commercial or Personal. The default selection is Commercial.
- In the Client Name box, enter the full name of the new client. Notice that the name entered when searching is copied to this box by default. The name can be changed.
- In thePrimary Account Address area, enter the following information. The address information will pre-fill the Physical Address and Mailing Address boxes on the locations tab.
- In the Location Name box, enter the unique location name. There may be several location names for each client; enter a name that is easily identifiable among a list of location names.
- In the Address boxes, enter the primary address for the client. The primary address is where invoices and correspondence will be sent. There are two address boxes available for more street address information.
- In the City box, enter the name of the city for the client's primary address. Enter at least three characters and click the Ellipsis
 button to retrieve possible matching cities. Once a match is selected the State / Province and Zip / Postal will be automatically completed.
- In the State / Province list, select the state for the client's primary address.
- In the Zip / Postal box, enter the Zip or Postal code for the client's primary address. Optionally, click the Ellipsis button to retrieve possible matching Zip / Postal codes. Once a match is selected the City and State / Province will be automatically completed.
Tip: Fill in either the primary City or Zip / Postal code then click the Ellipsis button. Select the appropriate information and the City, State and Zip information will be completed automatically.
- In the Country list, select the country in which the client resides.
- In the Intl Address Info box, add any necessary international address information.
- In the Phone box, enter the Phone number for the primary office. Enter the Phone number with the area code first and no formatting. Formatting will be applied
after the card file tab has been saved. To add additional
numbers, see Locations.
- In the Fax box, enter the Fax number for the primary office. Enter the Fax number with the area code first and no formatting. Formatting will be applied
after the card file tab has been saved. To add additional
numbers, see Locations.
- In the Is the above the US Mail address for this location? area, select either Yes or No to indicate whether the address is US or international. If No is selected, a mailing address entry area will be displayed. Enter the US mailing address in this area.
- In the Primary Contact area, enter the following information:
- In the Apply Contact area, select whether this contact will be a new contact or if an existing contact will be used. If Use Existing is selected, the Search For An Existing Contact screen is displayed.
- In the Last Name box, enter at least two characters of the contact's last name and click Search. The list of resulting contacts is displayed.
- Click the appropriate contact name and proceed with completing the Primary Assignment area.

- In the Prefix list, select the prefix to the contact's name. The selections in this list are added by the agency in SETUP > Lookup Management.
- In the First Name box, enter the first name of the primary contact for this client. The primary contact is identified as the person that would be contacted or correspond
with most of the time.
- In the MI box, enter the middle initial
of the primary contact. Only one character can be entered.
- In the Last Name box, enter the last name of the primary contact.
- In the Suffix list, select a Suffix to the primary contact's name. The selections in this list are added by the agency in SETUP > Lookup Management.
- In the Title list, select a title that is used to identify the contact's
occupation. The selections in this list are added by the agency in SETUP > Lookup Management.
- In the Contact Role list, select the Contact Role used to identify
the contact's role within the branch.
- In the E-Mail box, enter the optional email address for the contact. This box can hold up to 30 characters. When entering the email address be sure to include the @ symbol and the extension such as .com or .net.
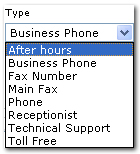
- In the Personal Numbers area, enter the following information:
- Enter Personal Numbers without formatting. Formatting will be applied
after the card file tab has been saved. Use the Type lists to
identify the type of number entered. Extension numbers may be entered up
to six characters long.
The available Types are as follows:
- In the Primary Assignment area, enter the following information:
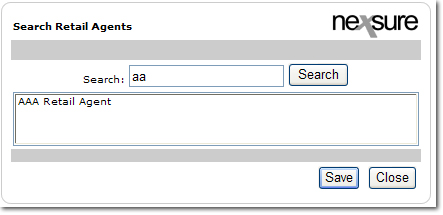
- If the client's business is placed through a retail agent, a retail agent can be
 added at the client level.
- In the Branch list, select the primary branch that will service the client.
Branches are added to the agency's organization by the Nexsure administrator.
- In the Department list, select a department to identify how and when the income and expenses are allocated in the general ledger. The department may be modified later as needed at the policy level. The department added at the client level will automatically be used as the default department for each policy added.
- In the Unit list, select the optional unit for the client. Units are not required but are used to further breakdown income and expenses. If units are added one must be selected as the client default. The unit may be modified later as needed at the policy level. The unit added at the client level will automatically be used as the default unit for each policy added.
- In the Responsibility list, select what role the person assigned to the account represents. The content of this list can be edited by the Nexsure administrator.
- In the Names list, select the name of the person primarily responsible for this account. This name corresponds to the Responsibility added above. The content of this list is populated with the employees identified in Nexsure as employees.
- In the Go Directly to the Profile Page check box, uncheck the check box if completion of the profile tab is not needed. The profile tab contains questions about the client, prospect or suspect that may
be useful to determine if the account is a fit for the entity.
- Click Save. The new client is then added to Nexsure.
Or
Click Clear to remove all entries made on the card file tab.
Profiling