Journal Entry
A journal entry is an entry made directly to specific general ledger
accounts. Journal
entries must balance before posting is allowed. If
a particular entry is made on a consistent basis, it can be created as
a recurring entry.
To Add a Journal Entry
- On the Primary
menu,
click ORGANIZATION.
- Click the territories
tab.
- Click the Details
 icon of the appropriate territory.
- Select the accounting > transactions > journal entry tab.
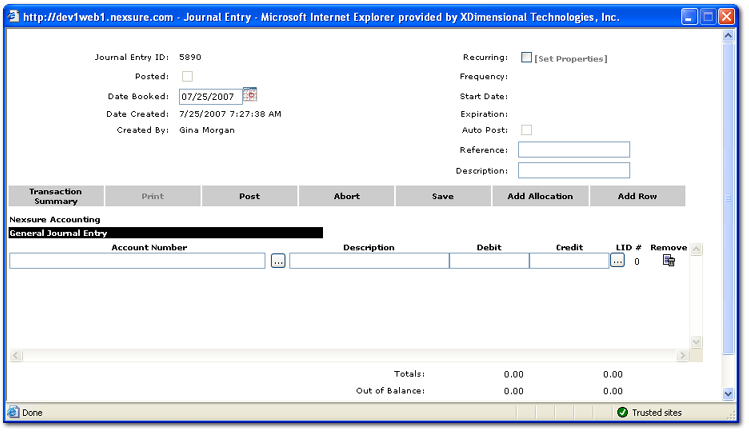
- On the journal entry tab, click [Add New]. The Journal Entry dialog box is displayed.

- In the Date Booked box, enter the date that the journal entry will post to the general ledger. This date can be changed back or forward, however, the date booked can not be posted to a locked month unless the staff member has the security rights to override a locked month. The date booked can never be posted to a closed month.
- Select the Recurring check box to make the entry a template for new entries. Posting will be disabled. Since this template will not post it can be edited or removed at any time. The template will be available for manual selection whenever desired and can also be used by Nexsure to automatically create entries.
- In the Reference box, enter an internal note.
- In the Description box, enter a description that will be reflected in the journal entry line item description and will display on general ledger reports.
- In the Account Number box, click the Ellipsis
 button to select the appropriate general ledger account number.
- In the Description box, enter a new description. The entry in this box defaults from the Description entered in the journal entry header. This description will display in the General Ledger Detail report.
- In the Debit and Credit boxes, enter the offsetting amount.
- In the LID column, click the Ellipsis
 button to open the Line Item Distribution area of the screen. Line item distribution (LID) is used to track employee’s expenses that do not need to display on the general ledger.

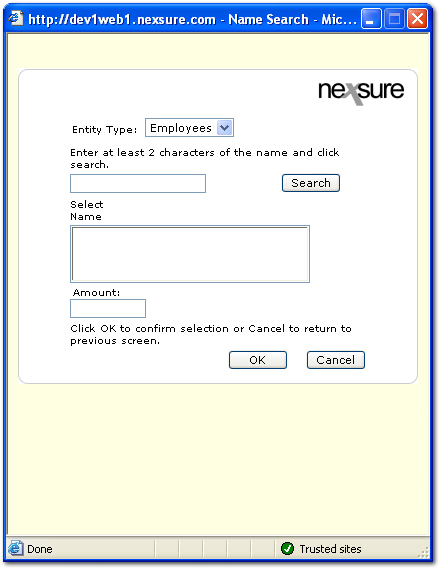
- In the Line Item Distribution area, click [Add]. The Name Search dialog box is displayed.

- In the Name Search dialog box, search for and select the employee that will be added to the line item distribution.
- In the Amount box, enter the amount of the line item distribution for the employee.
- Click OK. A new entry line is added to the Journal Entry screen.

- Return again to the General Journal Entry area, click the LID Ellipsis
 button again to add the number of line item distributions to the journal entry. Notice the count under the # column is updated.
- In the Navigation Toolbar, click Save. Once the journal entry is complete and saved the entry may be posted.
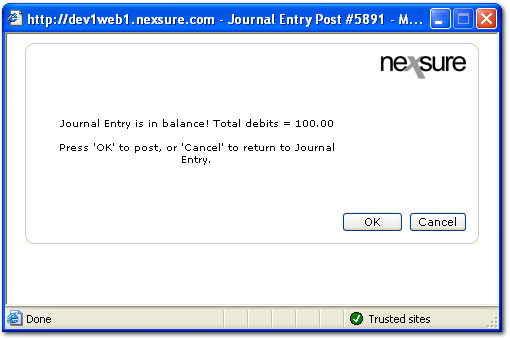
- In the Navigation Toolbar, click Post. A confirmation dialog box is displayed.
Note: When posting to locked periods, keep the following in mind. If the staff member has rights to post to a locked period a dialog box is displayed letting the staff member know they are posting to a locked period. If the staff member does not have rights to post to a locked period, the only option is to change the date booked to an unlocked period. More information on rights for staff members to post to locked periods can be found at Transactions > Reconciliation Security.

- The confirmation dialog box gives verification that the account is in balance. Click OK to post the entry to the general ledger. Posting makes the entry permanent and allows a check to be printed. If an entry is posted in error, it must be reversed and re-entered as a new item.
Recurring
Journal Entries
Using
Allocations

 button to select the appropriate general ledger account number.
 button to open the Line Item Distribution area of the screen. Line item distribution (LID) is used to track employee’s expenses that do not need to display on the general ledger.


 button again to add the number of line item distributions to the journal entry. Notice the count under the # column is updated.