Retail Agent Locations
The retail agent locations tab stores the agent's location information.
Important: A retail agent cannot be deleted from Nexsure once an invoice is associated with that retail agent.
Quickly navigate to procedures included in this topic by clicking one of the links below:
To Search for a Location
To Add a Location
To Search for a Location
- On the , click SEARCH.
- In the Entity
list, select Retail Agent. Search for the appropriate retail agent.
- Click the Details
 icon next to the retail agent.
- Click the locations tab. The Location Summary screen is displayed.
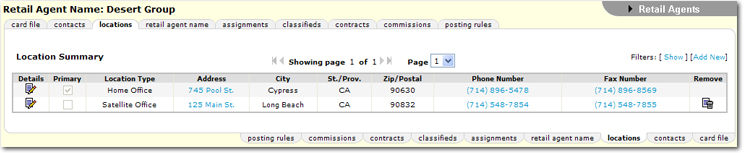
There are several options when working with locations. Notice the options at the top of the summary.
- Showing Page: The Arrow

 icons can be used to navigate through pages of search results.
- First Page
 icon.
icon.
- Previous Page
 icon.
icon.
- Next Page
 icon.
icon.
- Last Page
 icon.
icon.
- Page List: Click the Page List
 arrow to open a list of all search results pages. Select the desired page number to open that page of search results.
- In the Filters area, the [Show] option is available to open the Search Filters and Sort Filters to aid in finding specific locations.
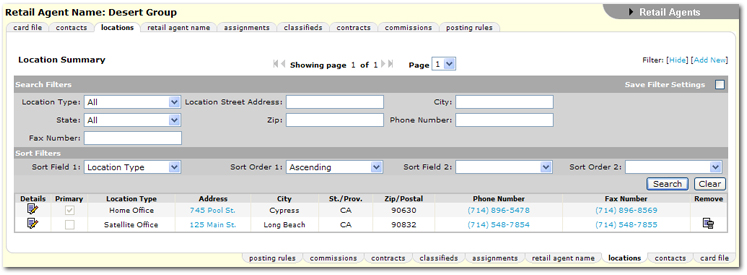
- In the Search Filters area, the following search options are available:
-
Save Filter Settings: Selecting the Save Filter Settings check box on the Search Filters screen and clicking Search will change the default Search Filter setting. The next time the locations tab is opened, the locations returned will be filtered by the saved setting. Exercise caution when using the Save Filter Settings check box with a date range as returned locations will be restricted to that date range. As a general rule, check the filter settings each time this tab is accessed.
- Location Type: Select the Location Type from the list that includes, All, Corporate Headquarters, Home Office, or Satellite Office.
- Location Street Address: Enter at least two characters to narrow the search results. Entering some of the street address returns a broader result, enter most of the street address for more specific results.
- City: Enter at least two characters to narrow the search results. Entering some of the city name returns a broader result, enter most of the city name for more specific results.
- State: Enter at least two characters to narrow the search results. Entering some of the state name returns a broader result, enter most of the state name for more specific results.
- Zip: Enter at least two characters to narrow the search results. Entering some of the zip code returns a broader result, enter most of the zip code for more specific results.
- Phone Number: Enter at least two characters to narrow the search results. Entering some of the phone number returns a broader result, enter most of the phone number for more specific results.
- Fax Number: Enter at least two characters to narrow the search results. Entering some of the fax number returns a broader result, enter most of the fax number for more specific results.
- In the Sort Filters area, the following options are available. Use the Sort Filters to sort the results of the locations search.
- Sort Field 1: By default Sort Field 1 is set to Location Type. However, another column heading from the Sort Field 1 list may be selected. The search results will be sorted by the column selected in the Sort Field 1 list.

- Sort Order 1: By default Sort Order 1 is set to Ascending. However, either Ascending or Descending may be selected to set the order of the locations returned. Ascending will set the order from A-Z. Descending will set the order from Z-A. The Sort Field 1 will be the first sort and Sort Field 2 will be the sub sort.
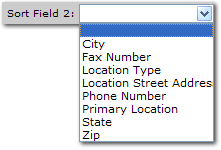
- Sort Field 2: By default Sort Field 2 is set to blank. However, a column heading from the Sort Field 2 list may be selected. The search results will be sorted by the column selected in the Sort Field 2 list.
- Sort Order 2: By default Sort Order 2 is set to Ascending. However, either Ascending or Descending may be selected to set the order of the locations returned. Ascending will set the order from A-Z. Descending will set the order from Z-A. The Sort Field 1 will be the first sort and Sort Field 2 will be the sub sort.
- Search: Click Search. The results of the Search Filter criteria and Sort Filter settings are displayed.
- Clear: Click Clear to remove all entries in the Search Filter and Sort Filters fields.
Important: Clicking Clear does not remove the Save Filter Settings selection.
To Add a Location
- On the , click SEARCH.
- In the Entity
list, select Retail Agent. Search for the appropriate retail agent.
- Click the Details
icon next to the retail agent.
- Click the locations tab. The Location Summary screen is displayed.
- On the Location Summary screen, click [Add New]. The Location Information screen is displayed.
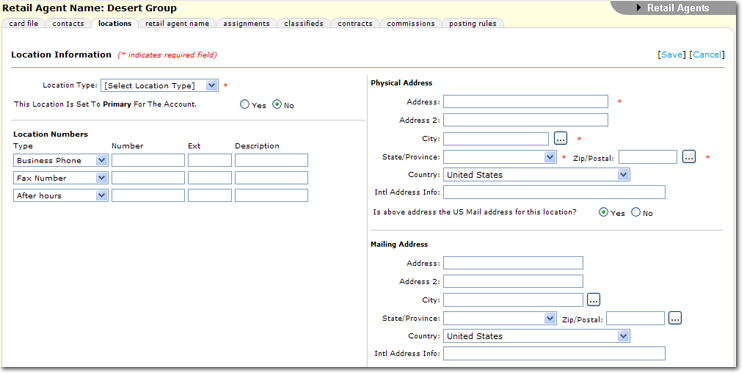
- In the Location Type list, select from the location types entered in Setup > Lookup Management > Category > Retail Agent > Types > Location Types.
- Select either Yes or No to indicate if this location is the primary location for the account.
- In the Location Numbers area, enter phone numbers without formatting. Formatting will be applied after the locations tab has been saved. Select the type of phone number. Extension numbers may be entered up to six characters.
 Adding additional phone numbers...
- Once the new location information has been saved, the Location Summary screen displays. Click the Details icon next to the location to update. Notice [Add New] is now available in the Location Numbersarea.
- In the Location Numbers area, click [Add New].
- Select the identity of the phone number being added.
- Enter the phone numbers without formatting. Formatting will be applied after the screen has been saved.
- The extension numbers may be entered up to six numeric characters.
- Click Save to save the phone number just added.
Or
- Click Close to abort the addition of the new number.
Note: The number of phone numbers that can be added to each location is only limited by the identity choices.
- Click the Details icon beside the number if edits to the number are required.
- Click the Delete
 icon beside the number to permanently delete the number.
- In the Physical Address area, enter the address of the physical location of the retail agent. Select Yes or No to indicate if this address is to be used as the US mailing address as well as the physical address. If Yes is selected, there is no need to complete the Mailing Address information below; once the location information is saved, the Physical Address will automatically populate the Mailing Address area.
Tip: Don't forget to use the Ellipsis  button to help complete address information quickly.
- If the Mailing Address is different than the Physical Address, complete the boxes in the Mailing Address area.
- Click [Save] to save all entries on the Location Information screen and return to the Location Summary screen.
Or
- Click [Cancel] to return to the Location Summary screen without saving entries.
Retail Agent Profile
Adding Retail Agents