Invoices Tab
The invoices tab allows access
to posted, unposted, reversed invoices, and installments.
Quickly navigate to procedures included in this topic by clicking one of the links below:
To Access the Invoices Tab
To Print Invoices
To Add an Invoice to an Existing Batch
To Access the Invoices Tab
- On the Primary
menu,
click ORGANIZATION.
- Click the territories
tab.
- Click the Details
 icon of the appropriate territory.
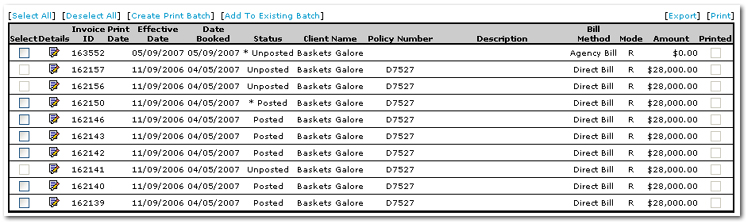
- Click the accounting > transactions > invoices tab. A maximum of 1000 records are displayed.
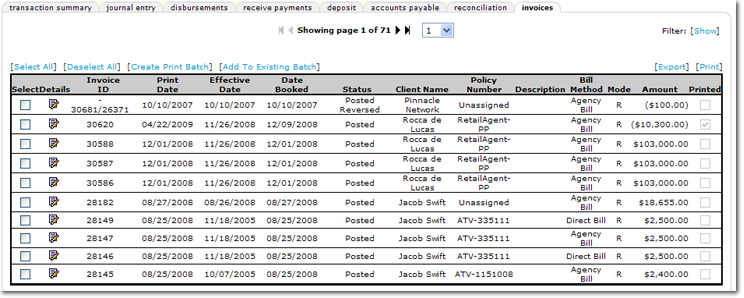
- In the Filter area, click [Show] to open the Search Criteria screen.
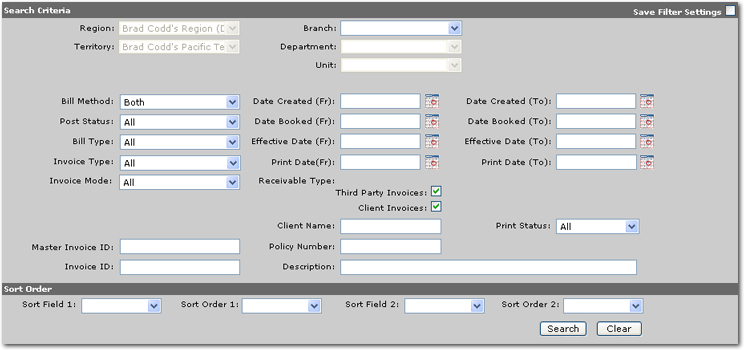
The options available on the Search Criteria screen are:
- Save Filter Settings: Selecting the Save Filter Settings check box on the Search Criteria screen and clicking Search will change the default Search Filter setting. The next time the invoices tab is opened, the invoices returned will be filtered by the saved setting. Exercise caution when using the Save Filter Settings check box with a date range as returned invoices will be restricted to that date range. As a general rule, check the filter settings each time this tab is accessed.
- Branch: The Branch list box can be used to select a branch to narrow the search results. Once a branch is selected only invoices associated with that branch will be displayed.
- Bill Method: Use the Bill Method list to select the type of billing method used when creating the invoice.
- Both
- Agency Bill
- Direct Bill
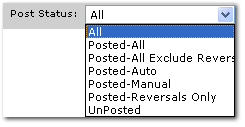
- Post Status: Use the Post Status list, to select the posting status of the transaction. The default selection in this list is All which returns all posted transaction in the search results. The available selections are:
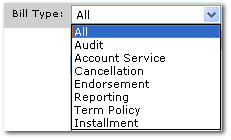
- Bill Type: Use the Bill Type list to select a bill type. The available selections are:
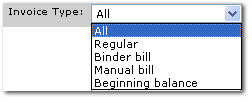
- Invoice Type: Use the Invoice Type list to select an invoice type. The available selections are:
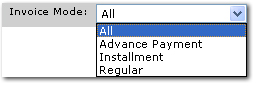
- Invoice Mode: Use the Invoice Mode list to select an invoice mode. The available selections are:
- Master Invoice ID: Use the Master Invoice ID box to enter all or part of the ID from the master invoice used to create other invoices. Results found will include all invoices based on the master invoice.
- Invoice ID: Use the Invoice ID box to enter all or part of the Invoice ID.
- Date Created (Fr): Click the Calendar
 icon to select the beginning date in a date range. A date range can be selected to return all invoices that were created on a specific date in the date range.
- Date Booked (Fr): Click the Calendar
icon to select the beginning date in a date range. A date range can be selected to return all invoices that were booked on a specific date in the date range.
- Eff. Date (Fr): Click the Calendar icon to select the beginning date in a date range. A date range can be selected to return invoices with term effective dates in the date range.
- Print Date (Fr): Click the Calendar icon to select the beginning date in a date range. A date range can be selected to return invoices that were printed on specific dates in the date range.
Tip: The Print Date initially is the date that the invoice is available for printing; subsequent printing of the invoice will change the date.
- Receivable Type: Two options are available to filter third party and client invoices. By default both options are selected to return all invoices. By selecting only one option, the types of invoices returned are narrowed. The available options are:
- Third Party Invoices: Select this option to return only third party invoices.
- Client Invoices: Select this option to return only client invoices.
- Client Name: Use the Client Name box to enter all or part of the name of the client.
- Policy Number: Use the Policy Number box to enter the policy number. Enter at least one character to narrow the search results. Entering some of the Policy Number returns a broader result, enter most of the Policy Number for more specific results.
- Description: Use the Description box to enter all or part of the invoice description.
- Date Created (To): Click the Calendar
icon to select the ending date in a date range. A date range can be selected to return all invoices that were created on a specific date in the date range.
- Date Booked (To): Click the Calendar
icon to select the ending date in a date range. A date range can be selected to return all invoices that were booked on a specific date in the date range.
- Eff. Date (To): Click the Calendar icon to select the ending date in a date range. A date range can be selected to return invoices with term effective dates in the date range.
- Print Date (To): Click the Calendar icon to select the ending date in a date range. A date range can be selected to return invoices that were printed on specific dates in the date range.
- Print Status: Use the Print Status list to select one of the following options:
- All
- Printed
- Unprinted
The options available on the Sort Filters screen are:
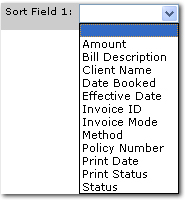
- Sort Field 1: Select a column heading from the Sort Field 1 list. The search results will be sorted by the column selected in the Sort Field 1 list. The available selections are:
- Sort Order 1: Select either Ascending or Descending to set the order of the marketing policies returned. Ascending will set the order from A-Z. Descending will set the order from Z-A. The Sort Field 1 will be the first sort and Sort Field 2 will be the sub sort.
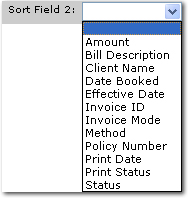
- Sort Field 2: Select a column heading from the Sort Field 2 list. The search results will be sorted by the column selected in the Sort Field 2 list. The available selections are:
- Sort Order 2: Select either Ascending or Descending to set the order of the marketing policies returned. Ascending will set the order from A-Z. Descending will set the order from Z-A. The Sort Field 1 will be the first sort and Sort Field 2 will be the sub sort.
- Clear: Click Clear to remove all entries in the Search Filter and Sort Filters fields.
Important: Clicking Clear does not remove the Save Filter Settings selection.
- Search: Click Search. The results of the Search Filter criteria and Sort Filter settings are displayed.
- Clicking the Details
icon will display the invoice for review.
Note: In the Status column, an asterisk * indicates an internal note has been entered. Pause the pointer over the asterisk to view the internal note.
- After reviewing the invoice, on the Navigation Toolbar, click Transaction Summary to return to the invoices summary view.
To Print Invoices
- On the Primary
menu,
click ORGANIZATION.
- Click the territories
tab.
- Click the Details
icon of the appropriate territory.
- Click the accounting > transactions > invoices tab.
- In the Select column, select all invoices to be printed.
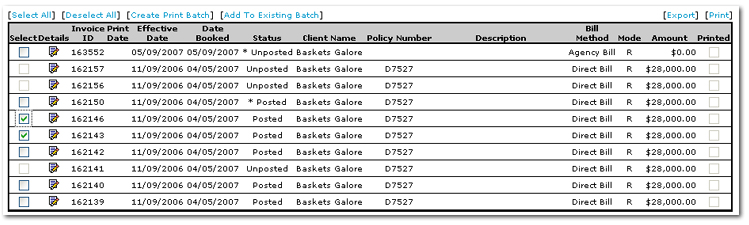
- Once all invoices have been selected for printing, click [Create Print Batch]. The Create Batch Print dialog box is displayed.

- In the Batch Name box, enter a name for the new batch. The default entry is Invoicing.
- In the Description box, accept the default description or add a new description.
- In the Style list, select the style of the invoice to be printed.
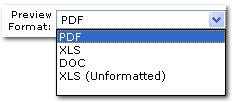
- In the Preview Format list, select the type of preview for the batch. The selections are:
- In the Printer list, select the printer to which the batch is sent.
- Select the Restricted check box to restrict others from accessing the batch.
- Select the Print Now check box to send the batch directly to the printer.
- Click OK. A confirmation message is displayed.

- Click OK. The batch is added to the invoices tab within the batch summary tab..
- To navigate to the invoices tab containing the batch, click the batch summary tab that is one level of tabs up.
- On the batch summary tab, click the invoices tab. The invoices tab is displayed.
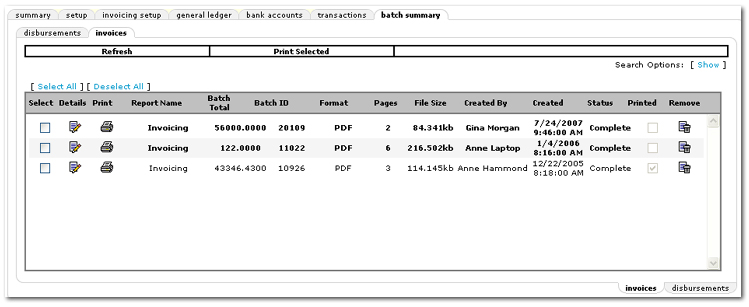
- Click the Print
 icon to print a single batch.
Or
In the Select column, select one or more batches to print or use the [Select All] option. On the Navigation Toolbar, click Print Selected. The Create Batch Print dialog box is displayed.
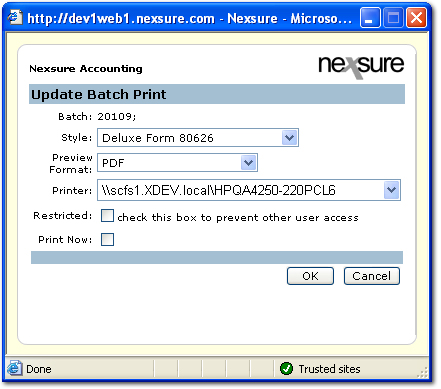
- In the Style list, select the style of the invoice to be printed.
- In the Preview Format list, select the type of preview for the batch. The selections are:
- In the Printer list, select the printer to which the batch is sent.
- Select the Restricted check box to restrict others from accessing the batch.
- Select the Print Now check box to send the batch directly to the printer.
- Click OK. A confirmation dialog box is displayed, click OK and the batch is sent to the printer.
To Add an Invoice to an Existing Batch
- On the Primary
menu,
click ORGANIZATION.
- Click the territories
tab.
- Click the Details
icon of the appropriate territory.
- Click the accounting > transactions > invoices tab. The invoices tab is displayed.
- In the Select column, select all invoices to be added to an existing batch.
- Click [Add to Existing Batch]. The Add to Exiting Batch dialog box is displayed.
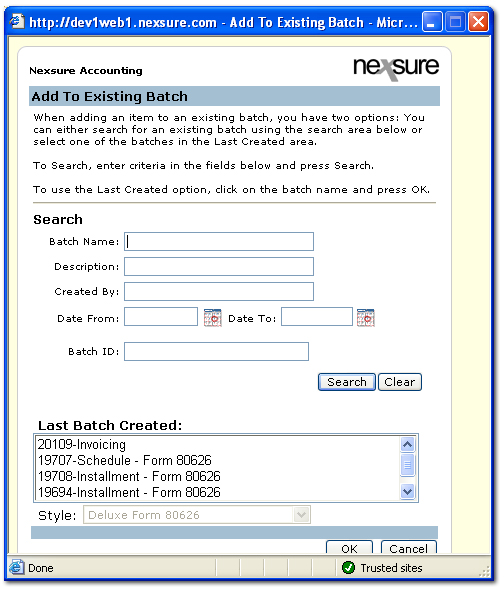
- Use the options in the Search area to search for an existing batch.
Or
In the Last Batch Created area, select the batch to add the new invoices.
- Click OK. A confirmation is displayed verifying to which batch the new invoices were added.
- Click OK. The updated batch can be found by navigating to the batch summary > invoices tab.
Related Topics
Batch Summary Tab