Bank Reconciliation
Bank reconciliation creates a process to provide functionality for the clearing of checks, deposits, adjustments and provide a mechanism for the recording of bank interest and service charges.
Quickly navigate to procedures included in this topic by clicking one of the links below:
To Reconcile a Bank Account
To Reverse a Bank Reconciliation
To Reconcile a Bank Account
- On the Primary menu, click ORGANIZATION.
- Click the territories tab and search for the appropriate territory.
- Click the Details
 icon next to the desired territory.
- Click the accounting > bank accounts tab.
- On the bank accounts tab, click the Details icon next to the appropriate bank account.
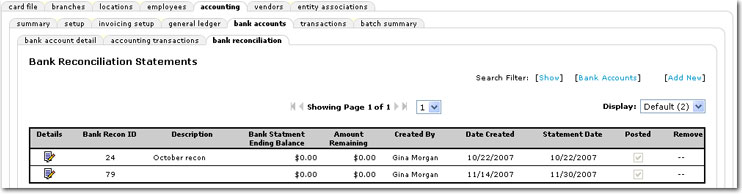
- Click the bank reconciliation tab. The Bank Reconciliation Statements screen is displayed.
- Click the Details icon next to an existing statement, or [Add New] to start a new statement. The bank reconciliation tab is displayed.
Note: Bank statements must be completed and posted in chronological order. The previous statement must be posted before the [Add New] link becomes available again.
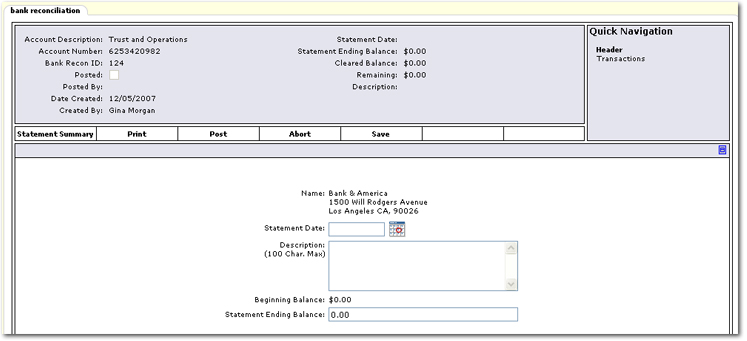
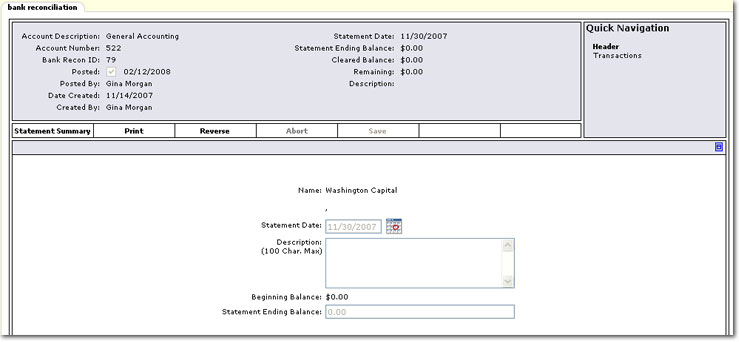
- The following information is available on the
 bank reconciliation header:
- Account Description: Defaults from the bank account detail tab > Account Description box.
- Account Number: Defaults from the bank account detail tab > Account Number box.
- Bank Recon ID: Sequential ID number assigned by Nexsure.
- Posted: Selected when the bank reconciliation is posted. The date of the posting is also added upon post.
- Posted By: The name of the staff member that posted the reconciliation.
- Date Created: The date that the [Add New] link is clicked to start the reconciliation.
- Created By: The name of the staff member that clicked the [Add New] link.
- Statement Date: The date entered in the Statement Date box when editing the bank reconciliation header.
- Statement Ending Balance: The ending balance entered in the Statement Ending Balance box when editing the bank reconciliation Header.
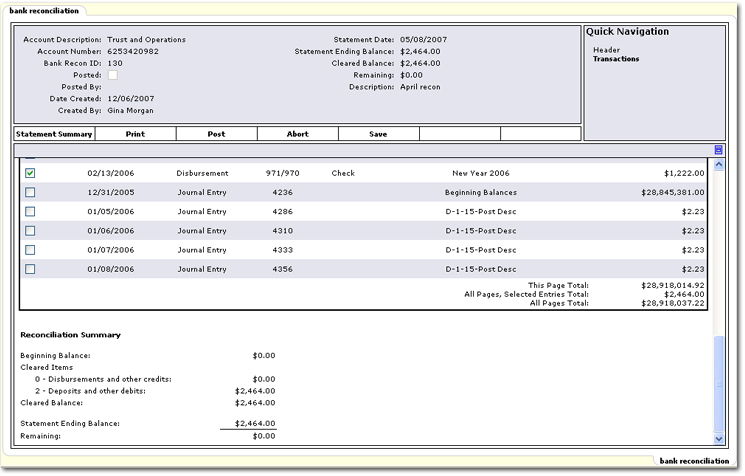
- Cleared Balance: The cleared balance is equal to; beginning balance - disbursements and other credits + deposits and other debits.
- Remaining: The remaining amount is equal to (Cleared Balance - Statement Ending Balance).
- Description: The entry made in the Description box when editing the bank reconciliation header.
- The following options are available on the Navigation Toolbar:
- Statement Summary: To return to the list of Bank Reconciliation Statement screen.
- Print: Lists reconciliation activity including:
- All transactions falling within a specified date range.
- Cleared vs. uncleared activity.
- Balancing information.
- Post: Posts the bank reconciliation. The post option is unavailable until the reconciliation Remaining amount is equal to $0.00. The Beginning Balance + / - Cleared Balance must equal the Statement Ending Balance.
- Abort: Cancel the reconciliation.
- Save: Saves entries without exiting the screen.
- Complete the following information on the bank reconciliation header:
- Statement Date: This date defaults to the date that the reconciliation is added. This date can be edited to match the date of the statement received from the bank.
- Description: Enter up to a 100 character description that will be displayed in the bank reconciliation header.
- Beginning Balance: This is the balance from the previous bank reconciliation and is also displayed Reconciliation Summary > Transactions link.
- Statement Ending Balance: Enter the ending balance amount from the bank statement to balance against cleared activity.
- On the Navigation Toolbar, click Save.
- In the Quick Navigation panel, click Transactions. The transaction selection results are displayed.
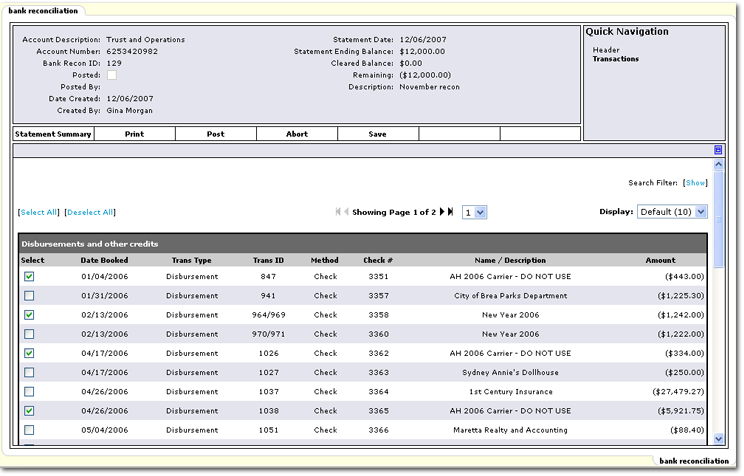
- Select the transactions that can be reconciled with the bank statement. Below the listing of transactions, the Reconciliation Summary is available.
Tip: A summary report can be generated by clicking Print on the Navigation Toolbar.
- Verify that the Remaining amount is $0.00 and click Post.
- On the Navigation Toolbar, click Statement Summary to return to the Bank Reconciliation Statement screen.
To Reverse a Bank Reconciliation
- On the Primary menu, click ORGANIZATION.
- Click the territories tab and search for the appropriate territory.
- Click the Details icon next to the desired territory.
- Click the accounting > bank accounts tab.
- On the bank accounts tab, click the Details icon next to the appropriate bank account.
- Click the bank reconciliation tab. The Bank Reconciliation Statements screen is displayed.
- Click the Details icon next to the reconciliation to reverse. The bank reconciliation tab is displayed.
Important: Reversals must be completed on the newest bank statements first working back in time. For example, if the February statement must be reversed and March / April statements exist, the April statement must be reversed first, then the March, then the February.
- On the Navigation Toolbar, click Reverse. A confirmation dialog is displayed.
- Click OK. The reconciliation is reversed and the reversed entry is recalculated.
Note: The Beginning Balance of any subsequent posted bank statements is updated to reflect the last posted bank statement. The Remaining value is the difference between pre-reversal Beginning Balance and the replacement Beginning Balance.
Bank Accounts