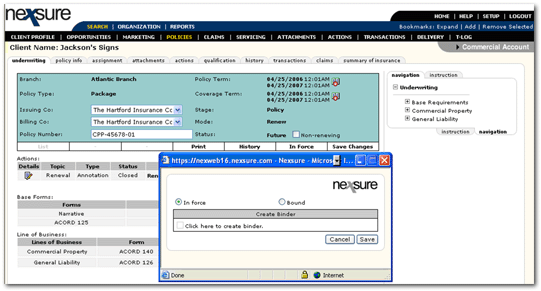
You are here: Client menu > POLICIES > Placing a Future Status Renewal in Force
Placing a Future Status Renewal In Force
Tip:
Do not
place a future policy in force until the policy info tab is updated
and all application edits are complete.
- On the Primary
menu,
click SEARCH.
- Click the Details
 icon of the appropriate client.
- On the Client
menu,
click POLICIES. All in force policies
for the client appear.
- Click the Details
 icon of the applicable line of business. Update the premium
information on the policy info tab and make all edits to the application.
- Click the In
Force link on the navigation toolbar located just under the policy
header. If a carrier association has been set up, the status of the association will be checked upon renewal. The carrier association will need to be active prior to placing the policy in force.
- If a binder is needed
select the Bound option and check the box beside Click here to create a binder. (See
Creating a
Binder).

- Click Save to change the status to In Force. If a binder was selected, the status will be Bound, and the policy mode will remain as Renew or Re-new-Co. The policy now reflects an In Force status blocking any further modification without going through SERVICING.
Note: Once a policy has been invoiced the carrier cannot be modified during the current term unless the invoices are reversed.
- The expired policy should
be sent to history. (See
Sending an Expired
Policy to History).
Sending an Expired Policy to History
