You are here: Client menu > POLICIES > Accessing eServices
Accessing eServices
To Access eServices
- On the Primary menu, click SEARCH.
- Click the Details
 icon next to the appropriate client.
- On the Client menu, click POLICIES. There are four options for accessing eServices from this point:
Option 1
- Click the Billing Carrier or Issuing Carrier name to launch eServices.

Option 2
- Click the Details
 icon next to the appropriate policy.
- In the navigation toolbar, right-click Print and select eServices.
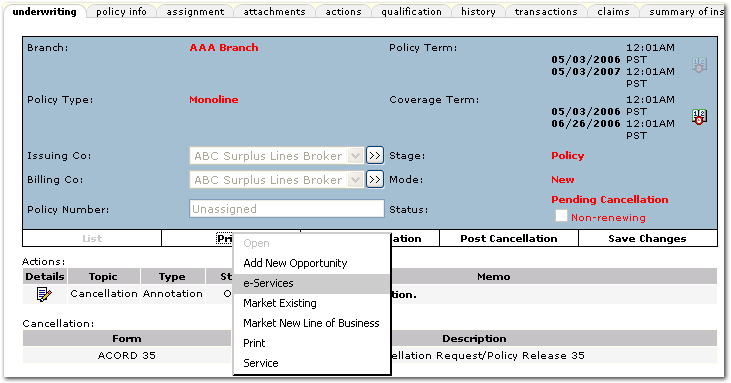
Option 3
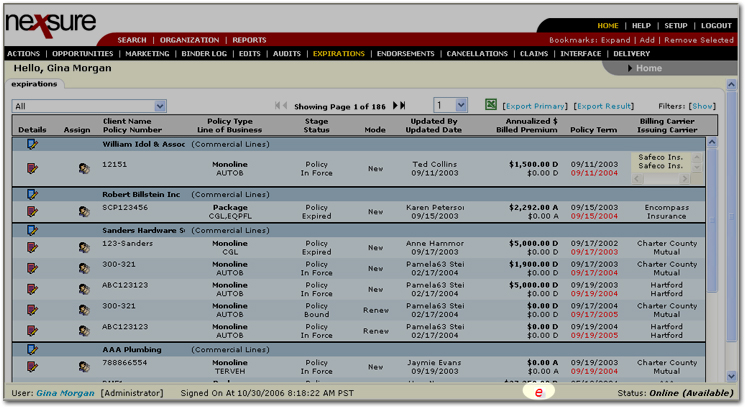
- From the Home menus, (Marketing / Binder Log / Edits / Audits / Expirations / Endorsements / Cancellations / Claims / Interface) click the carrier name.

Option 4
- After the Nexsure eServices dialog box is accessed the first time in a session, the eServices
 icon can be clicked at any time to access again.
To Use eServices
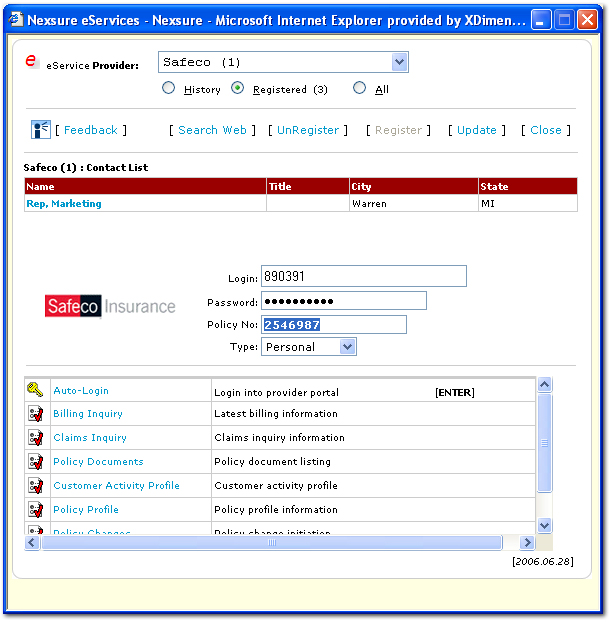
Once eServices has been accessed, the Nexsure eServices dialog box is displayed:
Note: The inquiry capabilities are dependent upon each provider’s Web site.
Each of the following options are available in the Nexsure eServices dialog box:
- eService Provider: If eServices is accessed by clicking on a carrier name, the eService Provider list will default to the Registered providers. Another provider can be selected. The eService Provider list contains providers depending on the selection of History, Registered, or All.
- History: Changes the eService Provider list to include up to the last 20 providers accessed. The History list will be displayed by default when the eServices
 icon is clicked.
- Registered: Changes the eService Provider list to include all of the providers for which registration was completed. If a provider is accessed that has previously been registered, the Registered list is displayed by default.
- All: Changes the eService Provider list to include all providers available through Nexsure.
Note: To register with a new provider, simply select the provider from the All list and complete the logon information. When all logon information is complete, click [Register]. The new provider will be added to the Registered list.
- [Feedback]: Opens an email form with Nexsure Support in the To line. Any feedback regarding eServices can be sent to Nexsure Support.
- [Search Web]: Opens both a web search results screen and stock information results for the selected eService provider. This function is not available for all providers.
- [UnRegister]: Removes registration information from the selected provider. To log onto the provider's site again, registration will need to be completed.
- [Register]: Saves registration information in Nexsure.
- [Update]: Saves the Password for the eServices provider. To change the Password, type the new password over the hidden password and click [Update].To create another Login for the same previously registered provider, enter the Login and Password and then click [Update]. This feature allows updates to eServices Login and Password when access to the Nexsure organization tab is not available.
- [Close]: Closes the eServices dialog box.
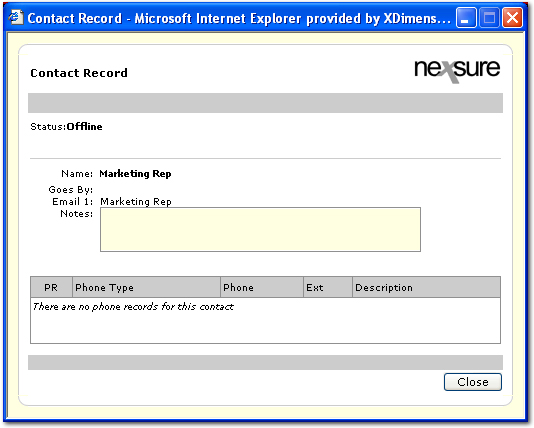
- Contact List: Gives a listing of all contacts associated with the selected provider. Click on the name of the contact to view the Contact Record dialog box.
- Login: Enter the Login name for the provider's Web site.
- Password: Enter the Password for the provider's Web site.
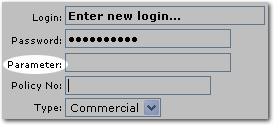
- Parameter: If the carrier requires a third parameter to log on, the Parameter box is displayed.
- Policy No: If eServices was accessed through a particular policy, that policy number will display on the Nexsure eServices screen. The policy number is also copied to the clipboard for use when in the provider's Web site.
The policy number is formatted based on the needs of the provider's Web site. The assumed policy number format is usually derived from a sample downloaded policy number from that provider, if available. The number of entry boxes change depending on the format required by the provider's Web site.


Note: Policy numbers that have been manually entered into Nexsure may need to be corrected in the Nexsure eServices Policy No box before logging on to the provider's Web site. Otherwise the policy number will not be recognized by the provider's Web site.
If policy numbers in Nexsure contain prefixes that are not used on the provider's Web site, correct the formatting of the policy number here before clicking Auto-Login or any of the other links. The policy number can also be completely overwritten if the inquiry functions are needed for a policy other than the one active in Nexsure. Changes to the policy number made in the eServices dialog box will not affect the policy numbers in Nexsure.
- Type: Defaults to the correct Policy Type (Personal or Commercial). If the incorrect Policy Type is displayed, select the correct one. The policy number formatting and eServices menu will change to match the Policy Type.
- Carrier Logo / Auto-Login / Enter: Once the Login, Password, and Policy No have been entered, click the provider's logo, Auto-Login, or press Enter to access the Web site.
- eServices
 icon: This icon is displayed once the Nexsure eServices dialog has been accessed in a Nexsure session. Clicking the eServices
  icon opens the Nexsure eServices dialog box with the History list displayed by default.
If the following critical service error is displayed, be sure to close any open browser windows for the eService provider before executing the next eService request for that carrier. Try accessing eServices again. If access is still unsuccessful, contact Nexsure Support. The critical eServices error message can happen if the staff member closes the browser window for the eServices provider before eServices is finished or if the carrier has made a change on their portal and the eServices script needs to be updated.

Note: Nexsure eServices are highly dependent upon the layout of provider Web sites. Therefore, when providers make changes to their Web sites, it is possible that eServices will stop prematurely. If the URL for the agent logon page changes, eServices will not be functional until that URL is updated in a future Nexsure release. If the provider keeps the logon URL the same but changes the logon page, it is possible that eServices will stop on that logon page and possibly not fill in the Login and / or Password. These changes are rare but please report them promptly to Nexsure Support. If a link (billing inquiry, policy inquiry, etc.) does not go as far as it went the day before or if it stops well before the described function, please report that to Nexsure Support as well. Help with this matter is greatly appreciated.
To Register for a Provider
- Access the Nexsure eServices dialog box using one of the options described in To Access eServices. The Nexsure eServices dialog box is displayed.
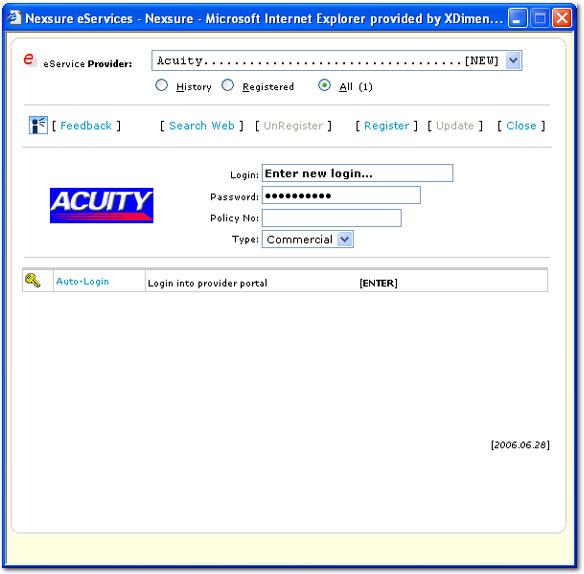
- Under the eService Provider list, select All. The eService Provider list then displays all available eServices providers whether currently registered or not.
- In the eService Provider list, select the new provider. Notice that any providers not previously registered for are marked [NEW].
- Enter the Login and Password information and click [Register]. The registration is then complete.
- To log on, click the provider's logo, Auto-Login or press the Enter key. The provider's site is then opened.
Related Topics
About eServices
Setting up Additional Logins


![]()


