Setup > Actions
Actions are used as follow-up reminders or to document activities in Nexsure. When setting up new actions, both a type and topic must be associated with the action. Types are a default description clarifying the action and are associated with topics. The topic might be looked at as a group or category for the action.
Once an action is added, it cannot be removed. Before adding the first action to Nexsure, it is best to determine what actions will be important to the organization. It is important to review the default list provided and modify the types to fit the organization's workflow.
To avoid duplication, consider that Nexsure tracks all open: opportunities, marketing submissions, binders, edits, audits, expirations, endorsements, cancellations, and claims. As each open item is moved, posted, or aborted they are automatically removed from the home screens. With this information in mind an action will most likely need to be created for anything that falls outside home screen tracking and things that cannot be tracked in Nexsure (such as documenting a phone call).
Quickly navigate to procedures included in this topic by clicking one of the links below:
To Add or Modify the Defaults for Actions
To Remove Action Topics
To Add or Modify the Defaults for Actions
- On the ,
click SETUP.
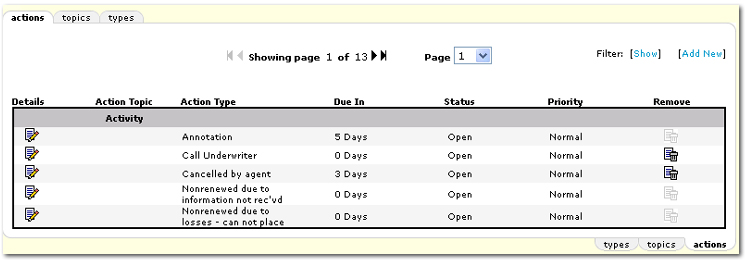
- From the Setup Console, click actions.
- By default, the actions are displayed by
topic. Use
the tabs at the top of the screen to view actions, topics, or types.
- From the actions tab, click [Add
New] to add a new action. The
New Actions dialog box is displayed.
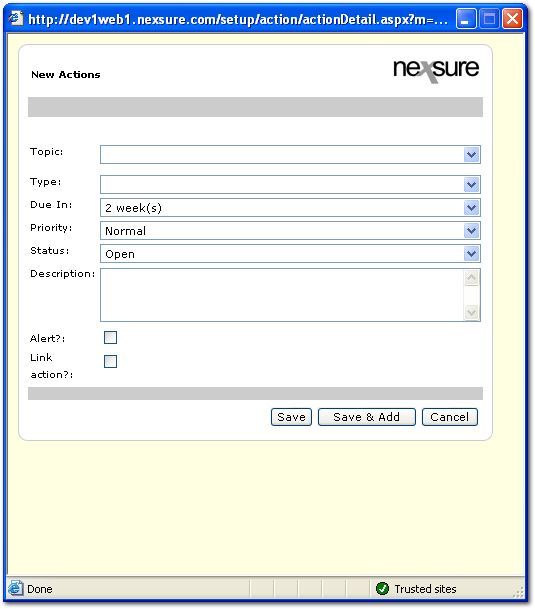
- In the Topic list, select an action topic. Topics
are unique and allow grouping like items together such as the renewal
topic. The
topic is used on every action during the renewal process, which then makes it easier to determine where the policy is in the renewal process. To add a new topic, see Adding Action Topics.
Note: If a topic is Inactive, the topic will not be available for selection when adding a new action. Any actions that were previously created using that topic will remain unchanged. If an action topic is Inactive, any action types associated with that topic will not be displayed on the actions tab.
- In the Type list, select an action type. Types are not unique and may be reused for any topic. Be careful not to add duplicate types. To add a new type, see Adding Action Types.
Note: If a type is Inactive, the type will not be available for selection when adding a new action. Any actions that were previously created using that type will remain unchanged. If an action type is Inactive, any active action topics associated with that type will still be displayed on the actions tab.
- In the Due In list, select the default for the number of days the action will generally be due.
- In the Priority list, select Normal or High.
If the
action’s priority is considered High a Red Flag
 icon will display
on the action in the summary view. If the priority is
Normal, no icon will be displayed. The staff member may change the Priority as needed when the action is
created.
- In the Status list, select either Open or Closed. When
adding a new action the status should generally default to Open
since actions are meant to remind the staff member to do something. The status can be changed as necessary when the action is added
or modified.
- In the Description box, enter a description for the new action. The description entered here is strictly
to identify the action in Setup.
- Select the Alert check box to include an alert message to be displayed when an action is being closed. The following Alert Message box is displayed upon selecting the Alert check box.

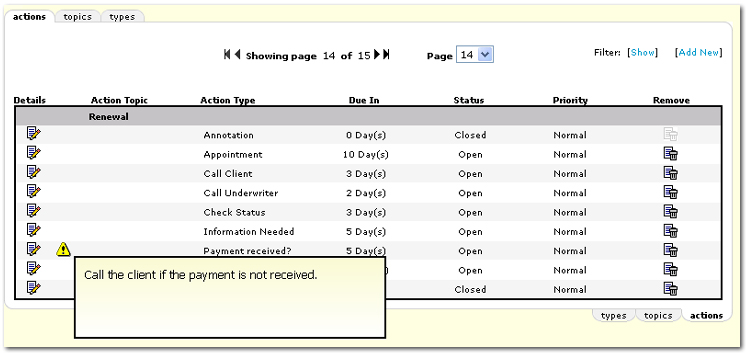
- In the Alert Message box, enter a message up to 200 characters long that will be displayed when a staff member is closing the action. Once the alert is added to the action in setup, an Alert
 icon is displayed next to the affected action. From the actions tab, hold the pointer over the Alert
  icon and the alert message is displayed.
- Select the Link Action check box to link the current action in use to a following predetermined action. A Link
 icon is displayed on the Setup > actions tab. Once the Link Action check box is selected, the following options are displayed when adding the new action:
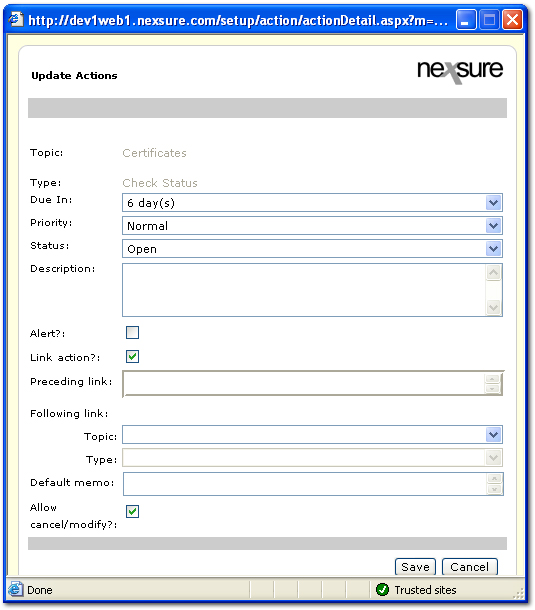
- In the Preceding link box, any action that was previously linked to the new action is displayed. The entries in the Preceding link box cannot be modified at this point.
- In the Following link area, the Topic and Type lists are available to select the topic and type for the following action. Once a Topic is selected, action types associated with that topic are then available in the Type list.
Note: Annotation action types cannot be linked as they are automatically added by Nexsure.
- In the Default memo box, enter a memo to default in the resulting action memo section. Up to a 250 character memo can be entered.
- Select the Allow cancel / modify check box to enable the Cancel, Topic and Type options in the following action. Clear the Allow cancel / modify check box to disable the Cancel, Topic and Type options in the following action. When the linked action is displayed the staff member must save the action.
Note: To remove a link between actions, access the action in Setup and clear the Link action check box. Once unlinked, the following action will no longer appear on any previously created or newly created actions.
To Remove Action Topics or Types
- On the ,
click SETUP.
- On the Setup Console, click Actions.
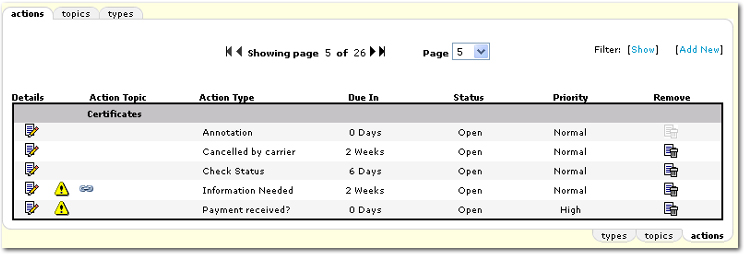
- By default the actions are displayed by
topic and then subcategorized by type. Use
the navigation link at the top of the page to view other pages. Click
the types tab to view specific action types. Click
the topics tab to view specific action topics.
- Click the Remove
 icon next to the topic or type to remove.
Note: Topics used for annotations will not have an active Remove  icon.
icon.
Related Topics
Actions Link and Alert Worksheet
About Actions
Creating Actions


 icon will display
on the action in the summary view. If the priority is
Normal, no icon will be displayed. The staff member may change the Priority as needed when the action is
created.


 icon next to the topic or type to remove.
 icon.
icon.