Creating Actions
There are three levels of actions, personal actions, client actions, and policy actions. A maximum of 2000 actions are returned with each search.
Quickly navigate to procedures included in this topic by clicking one of the links below:
To Add a Personal Action
To Add a Client Action
To Add a Policy Action
To Add a Personal Action
- On the Utility menu, click HOME. The actions tab is displayed.
Note: The actions tab is also displayed as the initial default view upon logging in to Nexsure. To navigate to the actions tab from the client or policy level see the Actions Overview topic.
- Click [Add New]. The actions menu is displayed.

- On the actions menu, select one of the following:
- Action: Add a new action.
- Plan: Opens the list of available action plans. Select the desired action plan. The first action in the plan will be displayed.
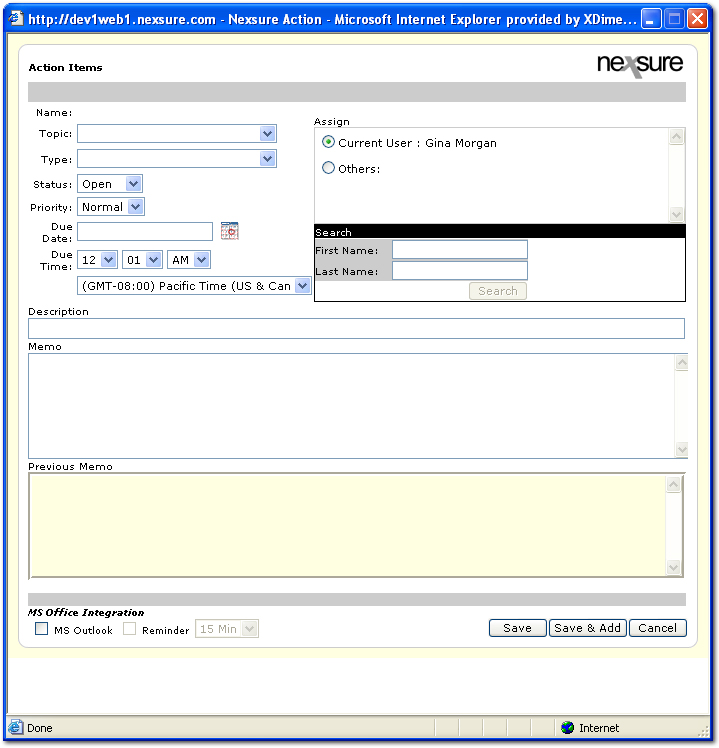
- The Action Items dialog box is displayed.

Note: When
adding personal actions, the Name field will be blank since the action is not associated with a client. Once the action is
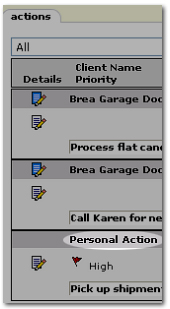
saved, the Name will be filled in with the name of the person that created the action. When the action is viewed as search results on the actions tab, the Client Name column will show Personal Action.

- In the Topic list, select a Topic for the action. Topics are unique and allow grouping of like items together,
such as the renewals or endorsements. The topics available are dependent on those that are added in SETUP by the Nexsure administrator.
- In the Type list, select a Type for the action. Types are not unique and may be reused for
any topic. The types available are dependent on those that are added in SETUP by the agency.
Note: When adding personal actions, the Policy and Certificate lists are unavailable and cannot be assigned.
- In the Status list, select one of the following to identify the status of the action:
When
the action is completed, the status can be changed to Closed so the action
will no longer display on the open actions listing.
- In the Priority list, select a priority for the action:
- Normal: The default selection is Normal.
- High: A High priority creates a red Flag
 icon that will be displayed
to the left of the action.
- In the Due Date box, the Due Date is automatically filled according to the number of days set in the Days Due box when the action was created in SETUP > Actions. To change the date, click the Calendar
 icon and select a date that the action will be due. The default due date for personal actions is the current date.
Important: By default, actions
do not appear on the HOME > actions tab until their due date. However, the actions tab Filter settings can be changed so that other actions can be searched for and displayed.
- In the Due Time lists, select a time that the action is due on the Due Date. If
multiple actions are due on the same day, they can be assigned different
times so they can be addressed in chronological order.
- In the Time Zone list, select the Time Zone associated with the due time for the action. The default time zone is based on the selections made in the security setup in the employee file.
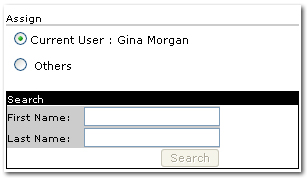
- In the Assign area, select either Current User or Others as appropriate:

- Current User: The action being created
will be assigned by default to the Current User.
- Others: The action can be assigned to others by selecting Others and entering at least two characters in both the First Name and Last Name boxes. Click
the Search button. If
a match is found the name will display in the Assign area next to Others. If no match was found, click Requery
to run a new search.
- In the Description box, enter a brief description for the action that will be displayed on the action summary screens. The description will also be copied to the memo section of the action.
- In the Memo box, type the action message.
- The Previous Memos box will show memos previously added to the action, these memos cannot be edited or
deleted.
- Select the MS Outlook check box to tag the action for Microsoft® Outlook® synchronization. Once the Outlook synchronization process is initiated by the person logged on, all appointment actions will be added to the Outlook calendar. Other action types will be added as tasks in Outlook.
- Selecting the Reminder check box will create an Outlook reminder for the action.
- Click Save to save the action and
close the Action Items dialog box.
Note: If the action is part of an action plan, the next action in the plan will be displayed.
Or
Click Cancel to close the action without saving.
Note: The Save & Add button appears dimmed if it is a part of an action plan as the next action in the plan is already set.
- Once
the action is saved, click the Outlook
 icon
on the HOME > actions tab. Nexsure will open Outlook. In
Outlook, click Nexsure Actions to synchronize Nexsure actions with Outlook. The
Outlook calendar and / or Outlook tasks will be updated. To
change how an action is added to the calendar or tasks, see Setup > Actions.
Tip: For more information about synchronization with Outlook, please see Tips & Facts Vol. 4, Issue 4.

Client Actions
To Add a Client Action
- On the ,
click SEARCH.
- Click the Details
 icon next to the appropriate client.
- On the Client menu, click ACTIONS.
- Complete the steps for adding a new action starting from step 2 in To Add a Personal Action.
Note: The Policy
and Certificate lists will contain selections associated with the client. Select
the Policy and / or Certificate to be associated to this action if applicable. To search for a policy or certificate, click [Show] to reveal the  Search screen. Click [Hide] to remove the Search screen.

The following search criteria options are available when searching for a policy:
- History: In the History list, select Yes, No or All to indicate whether or not to search policies that are in history. The default sort order is ascending. The default sort order is ascending.
- LOB: In the LOB box, enter the line of business for the policy. The default sort order is ascending.
- Stage: In the Stage list, select the stage of the policy. The default sort order is ascending.
- Eff Date: In the Eff Date box, click the Calendar
 icon to select the effective date of the policy. The default sort order is descending.
- Policy #: In the Policy # box, enter at least two digits from the policy number. The more digits of the policy number entered the narrower the search results. The default sort order is ascending.
- Exp Date: In the Exp Date box, click the Calendar
 icon to select the expiration date of the policy. The default sort order is descending.
- Search: Click Search. The results of the Search criteria are displayed in the Policy list. Select a resulting policy and continue adding the action.

The following search criteria options are available when searching for a certificate:
- Cert Id: In the Cert Id box, enter at least two digits of the certificate ID number. The more digits of the policy number entered the narrower the search results.
- Reference: In the Reference box, enter at least two digits of the certificate reference number. The more digits of the policy number entered the narrower the search results.
- Search: Click Search. The results of the Search criteria are displayed in the Certificate list. Select a resulting certificate and continue adding the action.
Policy Actions
To Add a Policy Action
- On the ,
click SEARCH.
- Click the Details
 icon next to the appropriate client.
- On the Client menu, click POLICIES.
- Click the Details
 icon next to the appropriate
policy.
- Click the actions tab.
- Complete the steps for adding a new action starting from step 2 in To Add a Personal Action.
Note: The Policy
and Certificate lists will contain selections associated with the client. Select
the Policy and / or Certificate to be associated to this action if applicable. To search for a policy or certificate, click [Show] to reveal the  Search screen. Click [Hide] to remove the Search screen.

The following search criteria options are available when searching for a policy:
- History: In the History list, select Yes, No or All to indicate whether or not to search policies that are in history. The default sort order is ascending.
- LOB: In the LOB box, enter the line of business for the policy. The default sort order is ascending.
- Stage: In the Stage list, select the stage of the policy. The default sort order is ascending.
- Eff Date: In the Eff Date box, click the Calendar
 icon to select the effective date of the policy. The default sort order is descending.
- Policy #: In the Policy # box, enter at least two digits from the policy number. The more digits of the policy number entered the narrower the search results. The default sort order is ascending.
- Exp Date: In the Exp Date box, click the Calendar
 icon to select the expiration date of the policy. The default sort order is descending.
- Search: Click Search. The results of the Search criteria are displayed in the Policy list. Select a resulting policy and continue adding the action.

The following search criteria options are available when searching for a certificate:
- Cert Id: In the Cert Id box, enter at least two digits of the certificate ID number. The more digits of the policy number entered the narrower the search results.
- Reference: In the Reference box, enter at least two digits of the certificate reference number. The more digits of the policy number entered the narrower the search results.
- Search: Click Search. The results of the Search criteria are displayed in the Certificate list. Select a resulting certificate and continue adding the action.
About
Actions
Setting
up Actions
Closing Actions
Action Plans


 Search screen. Click [Hide] to remove the Search screen.
 Search screen. Click [Hide] to remove the Search screen.