Additional Interest
Adding new additional interests is done on the search
screen. Before
you can add a new additional interest, you must conduct a search to avoid
duplicate entries.
To Add an Additional Interest
- On the Primary menu,
click SEARCH.
- In the Entity drop-down
list select Additional Interest.
- Click the Search
button.
- Click [Add New Record]. The card file tab is displayed.
Note: The [Add New Record] link will not be displayed unless an actual search has been run.
- Interest Type: Select the
Interest Type, such as Finance Company or Certificate Holder. Additional
Interest Types can be added to the drop-down list in Setup
under Lookup Management.
- Interest
Name: Enter
the Additional Interest name as you would identify and correspond with
them.
 Primary Location:
The primary
location is automatically assigned to the first location added. The
primary location may be reassigned only after other locations have been
added.
 - Address:
Enter the primary address for this entity.
- City:
Enter the
city for the primary address entered in the previous field.
- State/Province:
Select the state (or Province) for the primary address entered in the
previous fields.
- Zip/Postal
Code: Enter the zip code for the primary address entered in
the previous fields.
- Phone:
Enter the
phone number without formatting. Formatting
will be applied after the screen has been saved.
- Toll
Free: Enter
the toll free number without formatting.
- Fax:
Enter the
fax number without formatting.
Note:
Once the additional interest has been entered, the Location Types drop-down
box is available on the additional interest locations tab. Additional
interest Location Types can be added to Nexsure via the Lookup Management
screen.  More info...
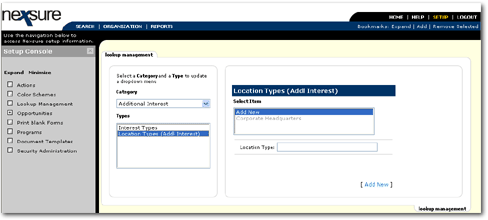
- On the ,
click Setup.
- On the Setup Console, click Lookup Management. A
summary list of existing Categories and Types will appear.
- From the Category drop-down list,
select Additional Interest. The
Types available for the Category will be displayed.
- Select the Type for the Category
(Location Types (Addl
Interest).
- Select Add
New in the Item list.

- Enter the Item Label. This
is what will appear in the drop-down list.
- Click [Add
New] to add the new item to the drop-down list.
 Primary Contact:
Only one
contact may be added per entity at the time of initial entry. Additional
contacts may be added after the new additional interest is saved.
- Prefix:
Use the drop-down box that contains items added by the agency in Setup
under Lookup Management.
- First
Name: Enter the first name of the contact for this entity.
- Middle
Initial (MI): This field is one character long. Enter the middle
initial of the contact.
- Last
Name: Enter the last name of the contact.
- Suffix:
Use the drop-down box that contains items added by the agency in Setup
under Lookup Management.
- Title:
Use the drop-down box that contains items added by the agency in Setup
under Lookup Management. The title is used to identify the contacts occupation.
- Phone:
Enter the phone numbers without formatting. Formatting will be applied
after the screen has been saved. Use the drop-down box to identify the
type of phone number. Extension numbers may be entered up to 6 characters.
A brief description may be entered for each number added. Phone number
identities initially are as follows:
- Home phone
- Cell phone
- International
phone
- Office phone
- Pager
- Personal
Fax
Note: To add additional number, see Contacts.
- E-mail: The email address
for the contact is optional, however if the format is entered incorrectly
an error will be returned to warn of the improper format. The field can
contain up to 30 characters with alphanumeric data.
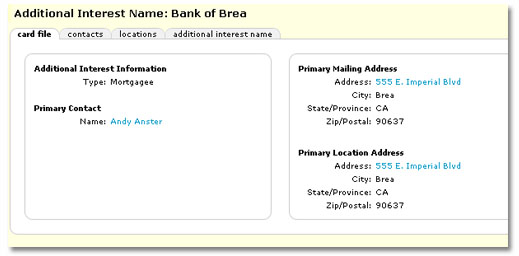
- Click Save to
save the data or click Clear to clear any data entered. Once the
additional interest has been added, it can be viewed and edited by clicking
on its Details
 icon.
icon.

 Primary Location:
The primary
location is automatically assigned to the first location added. The
primary location may be reassigned only after other locations have been
added.
  Primary Location:
The primary
location is automatically assigned to the first location added. The
primary location may be reassigned only after other locations have been
added.
  Primary Contact:
Only one
contact may be added per entity at the time of initial entry. Additional
contacts may be added after the new additional interest is saved.