Receive Payments
Use the receive payment tab to post received payments to the general
ledger. They will then be available for deposit.
To Receive
a Payment
- On the ,
click ORGANIZATION.
- Select the territories
tab.
Note: The territories tab does not have to be selected, receive payments can be done at the organization (book) level.
- Select the appropriate
Details
 icon
for the territory that will be receiving a payment.
- Select the accounting > transactions > receive payments tab.
- Click [Add
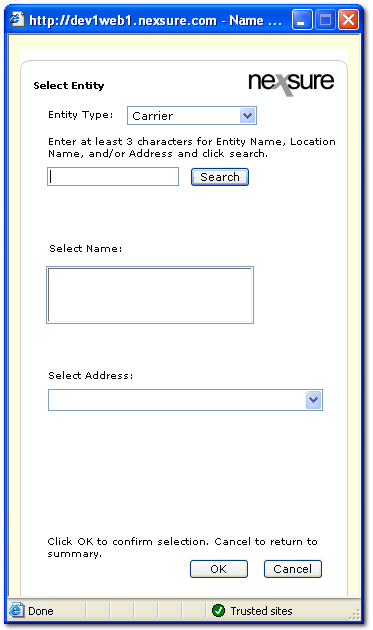
New]. The Select Entity dialog box is displayed.

- Select the Entity Type (the default is Client) and search for the entity name.
- Select the entity name
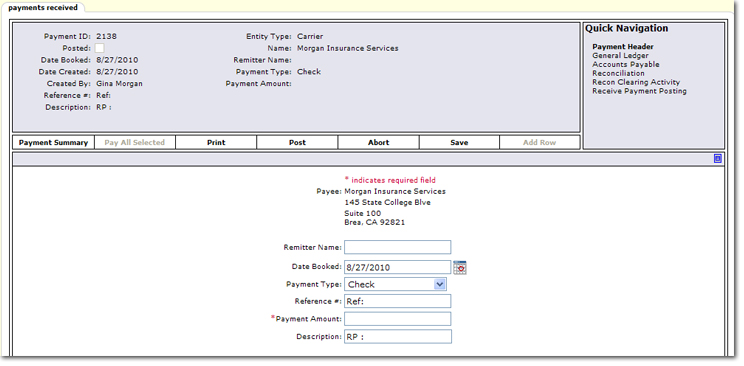
and click OK. The payments received tab is displayed.

- Enter the Remitter Name; the name of the entity.
- Enter the Date
Booked (current date is default).
- Select the Payment
Type from the list.
- Enter a Reference
number. If payment is by check, enter the check number.
- Enter the Payment
Amount.
- Enter a Description
(optional).
- In the Navigation Toolbar, click Save.
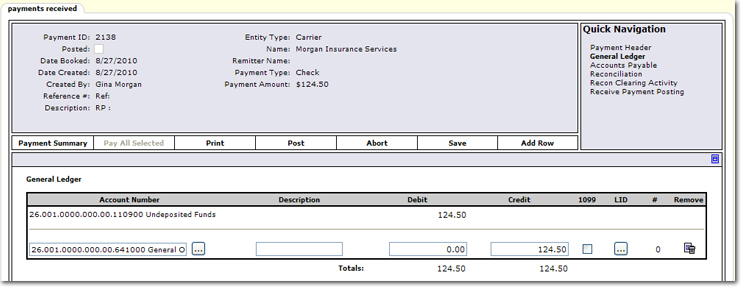
- In the Quick Navigation panel, select the General Ledger
link. Quick Navigation links vary by entity selected but the General Ledger link is available in all entity types.
Tip: To search
for specific invoices, click the [Show]
link and use the lists to enter search criteria. When making selections to pay, Nexsure will automatically
select the closest matching invoice based on payment and date. Automatic selection is dependent upon the invoice setup at ORGANIZATION >accounting > invoicing setup > receive payment defaults.

- Click the Ellipsis
 button next to the Account Number box. Select the account number that will receive the payment until the funds are deposited.
Note: The client level receive payment assumes a credit to accounts receivable unless the payment is offset to another link.
- In
the Debit box, enter the amount
owed.
- In the Credit box, enter
the amount being paid.
- Select the 1099 check box if the entity is 1099 reportable.
- Click the Ellipsis
 button in the LID # column to add a general ledger line item distribution for an employee. Line item distribution (LID) is used to track employee’s expenses that do not need to display on the general ledger.
- On the Navigation Toolbar, click Add Row if more than one payment to the same vendor must be made.
- On the Navigation Toolbar, click
Save to save the receivable information.
- On the Navigation Toolbar, click Post.
Once received
payments are posted, they will be available on the Receipts
screen of the deposit tab.
Note: When posting to locked periods, keep the following in mind. If the staff member has rights to post to a locked period a dialog box is displayed letting the staff member know they are posting to a locked period. If the staff member does not have rights to post to a locked period, the only option is to change the date booked to an unlocked period. More information on rights for staff members to post to locked periods can be found at Transactions > Reconciliation Security.
- Once the receipt has been posted, only the 1099 check boxes are editable. If it is necessary to update a 1099 selection, make the new selection and click [Update 1099]. The system records are then updated to match the selection.
Note: Only a staff member with Accounts Payable > Modify rights can change 1099 selections. Changes to locked or closed months can only be made by a staff member with Accounts Payable > Post Locked rights can change 1099 selections in a locked or closed month. For more information on security settings see 1099 Security.

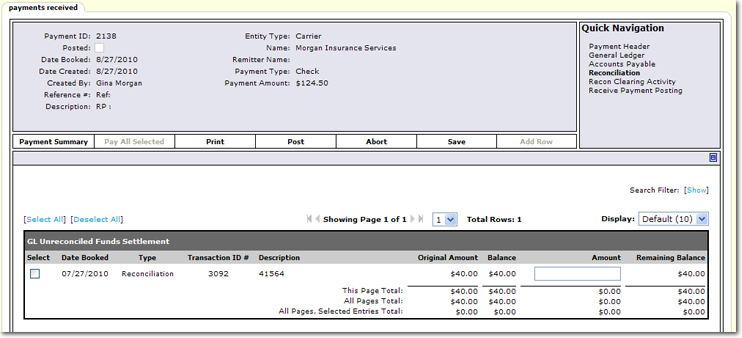
- In the Quick Navigation panel, select the Reconciliation
link. The available reconciliations are displayed.

- In the Amount box, enter the amount of the reconciliation to be applied.
- On the Navigation Toolbar, click Save.
- In the Quick Navigation panel, click Recon Clearing Activity. This link is available to track offsets to entries against the Reconciliation Clearing account.
NSF / Receive Payment Reversal


 button next to the Account Number box. Select the account number that will receive the payment until the funds are deposited.
  button in the LID # column to add a general ledger line item distribution for an employee. Line item distribution (LID) is used to track employee’s expenses that do not need to display on the general ledger.
