Preparing a Workstation for Nexsure
Before beginning the following preparations, print this topic for reference while completing the steps. For more information about printing topics see the Using Nexsure Help topic.
Quickly navigate to procedures included in this topic by clicking one of the links below:
To Clear Temporary Internet Files
To Clear Local Hard Drive Temporary Files
To Add Windows® XP Service Pack 2 Settings
To Remove Webupdate.Control and XDUpload.Upload
To Clear Temporary Internet Files
Web browsers store content from previously viewed sites in their Temporary Internet Files
folder. This allows the browser to load a previously viewed page from a site without downloading
it. When using Nexsure it is important to clear these files periodically to make sure the new
screen information is shown rather than the old. To delete Temporary Internet Files,
perform the following steps:
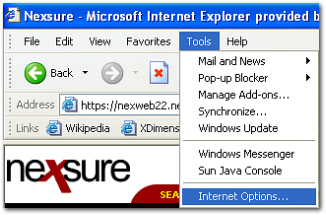
- In Microsoft® Internet Explorer, click Tools > Internet Options. The Internet Options dialog box is displayed.
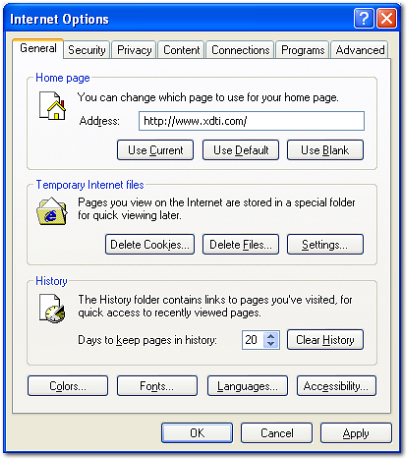
- In the Internet Options dialog box, click the General tab.
- On the General tab, click Delete Files. The Delete Files dialog box is displayed.
- Select the Delete all offline content check box.
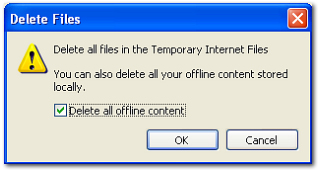
- Click OK. Wait for the process to complete. When the hourglass is no longer present, the process is
complete.
To Clear Local Hard Drive Temporary Files
Sometimes it is necessary to clear the Temp file directory on the local hard drive. Temporary
files are stored in the Temp file directory and may be inadvertently accessed when attempting
to access a newer file with the same name. To clear the Temp files directory, follow the steps
below:
- Close all open applications such as Microsoft® Word, Outlook®, Excel® or any other programs that may be open.
- Right-click the Start menu.
- Select Explore.
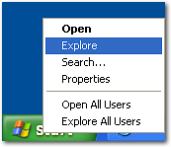
- Verify that hidden files can be viewed:
- On the main menu, click Tools > Folder Options.
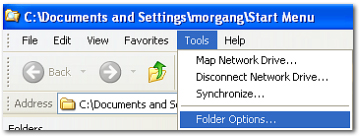
- Click the View tab.
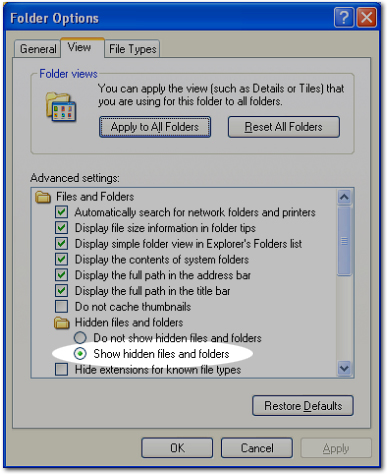
- Verify Show hidden files
and folders is selected.
- Click OK to close the window. The Windows Explorer view is displayed.
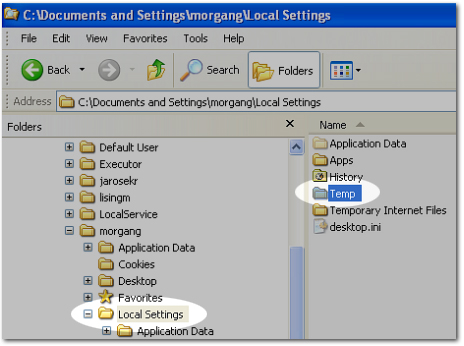
- Click the Local Settings folder.
- Double-click the Temp folder.
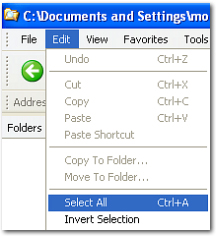
- On the Windows Explorer toolbar, click Edit > Select All.
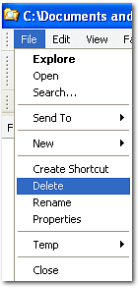
- On the Windows Explorer toolbar, click File > Delete. The Confirm Multiple File Delete dialog box is displayed.
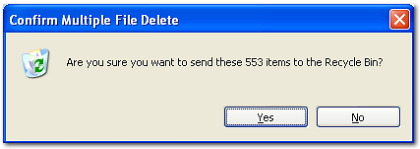
- In the Confirm Multiple File Delete dialog box, click Yes.
To Add Windows® XP Service Pack 2 Settings
If Windows XP with Service Pack 2 is installed on the workstation: In order for Nexsure to run properly with
Windows XP Service Pack 2, some components are required. If these components have not
been installed correctly, the following issues may occur:
- Downloads may not function properly
- Batch printing may not function properly
- Components may not download
- The user may be logged out attempting any of the above functions
- Dialog boxes may not be displayed
- eServices may not function properly
- Third party pop-up blockers must be turned off or www.nexsure.com must be added to the blocker's accept list for
Nexsure to work properly
- Close all open applications.
- Launch Microsoft Internet Explorer.

- In Internet Explorer, on the main menu, click Tools > Internet Options. The Internet Options dialog box is displayed.

- In the Internet Options dialog box, click the Security tab.
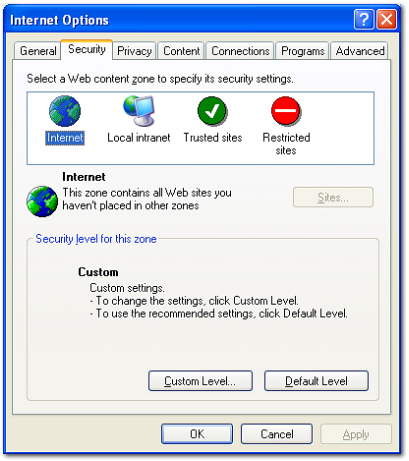
- On the Security tab, click the Internet
 icon.
icon.
- In the Security level for this zone area, click Custom Level. The Security Settings dialog box is displayed.
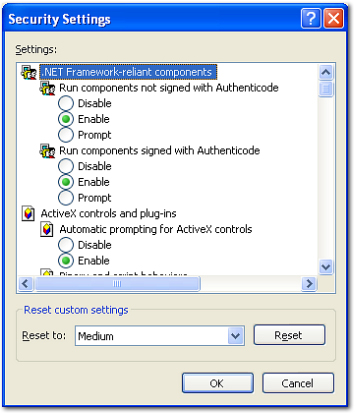
- In the Reset to list, select Medium andclick Reset. The following warning is displayed.

- Click Yes. The Security Settings dialog box remains displayed.
- In the Settings list, set Automatic prompting for ActiveX controls to Enable.
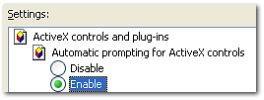
- In the Settings list, set Automatic prompting for file downloads to Enable.

- In the Security Settings dialog box, click OK. The following warning is displayed.

- Click Yes. The Internet Options > Security tab remains displayed.
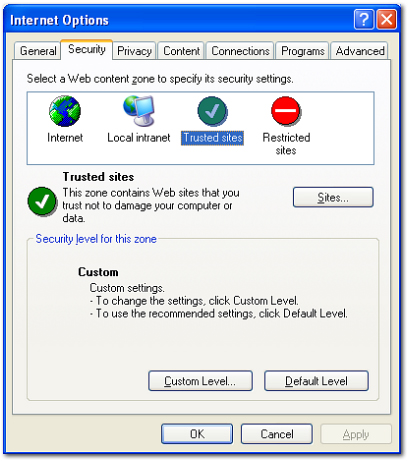
- In the Internet Options dialog box, click the Trusted sites
 icon.
icon.
- In the Trusted Sites area, click Sites. The Trusted sites dialog box is displayed.
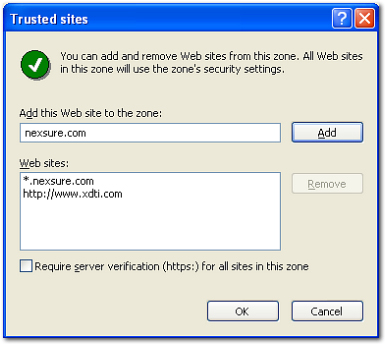
- In the Add this Web site to the zone box, enter nexsure.com.
- Clear the Require server verification (https:) for all sites in this zone check box.
- In the Add this Web site to the zone area, click Add. The trusted Web site is added to the Web sites box.
- In the Trusted sites dialog box, click OK. The Internet Options dialog box remains displayed.
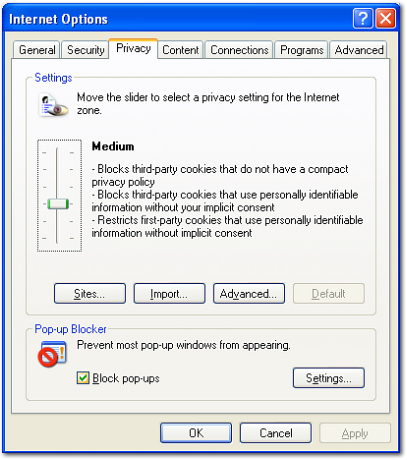
- In the Internet Options dialog box, click the Privacy tab.
- On the Privacy tab, click Sites. The Per Site Privacy Actions dialog box is displayed.
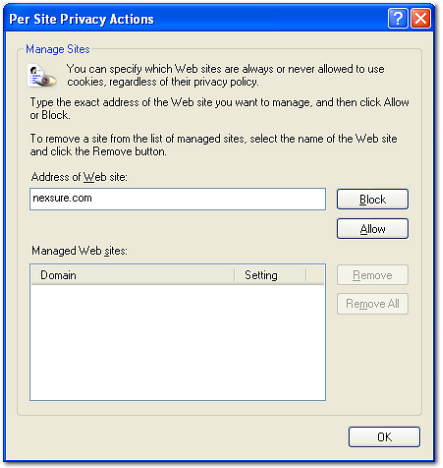
- In the Address of Web site box, enter nexsure.com and click Allow. The Web site is moved to the Managed Web sites box.
- In the Per Site Privacy Actions dialog box, click OK. The Internet Options > Privacy tab remains displayed.
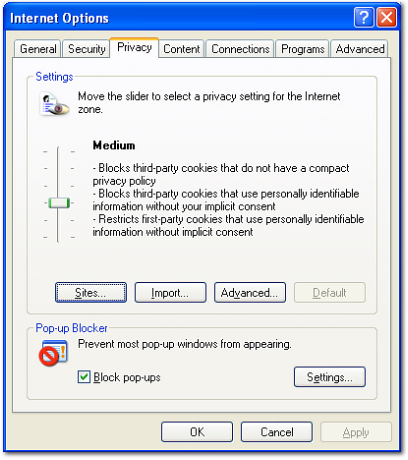
- In the Pop-up Blocker area, if the Block pop-ups check box is selected, click Settings. The Pop-up Blocker Settings dialog box is displayed.
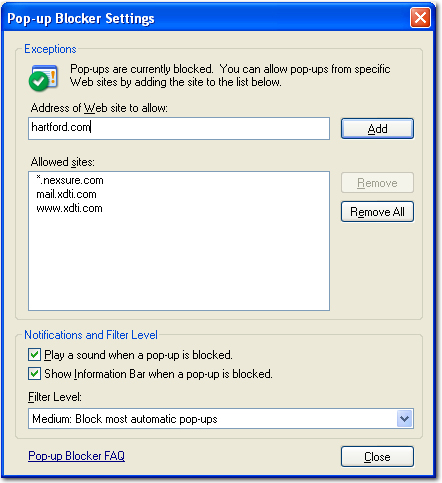
- In the Address of Web site to allow box, enter *nexsure.com and click Add. The Web site is moved to the Allowed sites box.
- In the Pop-up Blocker Settings dialog box, click Close. The Internet Options dialog remains displayed.
- In the Internet Options dialog box, click OK.
To Remove Webupdate.Control and XDUpload.Upload
If experiencing office integration issues, download issues, eServices is not working properly, or for an initial setup
of a new workstation, perform the
following steps for removing the Webupdate.Control and XDUpload.Upload components.
Important: First make sure to close all programs. Use the following steps to ensure all programs are closed.
- Check Windows Task Manager
Processes to make sure all office programs are closed and not just minimized. This includes Outlook, Word and Excel. Also make sure Adobe® Reader® is not running as a process.
This can be done by holding down Ctrl-Alt-Del and clicking Task Manager. The Windows Task Manager dialog box is displayed.

- In the Windows Task Manager dialog box, click the Processes tab.
- Verify OUTLOOK.EXE, EXCEL.EXE, WINWORD.EXE and AcroRd32.exe are not listed.
If any of these items are listed, highlight the item(s) and click End Process.
- Close the Windows Task Manager dialog box by clicking the Close
 icon.
icon.
- Launch Microsoft Internet Explorer.
- In Internet Explorer, on the main menu, click Tools > Internet Options. The Internet Options dialog box is displayed with the General tab open.
- In the Temporary Internet files area, click Settings. The Settings dialog box is displayed.
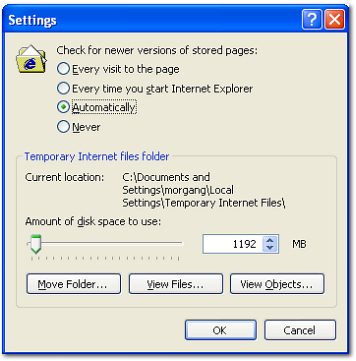
- In the Temporary Internet files folder area, click View Objects. Windows Explorer displays the Downloaded Program Files folder.
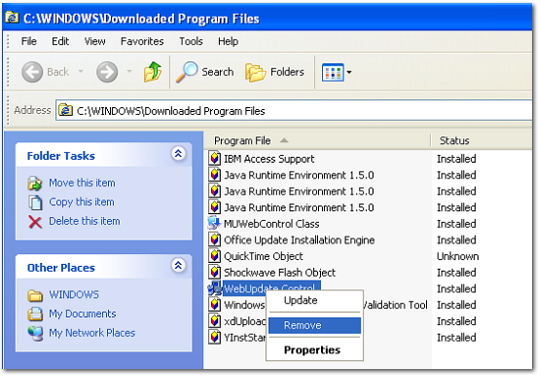
- Locate the program files WebUpdate Control and xdUpload.Upload. Right-click on each file and select Remove.
Note: One or both of these files may not appear in this list.
- Close Windows Explorer.
- In the Settings dialog box, click OK.
- In the Internet Options dialog box, click OK. The Internet Explorer session remains displayed.
- In Internet Explorer, open and log on to Nexsure.
- In Nexsure on the Utility menu, click SETUP. The Setup Console is displayed.
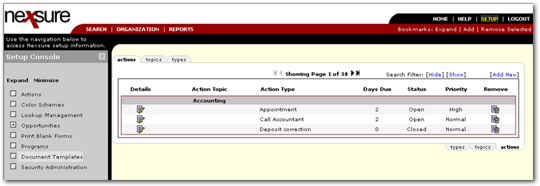
- In the Setup Console area, click Document Templates. After a few moments the Template tab is displayed. This process loads the WebUpdate Control. The System Setting Change dialog box is displayed.

- In the System Settings Change dialog box, click No.
- On the Utility menu, click HOME. The Home menu is displayed.

- On the Home menu, click INTERFACE. The interface tab is displayed.

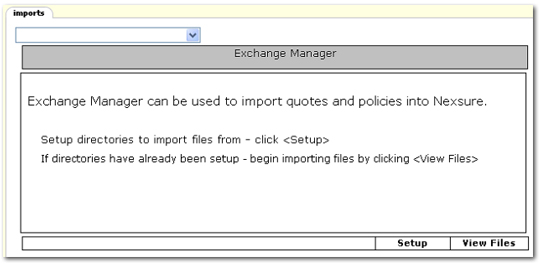
- On the interface tab, click [Import Files]. After a few moments the Exchange Manager will be displayed. Once this occurs, the XdUpload.Upload will have been loaded. The workstation set up is complete.
