You are here: Client menu > POLICIES > Summary of Insurance > Summary of Insurance
Summary of Insurance
The summary of insurance tab allows the viewing of policy information from the
application at the policy level or all policies at the client level. Only policies on the active policies tab are displayed on the summary of insurance tab. The summary may be printed or exported to Microsoft® Word or Excel®. Using the NIC  option grants temporary access to clients allowing them to view and print
their summary of insurance document.
option grants temporary access to clients allowing them to view and print
their summary of insurance document.
Note: A restricted policy will not be displayed in the summary if the staff member logged on is not
assigned to that policy.
Quickly navigate to procedures included in this topic by clicking one of the links below:
To View the Client Summary of Insurance
To View a Policy Summary of Insurance
To Deliver a Summary of Insurance
To Grant Temporary Access to a Summary of
Insurance
To Print a Summary of Insurance
To View the Client Summary of Insurance
- On the Primary menu, click SEARCH. Search for the appropriate client.
- Click the Details
 icon next to the appropriate client.
- On the Client menu, click POLICIES.
- Click the summary of insurance tab. The Summary of Insurance screen is displayed.
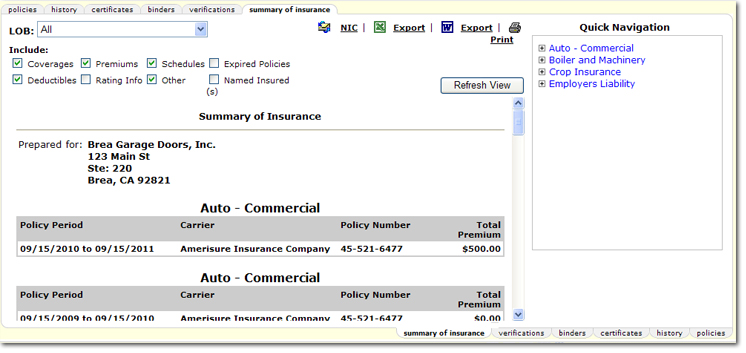
- Across the top of the Summary of Insurance screen are several options for working with the summary:
- Click one of the following links for more information:
To View a Policy Summary of Insurance
- On the Primary menu, click SEARCH. Search for the appropriate client.
- Click the Details icon next to the appropriate client.
- On the Client menu, click POLICIES.
- On the policies tab, click the Details icon next to the appropriate policy.
Tip:
You can
also access the summary of insurance tab by right-clicking on the Details icon and selecting Summary
of Insurance.
- Click the summary of insurance tab. The Summary of Insurance screen is displayed.
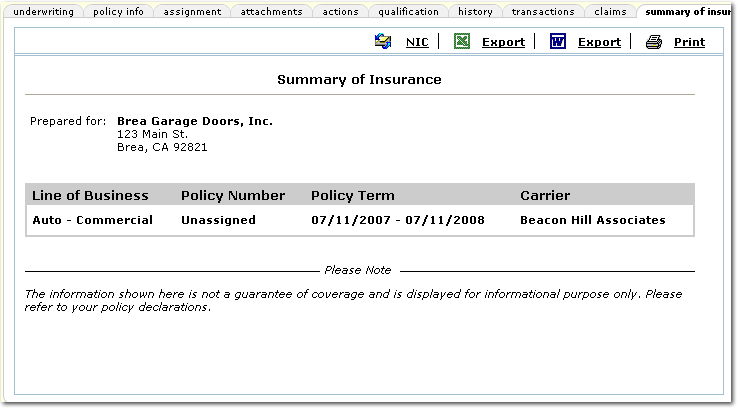
- Across the top of the Summary of Insurance screen are several options for working with the summary:
- LOB: Select one or all LOBs to be displayed on the summary.
- Include: Select the items to be included on the summary. Once selections have been made, click Refresh View to update the summary.
- Quick Navigation: Links are available in the Quick Navigation panel that lead to the policy information on the summary. Click one of these links to view that area in the summary.
- Click one of the following links for more information:
To Deliver a Summary of Insurance
In order to deliver a summary of insurance, the summary must first be exported to a Microsoft Word or Excel file.
- Navigate to the appropriate summary of insurance tab at either the client or policy level.
- On the summary of insurance tab, click one of the Export

 links depending on the format desired.
- In the Microsoft Excel or Word document, save the file to a local or network drive.
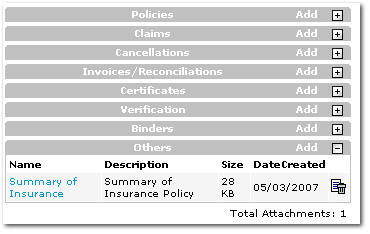
- In Nexsure, on the Client menu, click ATTACHMENTS. The attachments tab is displayed. Add the exported file to the attachments tab as described in Adding an Attachment.

- Once the attachment has been added to Nexsure, on the Client menu, click DELIVERY. The delivery tab is displayed.

- Create the delivery as described in Delivery. Use the Others > Add attachment option to locate the attachment and finish the delivery.
To Grant Temporary Access to a Summary of
Insurance
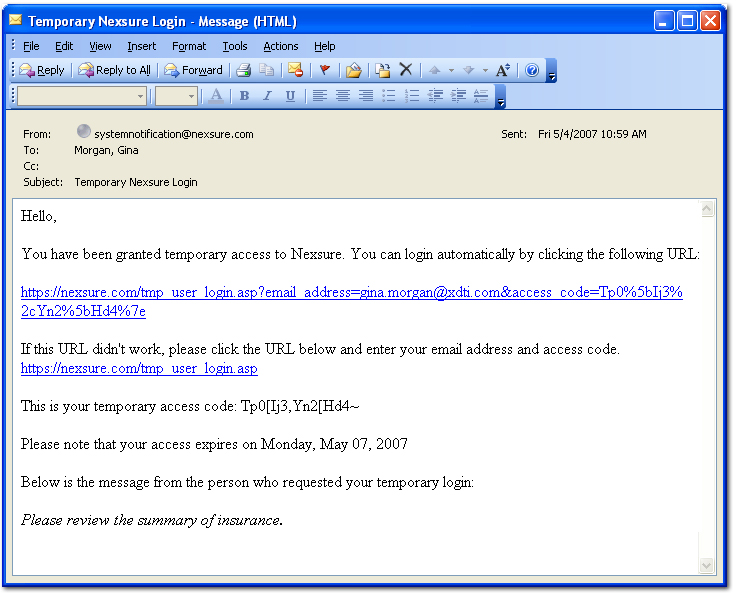
Temporary access can be granted to any contact associated
with a policy. The contact will be sent an email with a link to view or print the summary of insurance.
- Navigate to the appropriate summary of insurance tab at either the client or policy level.
- Click NIC . The Create Temporary User tab is displayed.
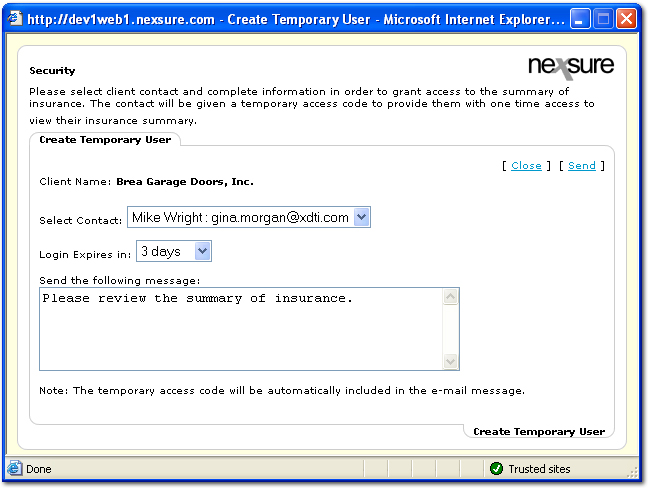
- In the Select Contact list, select the recipient of the temporary access. If the recipient is not in the Select Contact list, add the recipient to the CLIENT PROFILE > contacts tab.
Note: Multiple contacts can be granted access, however each contact must be set up separately.
- In the Login Expires in list, select the amount of time in which the recipient will be able to view the summary of insurance.
Important: The recipient will only be able to access the summary of insurance once within the time allotted in the Login Expires in list.
- In the Send the following message box, either accept the default message or customize the message as necessary. This message is displayed below the default instructional text in the email.
- Click [Send]. The message is sent to the contact.
The dialog box will remain open to allow another contact to be selected.
- Click [Close] if no other contacts need temporary access. Once the recipient has accessed the summary of insurance
and clicked the Logout link, Nexsure will return an
email to the staff member that granted access notifying them that the contact
has reviewed the summary of insurance.
To Print a Summary of Insurance
- Navigate to the appropriate summary of insurance tab at either the client or policy level.
- On the Summary of Insurance screen, click Print
 . The Print dialog box is displayed. Make the appropriate selections in the Print dialog box.
Summary of Insurance Data Flow