Working with Schedules
To Add Scheduled Items to a Form
- On the ,
click SEARCH.
- Search for the client
or prospect.
- Click the Details
 icon next to the client or prospect name to display
the card file.
- On the ,
click MARKETING. The
marketing summary screen is displayed.
- Click the Details
 icon next to the marketing policy to display the underwriting
screen.
- To populate the Additional Interest schedule on the Commercial ACORD auto application from the navigation
tab, click on the "+"
beside Auto - Commercial and the
"+" beside the ACORD form,
and then on the Additional Interest link.
Note: Units that are linked to other schedules are displayed with a Yellow  Details icon. If the unit is updated outside of the units at risk tab, the Details
  icon will change back to white.
- Click the Add
Record link on the Navigation Toolbar to add a vehicle.
Or
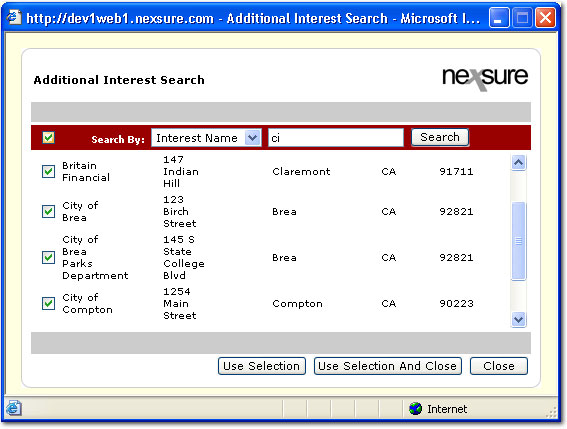
Click Lookup. The Additional Interest Search dialog box is  displayed.


- In the Search By list, select the information category to search.
- Enter at least two characters to search and click Search.
- Once the search results are displayed, select the appropriate additional interests, in this example.
Tip: Use the selection box in the screen header to select all search result items.
- After all selections have been made, click Use Selection. The dialog box remains open for further selections.
Or
Click Use Selection and Close. The dialog box is closed and all selections are added to the schedule.
Or
Click Close to close the dialog box without saving selections.
- Enter all the vehicle
information navigating through all the vehicle screens.
- Selecting Summary
on the navigation toolbar saves the current screen and displays to the
vehicle summary.
- To add more vehicles,
continue by selecting the Add Record
link from the navigation toolbar.
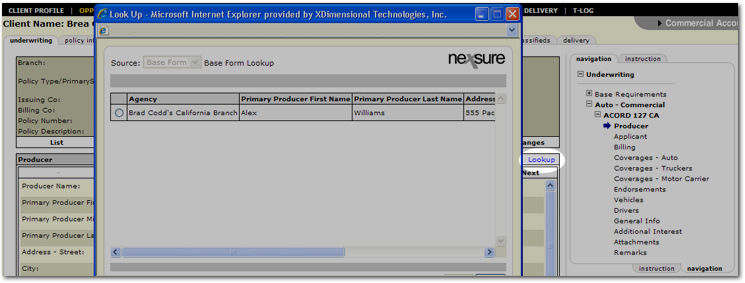
Tip: When adding producer information to a line of business application, the producer information from the Base Form ACORD 125 is available by clicking Lookup. The Base Forms ACORD 125 & 325 can be used to look up information for ACORD 126, 146, 130, 301, 155, 188.

Renumbering Schedules
When the policy is in a pliable state (marketing, pending endorsement,
edit of future policy) renumbering can be performed within the schedule
itself. Items which can be renumbered include: vehicles, drivers, locations
and additional interests.
To Renumber a Schedule
- Select the client.
- On the , click
POLICIES.
- Select the policy with
the schedule by clicking the Details
 icon.
icon.
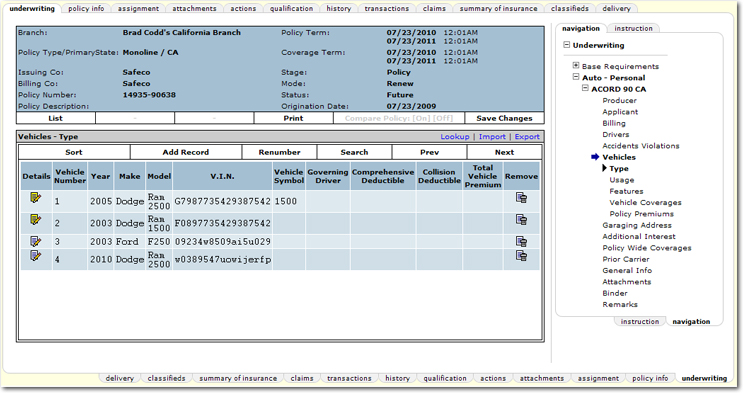
- In the navigation panel,
select the Vehicles (in this example)
section of the form to display the schedule.

- Click the Renumber
link.

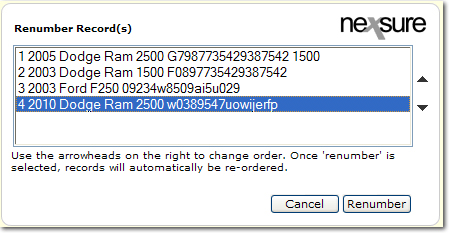
- Select the records in
the schedule and click the up or down arrows on the right of the dialog
box to change the order of the items. When
the records are in the correct order, click Renumber.
Entering a Fleet
Some commercial businesses will purchase a fleet of the same type vehicle.
In order
to save time, enter one vehicle and use the Copy tool to add the remaining
fleet.
- Click the Vehicles
link on the navigation tab to display the vehicle summary.
- Click the Details
 icon beside the auto.
- On the navigation toolbar,
select the Copy link to display
the Copy Record screen.
- Enter in the number of
vehicles remaining in the fleet.
- Select Copy
to add the specified number of vehicles to the schedule. The
vehicles have been added to the schedule.
- To edit the VIN number
of each vehicle, click on the Details
 icon beside the vehicle and edit the VIN number.
- Click the Summary
link in the navigation toolbar to save the change and display the summary.
- Repeat the process until
all vehicles have been updated.
Working with Forms
![]() Details icon. If the unit is updated outside of the units at risk tab, the Details
Details icon. If the unit is updated outside of the units at risk tab, the Details  icon will change back to white.
 displayed.

