Accounts Payable Auto Processing
This process allows you to create a disbursement by selecting multiple
accounts payable items and posting them all at once, bypassing the need
to create a new disbursement for each item. All
posted, unprocessed accounts payable entities can be selected for auto
processing.
Note:
Accounts
payable items that anticipate a refund and require a receive payment entry
cannot be selected for auto processing.
To Auto-Process AP Items
- On the ,
click ORGANIZATION.
- Select the accounting
territory by clicking the Details
 icon.
icon.
- Select
the accounting tab.
- Select the transactions
tab.
- Click accounts
payable.
- Click [Add
New].

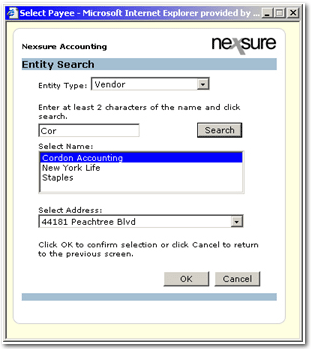
- Search
for the Entity to pay.
Note:
If the
entity has an alternate payment address, it can be selected from the Select Address drop-down list.
- Click
OK.

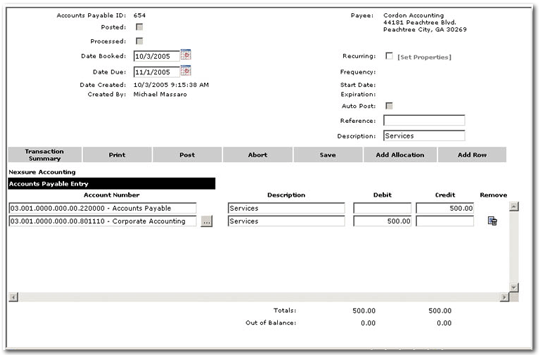
- Enter
the Date Booked (current date
is default).
- Enter
payable Date Due.
- Enter
an internal Reference and Description for the payable transaction
(optional).
- Accounts
Payable should be the credit amount that will be paid. Enter
the amount owed in the Credit
field. The
difference will be displayed below.
Note:
If you
are making more than one payment to the same vendor, click Add
Row to add another line item.
- The second line item will be the expense or offset detail related to the amount
that is owed. Enter
that amount into the Debit field.
The difference,
unless an additional row is needed, should be “0”.
- Click
Save to save the payable information,
then click Post to return to the
Accounts Payable Summary.
- Click
Auto Process Accounts Payable.
A list
of the posted, unprocessed AP items will be displayed.
Note:
Items creating
a debit to accounts payable (expecting receive payment) will not be available
for auto processing.

- Select
a bank account from the drop-down list.
- Select
AP items for auto processing by clicking in the Select
box, or clicking the [Select All]
link.
- Click
[Process Accounts Payable]. All
selected AP items will be auto processed and will now appear on the Disbursements tab.

- To
print a check for an item in the disbursement list, click the Details
 icon and click the Print
link.


