List Bill Plan Invoicing
Once a List Bill Plan has been created, it is used as a billing template.
The Invoice
is created at the Client level on the Master Client.
- On the Primary
menu, click SEARCH.
- Click the Details
 Icon of the appropriate master client.
- On the Client
menu, click Transactions.
The transaction
summary tab is displayed.
- Click the [Add
Master Invoice] link. The
Invoice Add Policy pop-up window is displayed.
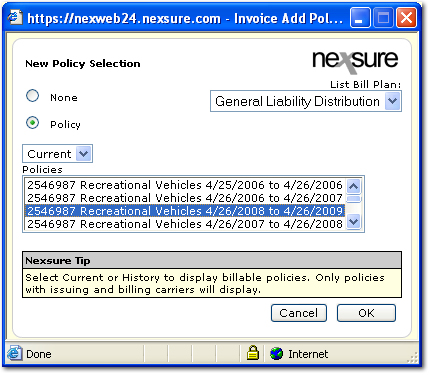
- Select the Policy
option, select Current or History from drop-down box, highlight
the policy number to be billed and select the List
Bill Plan from the drop-down box. Click
OK.
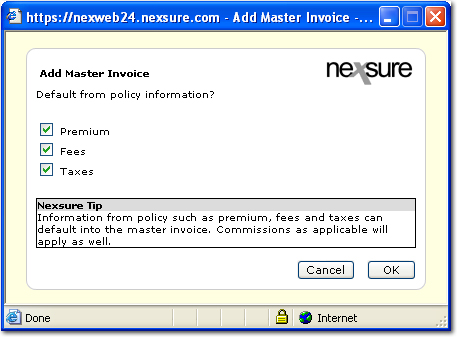
- Select the appropriate
check boxes for Premium, Fees and/or Taxes
to default in from the policy info tab of the master client, click OK.
- Using the links in the
Quick Navigation panel, or the scroll bar, complete the following screens:
- Invoice Header - Click [Edit Invoice Header], the following options are displayed:
- Bill Method: Select either Direct or Agency.
- AR Entity Bill To: Select to whom the accounts receivable will go.
- Lockbox Match: Select the items upon which a match is based for the lockbox files.
- Annualize: Select this check box to set the invoice amount to annualize calculations.
- Bill Type: Select the bill type.
- Department: Select the department to which this master invoice is associated.
- Unit: Select the unit to which this master invoice is associated.
- Down Payment Type: Select % of Premium or Flat.
- Down Payment Amount: Enter the amount required for a down payment.
Note: The down payment is not included in the number of installments.
- Down Payment Eff. Date: Enter the effective date of the down payment. If the invoice is being set up exclusively for installments, the date should be left blank.
- Down payment Date Booked: Enter the date booked for the down payment. If the invoice is being set up exclusively for installments, the date should be left blank.
- Down Payment Due Date: Enter the due date of the down payment. If the invoice is being set up exclusively for installments, the date should be left blank.
- Installment Frequency: Select the frequency which the installments are due.
- Number of Installments: Enter the number of installments.
- 1st Installment Eff. Date: Select the effective date for the invoice.
- 1st Installment Date Booked: Enter the date the first installment was booked. This box defaults to the policy effective date or the transaction date, whichever is later.
- 1st Installment Due Date: Enter the date the first installment is due. This box defaults to the Date Booked + Invoice Days Until Past Due (from Department settings).
- # of Print Days Before Eff. Date: This field is used to calculate
the date when the installment will automatically post and makes the invoice
available to print in batch.
- Fee Option: Select the installment to which the fee will be applied.
- Tax Option: Select the installment to which the tax will be applied.
- Rounding Option: Select the type of rounding that will be made to the amount.
- Unique Invoice Message: Enter a message that will be displayed on the invoice.
- Internal Note: In the Internal Note box, enter an internal note. This note will not be displayed on the invoice.
- Click OK
- Premiums
- Changes can be made to the existing premium by clicking on the details
icon. A
new premium can be added by clicking the add new premium link.
- Fees
- Changes can be made to existing fees by clicking on the details icon.
A new fee
can be added by clicking the add new fee link.
- Taxes
- Changes can be made to existing taxes by clicking on the details icon.
A new tax
can be added by clicking the add new tax link.
- Agency
Commission - If a default commissions exist for the Carrier it
will automatically default in. Changes
can be made to Agency commissions by clicking on the details icon. A
new agency commission can be added by clicking the add new agency commission
link.
Note:
The Other
commissions will become available after the Invoices are created.
- Click the List
Bill Detail link in the quick Navigation. A
new List Bill Schedule is generated. The
list bill schedule is based on the information in the list bill plan template.

- Click the Create
invoices link. A
separate invoice is created for each location shown in the schedule.
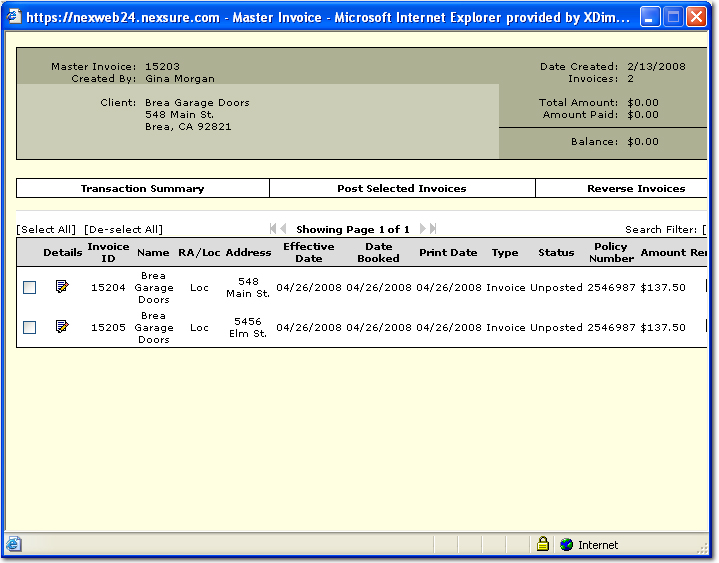
- Each location has its
own unique Invoice number. The
total number of invoices will be reflected in the header.
Note: Each
invoice ID numbers displays on the transaction summary tab at the client
level where the location record is located.
- Click the Transaction
Summary to close the master invoice. The
Transaction summary view of the master client displays only the invoice(s)
for the master Client.

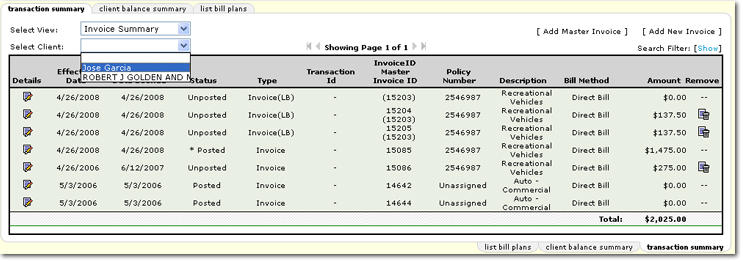
- Each invoice is displayed
with the master invoice number stacked below. The
master number is a hot link, clicking on the link will launch the entire
bill plan for review and modification.
- The select client drop-down
box will display the accounts related to the master client. Select
one of clients in the list to access that related accounts transaction
summary tab.
- The Transaction Summary
view of the related account selected will display the invoices for that client's location.
- Click the Details icon of one invoice; Invoice header will display the
master client info along with the location that is being billed for this
invoice.
Note: If an
agent makes changes to a policy level assignment it will affect list bill.
List bill
assignment comes from the client level.
Installment Billing