Binder Bill Invoicing
Binder bill invoicing hits the general ledger but does not appear on
the agents account current statement. Binder bills are available for Agency
Billed policies only.
To Create a Binder Bill Invoice
- Click on the Details
 icon of the client.
- On the ,
click POLICIES.
- Click the Details
 icon on the appropriate
policy.
- Select the transactions
tab.
- Click Add
New Invoice.
- Click Edit
Invoice Header link.
- Choose Binder
Bill as the invoice type.

- Click OK.
- In the Quick Navigation
panel, click Invoice Posting.
- Click
Post Now.
Note:
Invoice posting for binder bills creates entries to accounts receivable
and binder bill payable only. No posting rules will be taken into consideration
with binder bill invoices.
To Reverse the Binder Bill
- At the policy level,
click the transactions tab. If
there are several invoices, go to the Select view drop-down box and choose
Open Binder Bill.
- Click the Details
 icon of the posted
binder invoice.
- On the binder invoice
header, click Reverse Now.
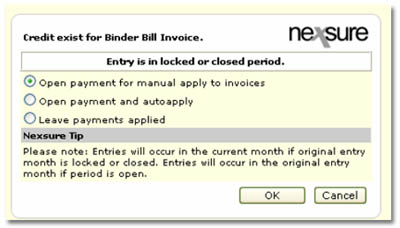
The reversal process displays three options:

- Open
payment for manual apply to invoices: Will open receive payment
with the entire amount as residual.
- Go to Receive Payment
- note that it now has a residual amount.
- Open and assign credits
to invoices as applicable.
- The original and
reversal can be applied against each other.
- Open
payment and auto-apply: Will re-apply the receive payment to the
replacement invoice.
- Replacement invoice
will have the credit.
- The original and reversal
invoice will need to be applied to each other.
- Leave
payments applied: No change to the receive payment, it will remain
against the original binder bill.
- No activity required.
Note: If credits exist for binder bill invoices, the message returned will be the same except for the reference to the locked or closed period: Locked or closed period: Entry is in locked or closed period. Open period: Entry is in an open period.
The binder bill reversal creates a replacement
invoice. The invoice header shows the replacement invoice number and the
original binder number.
- Make any necessary changes
to the premium, fees, taxes etc.
- Click Post
Invoice. If
the premium has been changed, the user will receive a prompt to generate
a manual invoice, select Yes and click OK.

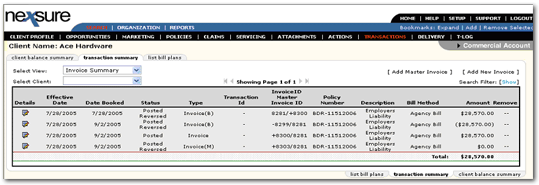
In the summary view there will be:
- "+" in front
of the replacement invoice with "posted" status only
- "-" in front
of the reversing binder bill invoice
- (M)
is the manual invoice

Related Receive Payment Activity
- Open
payment for manual apply to invoices:
- Go to Receive Payment,
note that it now has a residual amount.
- Open and assign credits
to invoices as applicable.
- The original and
reversal can be applied against each other.
- Open
payment and auto-apply:
- Replacement invoice
will have the credit.
- The original and reversal
invoice will need to be applied to each other.
- Leave
payments applied:
- No activity required.


