You are here: Reports
Reports Overview
Nexsure offers a comprehensive list of over 40 reports covering all
areas of Nexsure. Nexsure also offers Ad Hoc reporting (Ad Hoc reporting
must be purchased separately, contact your Nexsure sales rep. for details).
Using the
report criteria screens you can sort and select only the report criteria
you need. After
the results are displayed they can be saved or printed as a MS Word, Excel
or Adobe Acrobat pdf file.
To Access the Reports Screen
- On the ,
click Reports.
- On the ,
click Reports.

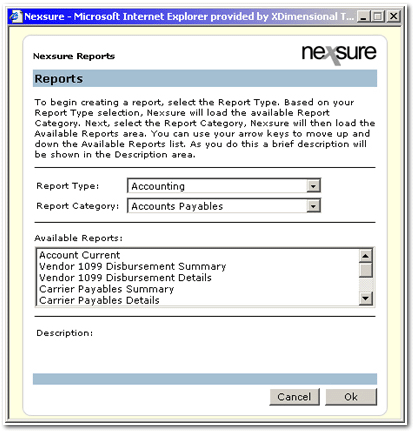
- Select a
 Report Type
from the drop-down list.
Report Types:
- Accounting
- Management
- Clients/Contacts
- Organization
- Marketing
- Opportunities
- Policies
- Ad-Hoc
- If an Accounting report is being generated, select
a
 Report Category.
Accounting Report Categories:
- Accounts Payable
- Accounts Receivable
- General Ledger
- Production
- Profitability
- Reconciliation
- Entities
- Select a report from the Available Reports box.
Note:
A description
of each report will be displayed when it is selected.
- Click OK.
The report
summary screen is displayed.

- All previous reports
of that type and category will be displayed. Existing
reports can be modified by selecting the report and clicking the New Report
Criteria link. If
this is the first time the report has been generated click New Report
Criteria.
- Enter the Organization Information.
Note: These
fields can not be populated directly. You
must click the [Select] link to enter the organization information.

- Click [Select].
The Nexsure
Organization Criteria dialog box will appear. Using
the drop-down lists, select the desired organization information (Region,
Territory, Branch, Department, Unit) you wish to query for the report
and click Add. This
feature allows you to add as many regions, territories, etc. to the report
as needed. Once
information has been added to the Include box, it can be removed by selecting
the item and clicking the Del
button or Clear to remove all
items. If
the organization information is correct, click OK.
- Enter the remaining report criteria.
- In the Report
Format Options drop-down list select how the report should be saved
as (PDF, Word or Excel file).
- Click Ok.
The report
will appear on the report summary screen.
Note:
Some
reports may take a few minutes to generate depending on the size of the
report. The
Status will display a percentage
of completion until the report is complete. Click
the Refresh link to update the
progress.
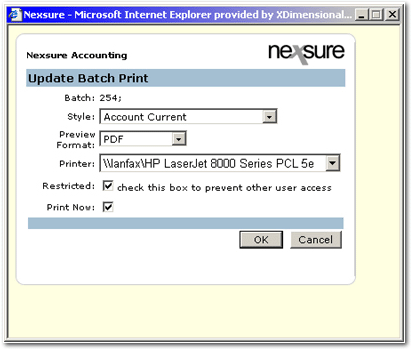
- Once a report is complete,
click the Print
 icon.
icon.

- Select the default printer.
- The Restricted
option prevents other users from viewing the report.
- Selecting Print
Now will send the report to the printer immediately.


 Report Type
from the drop-down list.
 Report Category.

